User guide
This section provides an overview to the user interface and the functionalities of the Bathroom Configurator via the HomeByMe for Home Retailers planner.
Launch the Bathroom Configurator
The Bathroom Configurator can be launched only through Home Retailers planner.
To access to this configurator:
- Click the Configurators, the configurators are displayed, as shown below:

- Click the Bathroom Configurator option.
If you are not logged, a login window is displayed, as shown below:

While opening the Bathroom Configurator, the loader appears with the brand logo before loading the bathroom planner, as shown below:
The color of the spinner changes from black to blue.
For more details about Dynamic Branding, visit the Dynamic Branding documentation 🔗.
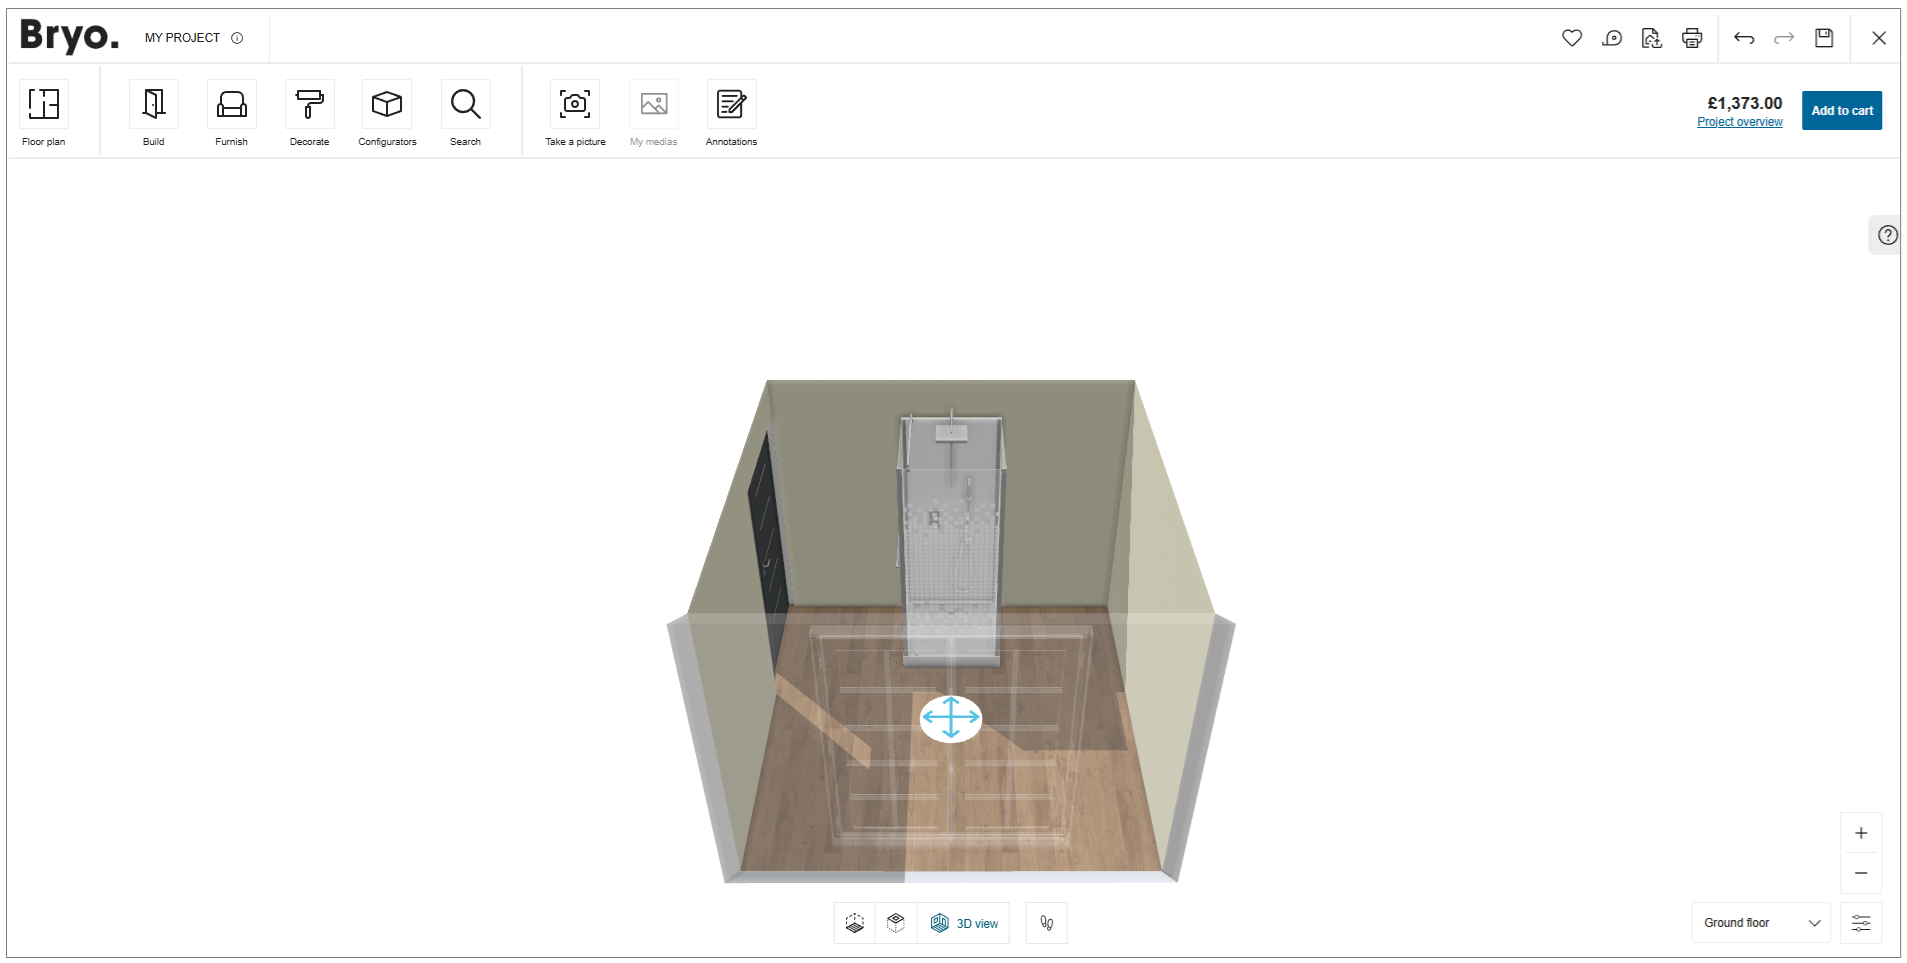
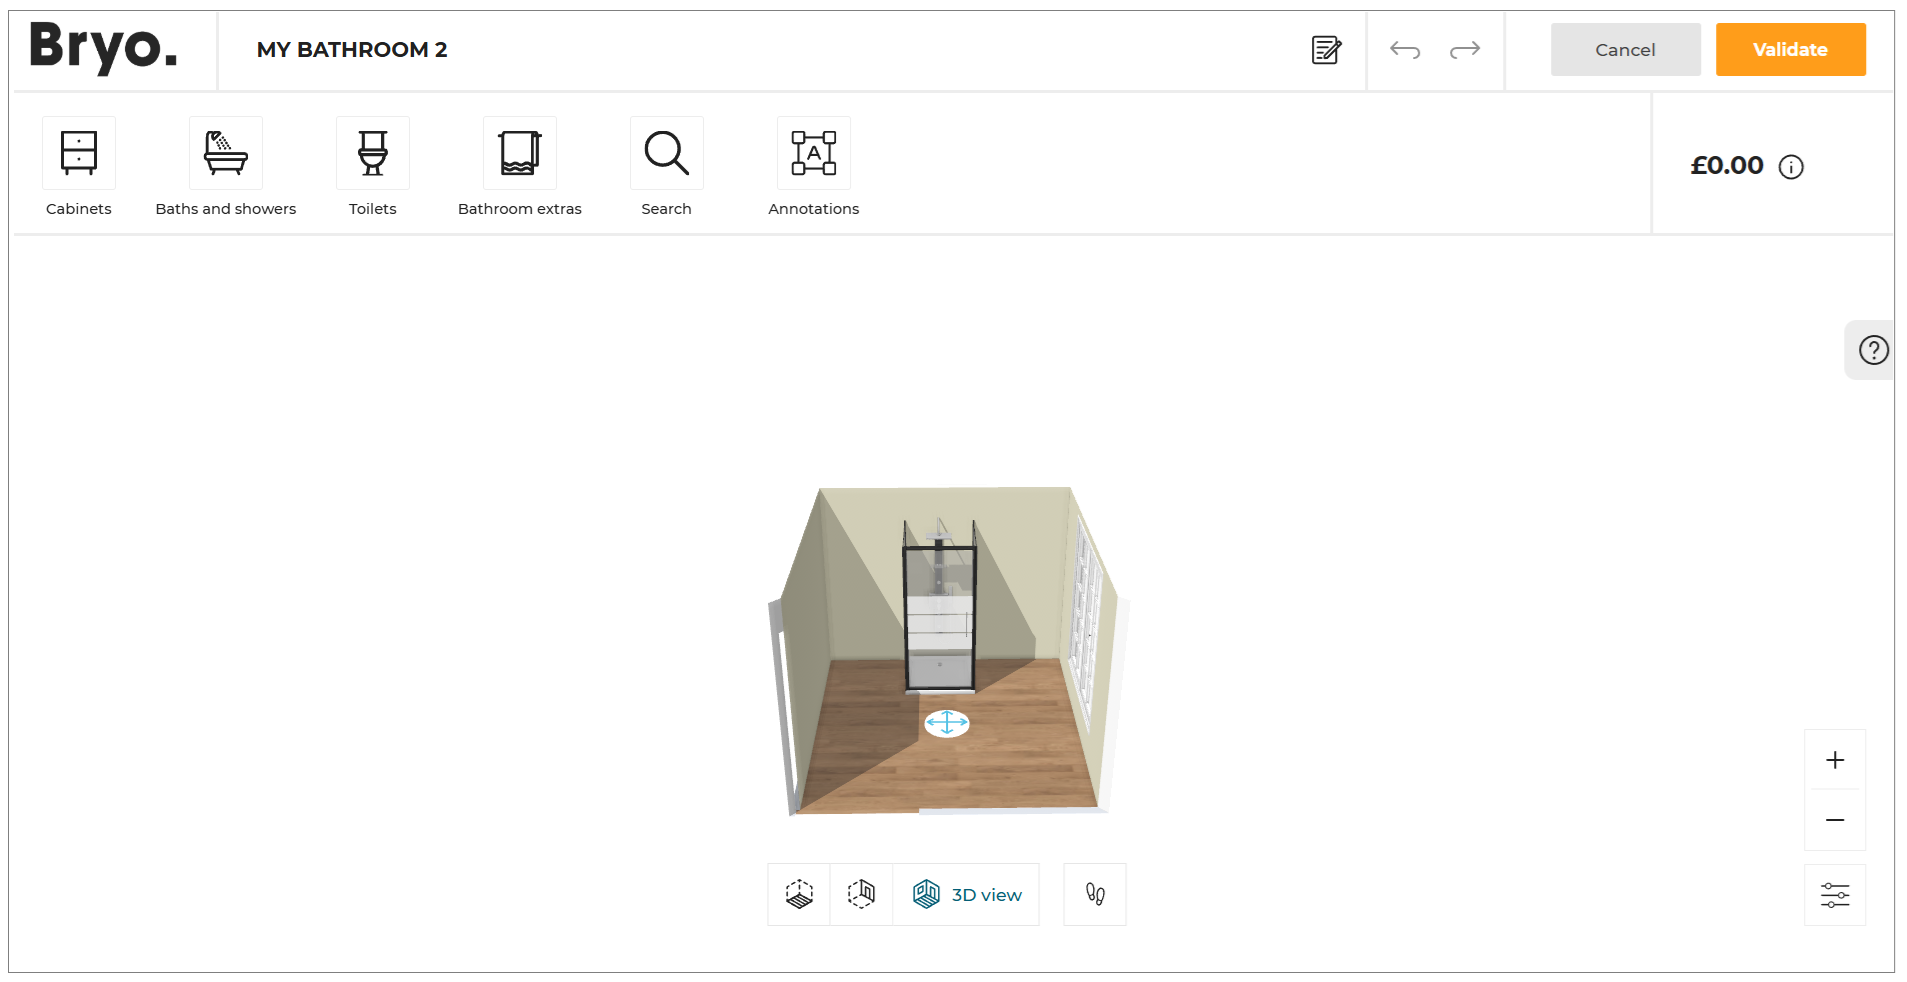
The Layout of Bathroom Configurator
Before you start the application, it is helpful to know how to use HomeByMe for Bathroom Configurator features.
Many of the features you use are accessible on the planner with printed commands on them.
These features are context sensitive, which means that commands are grayed out if the features are not available for your current task. Sometimes, the features do not appear at all, so it is helpful to know where you can access them.
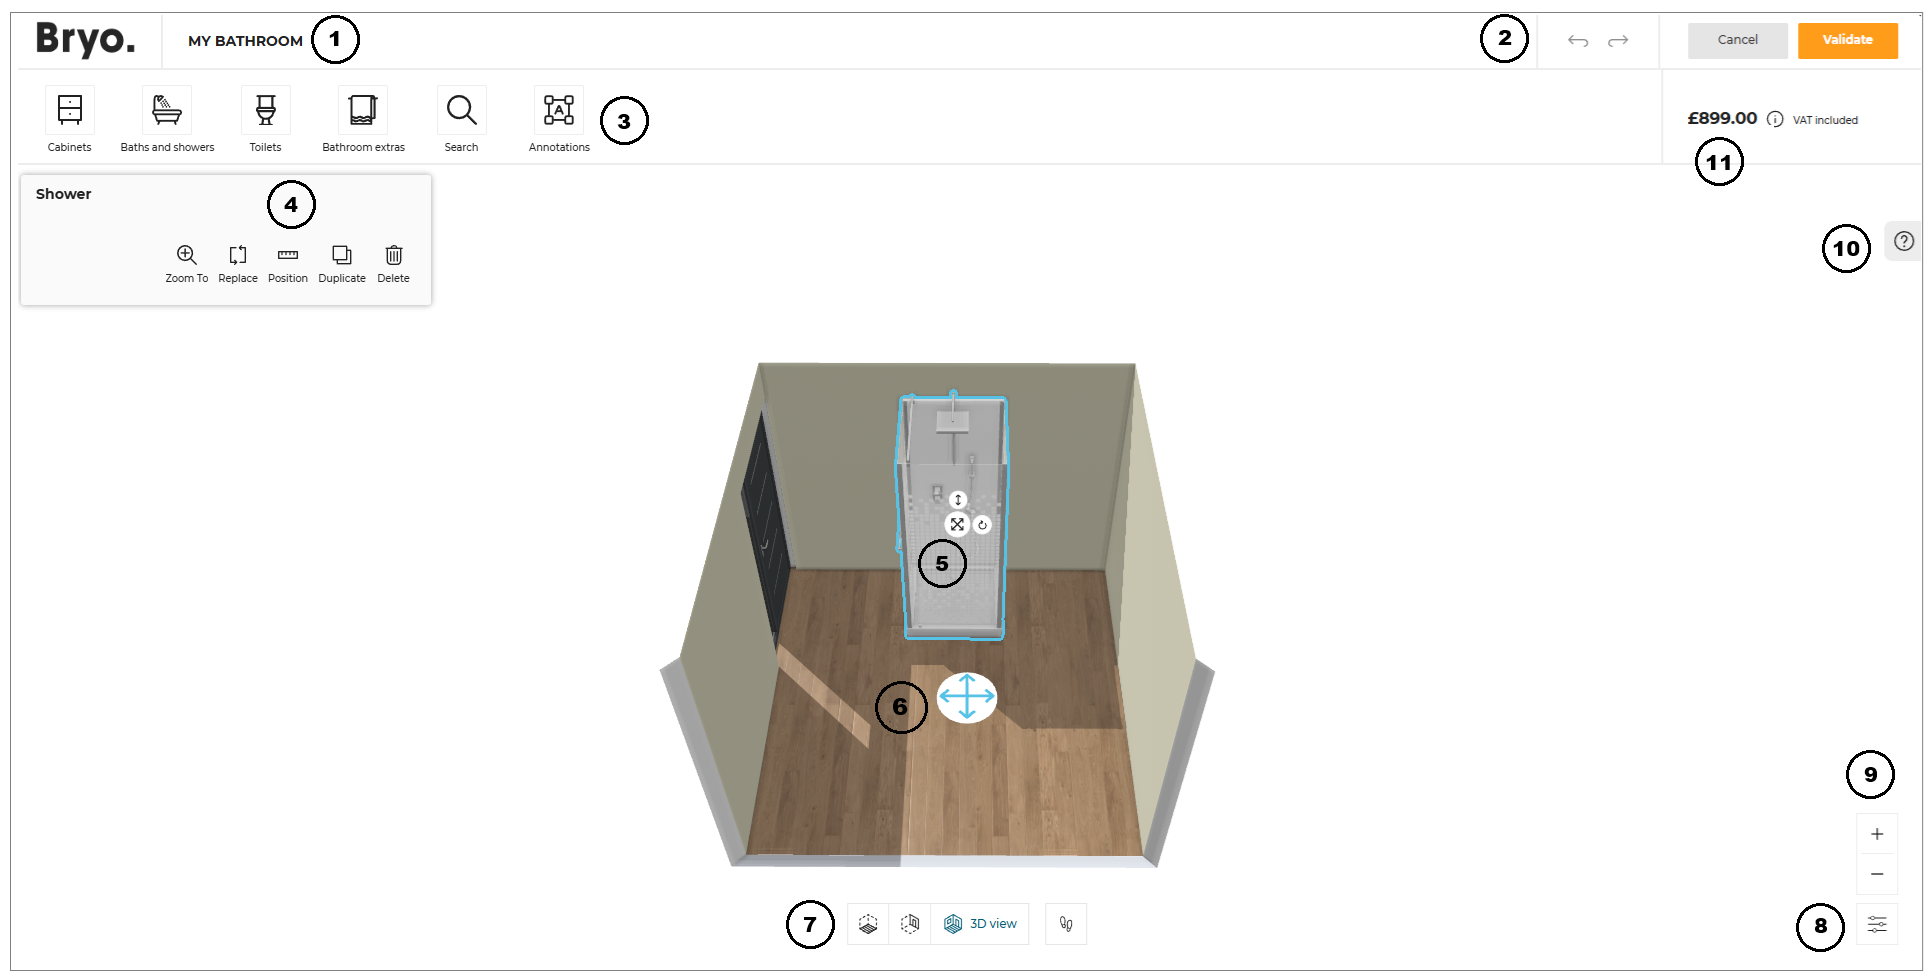
1. Project Name
This section displays the project name.
| Feature | Icon | Command | Command Location |
|---|---|---|---|
| Edit Project Name | Edit Project Name | On project name text |
2. Common Toolbar
The following commands are available in this section:
| Feature | Icon | Command | Command Location |
|---|---|---|---|
| Cancel | Cancel the configuration and go back to Home Planner | Command bar | |
| Validate | Validate the configuration and go back to Home Planner | Command bar |
3. Design Toolbar
This section contains commands and options to design your bathroom.
Favorites
You can create lists of your favorite products & add products from these lists in the bathroom project.
⚙️ Set up: Application distribution parameter favorites 🔗. The Favorites option is available in the application when the value of
favoritesis set totrue.
The default value of the parameter is set tofalse.
Creating Favorite List
- In the Design toolbar, click the
 icon.
icon.
A Favorite dialog box appears with the Create a new list button, as shown below:
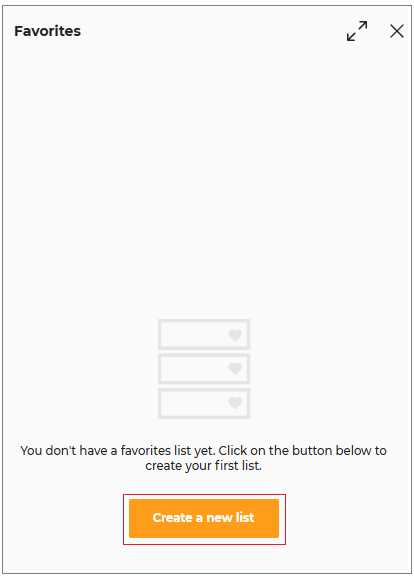
- Click the Create a new list button in Favorite dialog box.
A Create a new list dialog box appears, as shown below:

- Enter the name of the favorite list and click the Create button.
An empty favorite list with a specified name is created and a dialog box will appear with a Search a product button & an input box to edit the name of this list, as shown below:
The Search a product button is displayed only in an empty favorite list to search & add product in favorite list.
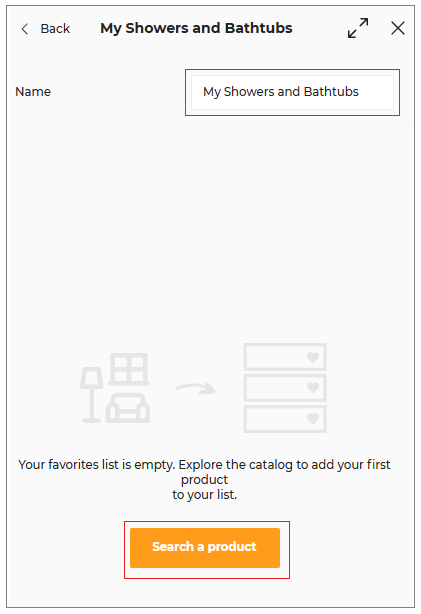
4 Click the Search a product button.
A search input box appears, as shown below:
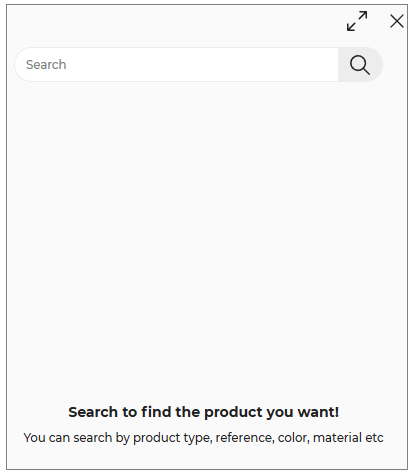
- Search the product you want to add to the favorite list.
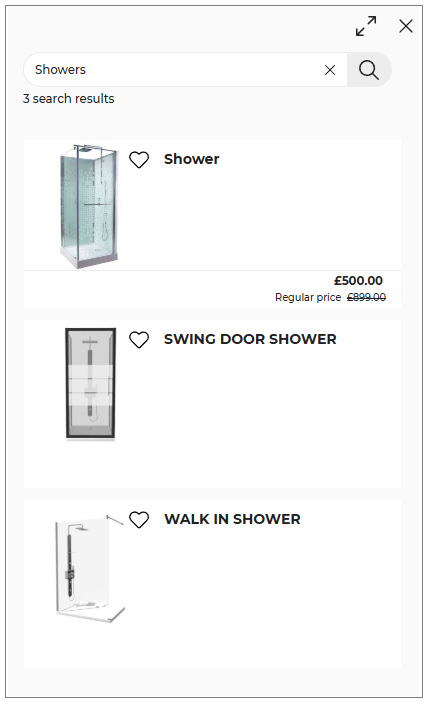
A catalog with a list of the searched product appears, as shown below:
Adding Product in the Favorite List
-
Open the product catalog from which you want to add a product to the favorite list.
Example: To open Showers catalog, click the Baths and showers option in Design toolbar & then click Configurable showers or search Showers using Search feature from Design toolbar. -
Click favorite icon of the product that you want to add to the favorite list.
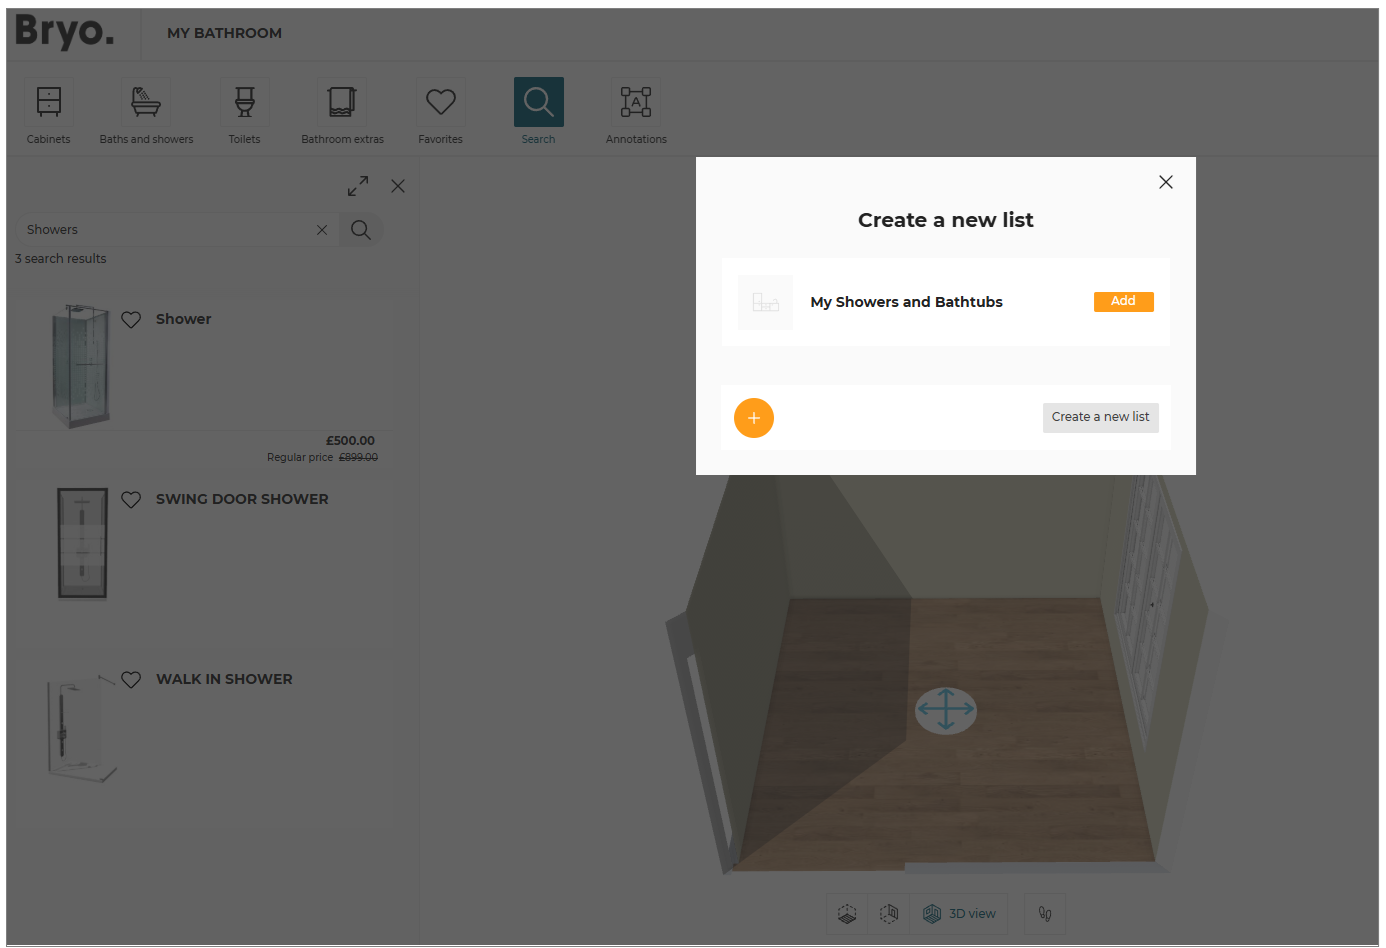
A dialog box with already created favorite lists appears. You can create a new list using Create a new list button in this dialog box.
- Click the Add button on the list to which you want to add this product.
A message will appear indicating that the product has been added to the list, as shown below:

Adding Product from Favorite List
- In the Design toolbar, Click Favorites.
A favorite dialog box will appear with added products. - To add the product, select the product from the Favorite List.
You can also add the products in the room from Favorite List by drag and drop them from the catalog.
4. Edit Panel
After selecting a product in the scene, the Edit panel is displayed to allow you to make changes to it.
5. Manipulators
| Feature | Icon | Command | Command Location |
|---|---|---|---|
| Move | Allows moving the product, sub-product or accessory in all directions | Planner | |
| Rotate | Allows rotating the product, sub-product or accessory | Planner | |
| Elevate | Allows elevating the product | Planner |
6. Avatar
| Feature | Icon | Command | Command Location |
|---|---|---|---|
| Avatar | Allows moving the avatar in the room | Planner |
7. Navigation Icons
The navigation icons allow you to switch from a 3D view to 2D view, First person view or Front elevation view.
| Feature | Icon | Command | Command Location |
|---|---|---|---|
| 2D view | Activates the 2D view. You can edit your products in this view. | Planner | |
| 3D view | Activates the 3D view. You can visualize your project in 3D and edit your products. | Planner | |
| First Person view | Activates the First person view. | Planner | |
| Front Elevation View | Activates the Front Elevation view. You can edit your products in this view. | Planner |
The Front view option is disabled in 2D view and becomes active only when switched to 3D view.
8. View Mode Options
| Feature | Icon | Command | Command Location |
|---|---|---|---|
| View Mode Options | Different view mode options | View options |
- Click the
 icon. The view mode options are displayed, as shown below:
You can select the View mode options in 2D/3D view.
9. Zoom Icons
| Feature | Icon | Command | Command Location |
|---|---|---|---|
| Zoom-in | Zoom in the view | Above view mode options | |
| Zoom-out | Zoom out the view | Above view mode options |
10. Help Center
| Feature | Icon | Command | Command Location |
|---|---|---|---|
| Help Center | To access the tooltips and planning tabs. A number indicates planning errors available in your design. | Planner |
11. Price Area
The price area computes in real time all the products and items added to the scene.
Start From A Room
If you have several rooms, a layer is displayed to allow to select a room.
Select a room in your project and click Validate.
As it is a configuration experience, only one room can be displayed in the configurator. If you want to work in another room, you need to close the configurator, relaunch it again and select the room you want.

Adding Products
You can add the products to the bathroom.
- Click the Baths and showers option.
The options are displayed, as shown below:
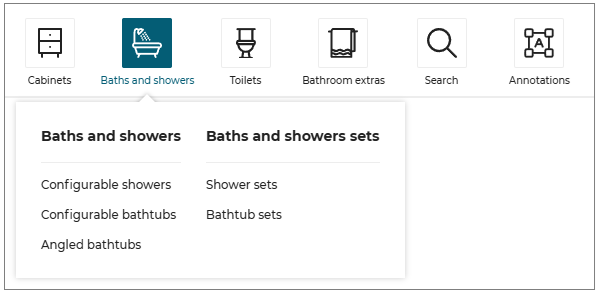
- Select the Sub-category, the product catalog is displayed, as shown below:
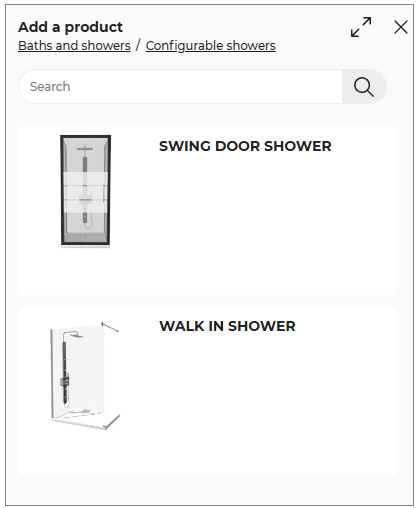
- Select the product from the catalog to add it to the room.
You can also add the products to the room by drag and drop them from the catalog.
Editing Products
The Bathroom Configurator allows you to customize the products inserted in the configuration.
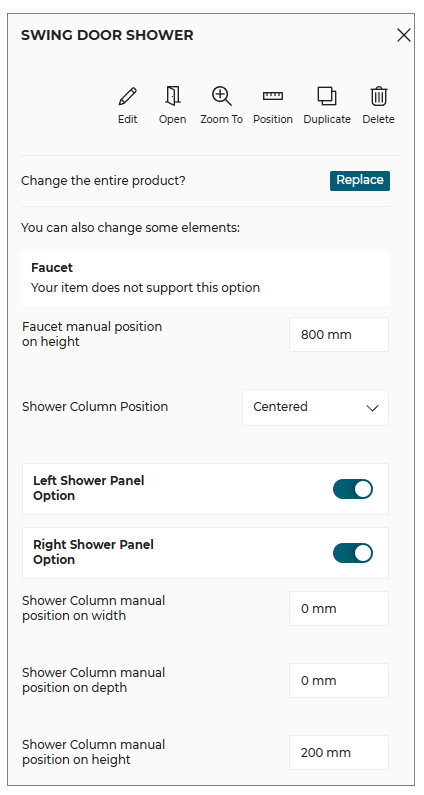
- Select the product, the edit options panel is displayed, as shown below:

| Option | Function |
|---|---|
Edit | Lists editing options. |
Open | Open/Close the product. |
Zoom To | Zoom in to the selected item. |
Position | Allows precise positioning, collision of items, and rotation with precision. |
Duplicate | Adds similar products to the room. The orientation of the duplicate product is consistent with the existing product. |
Delete | Deletes the selected product. |
Edit:
You can edit/modify the products in 2D view, 3D view, and front view, as shown below:
Animate:
You can open/close the openings of the products, as shown below:
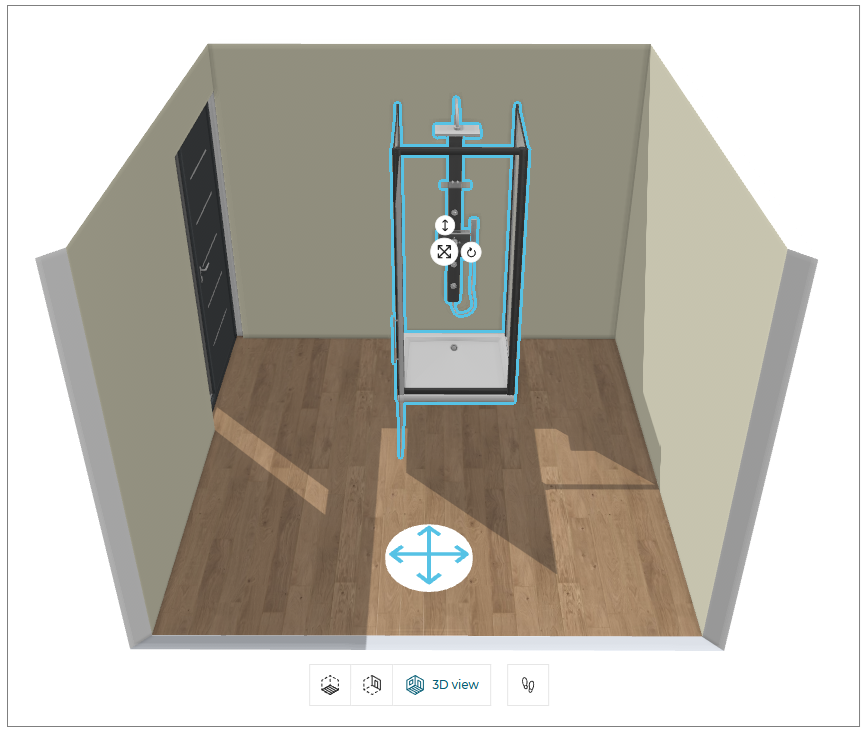
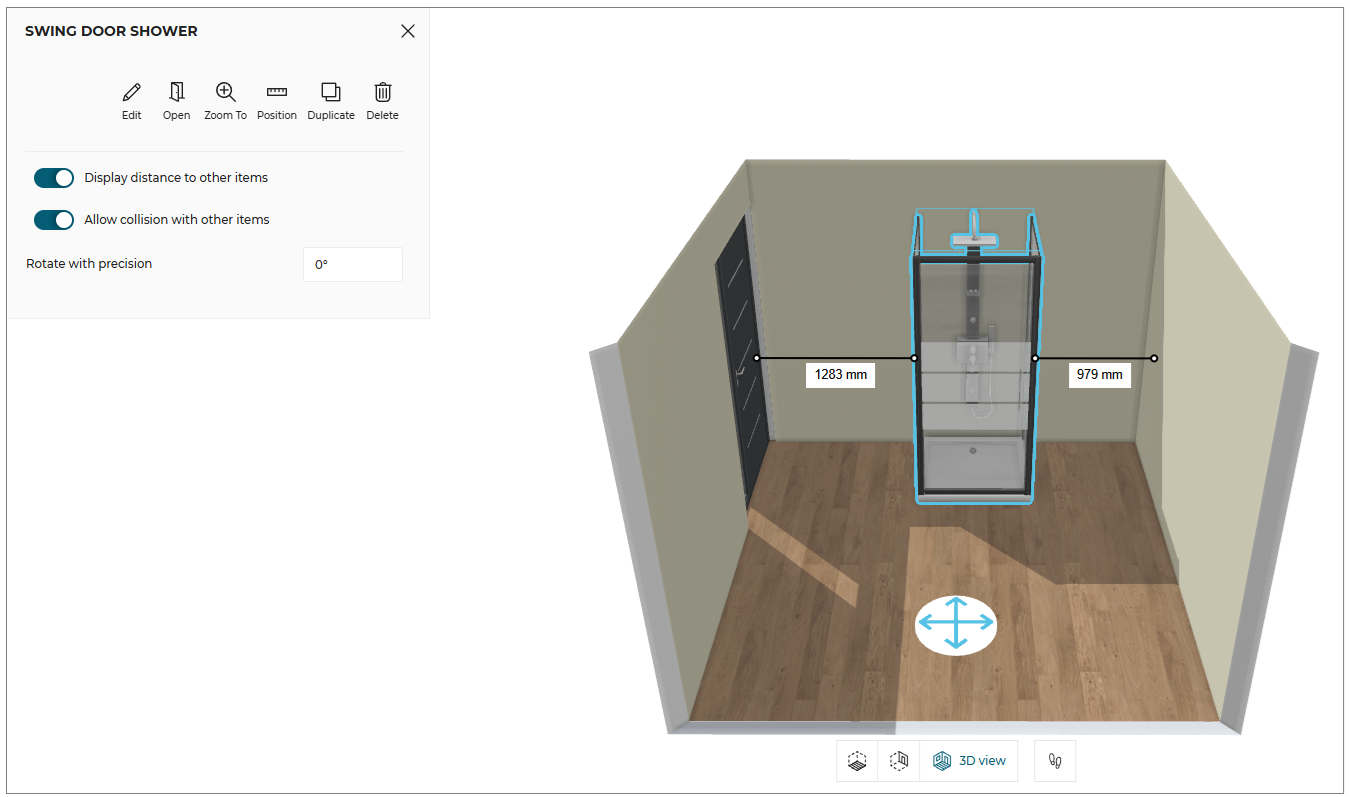
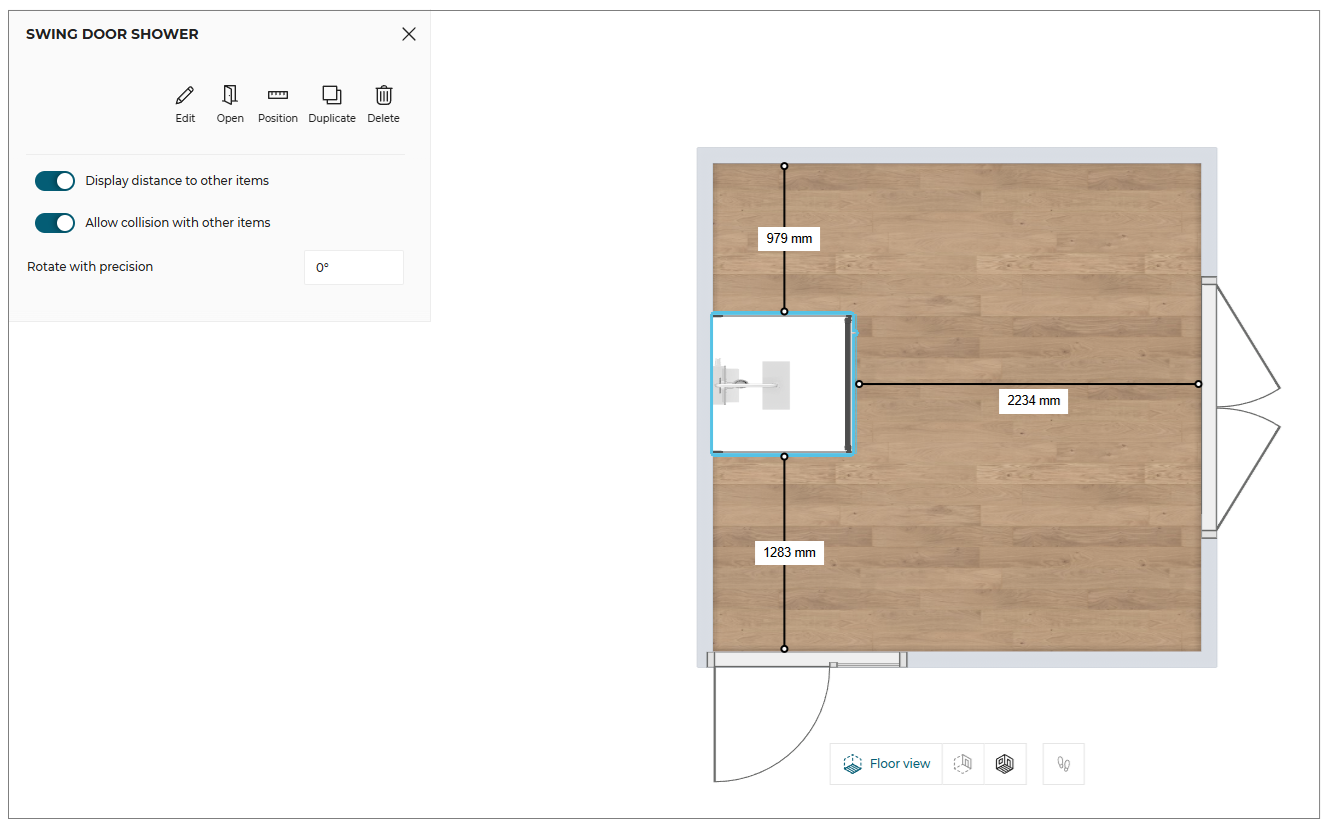
Position:
You can edit/modify the position of the products, as shown below:
Duplicate:
You can duplicate the selected products.
Delete:
You can delete the selected products.
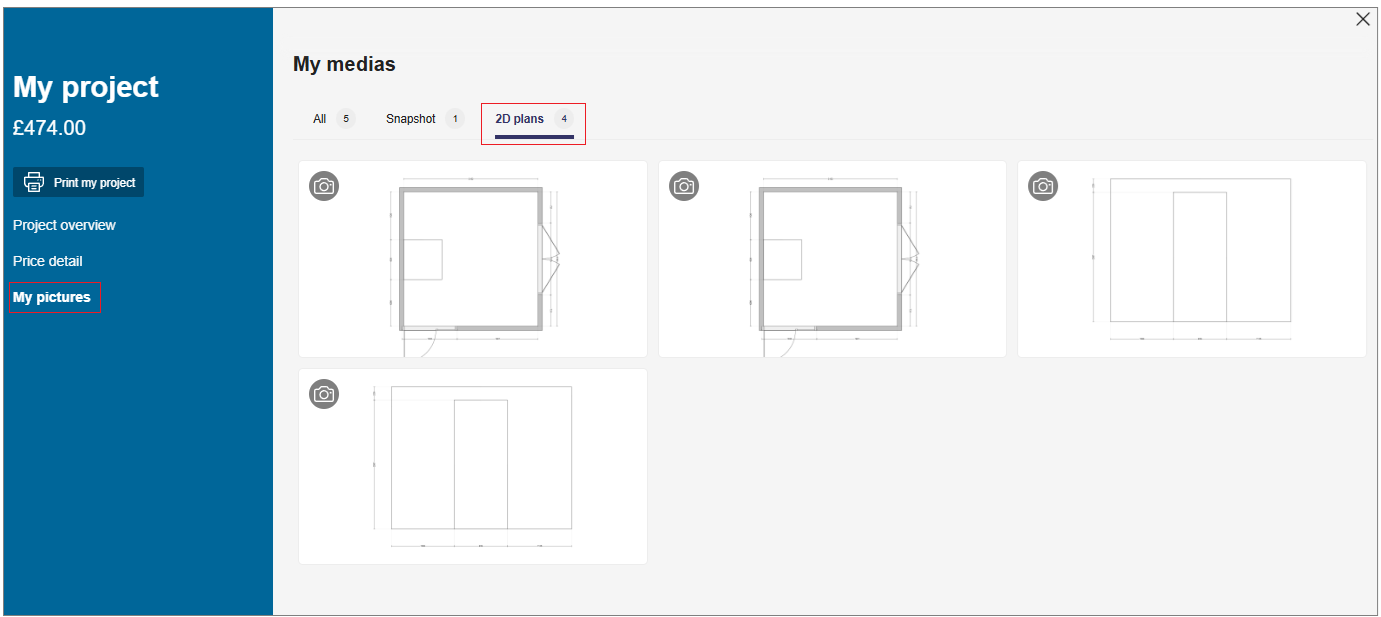
View Images
This section allows you to view 2D Plans of the kitchen project.
-
Click the
 icon.
icon. -
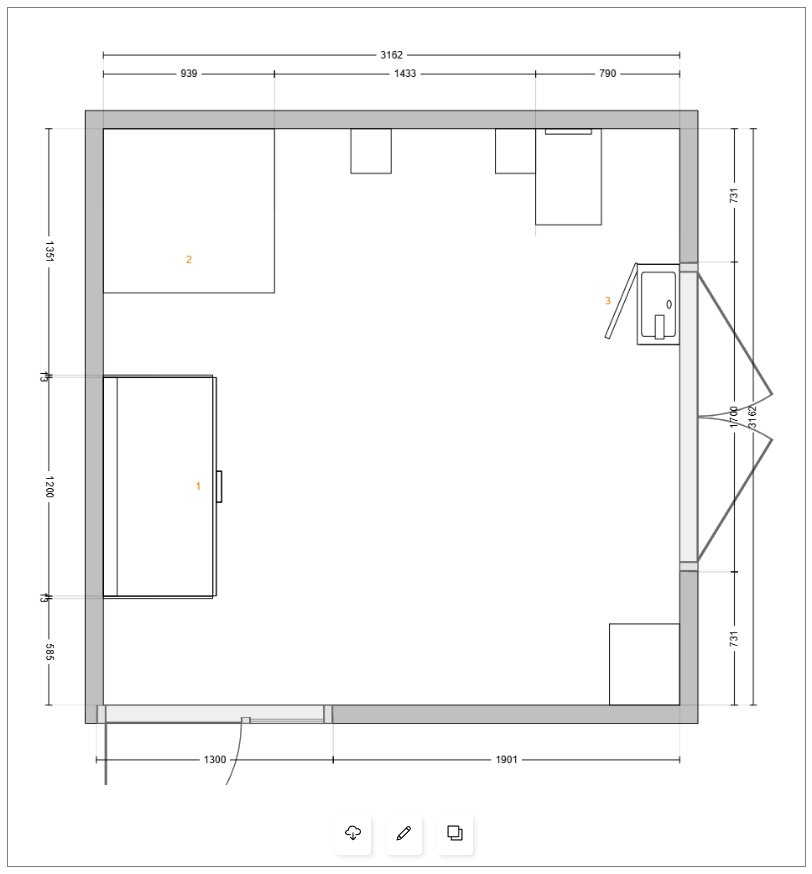
The 2D plans window is displayed, as shown below:

Edit 2D Plans
You can download, edit and duplicate the 2D plans.
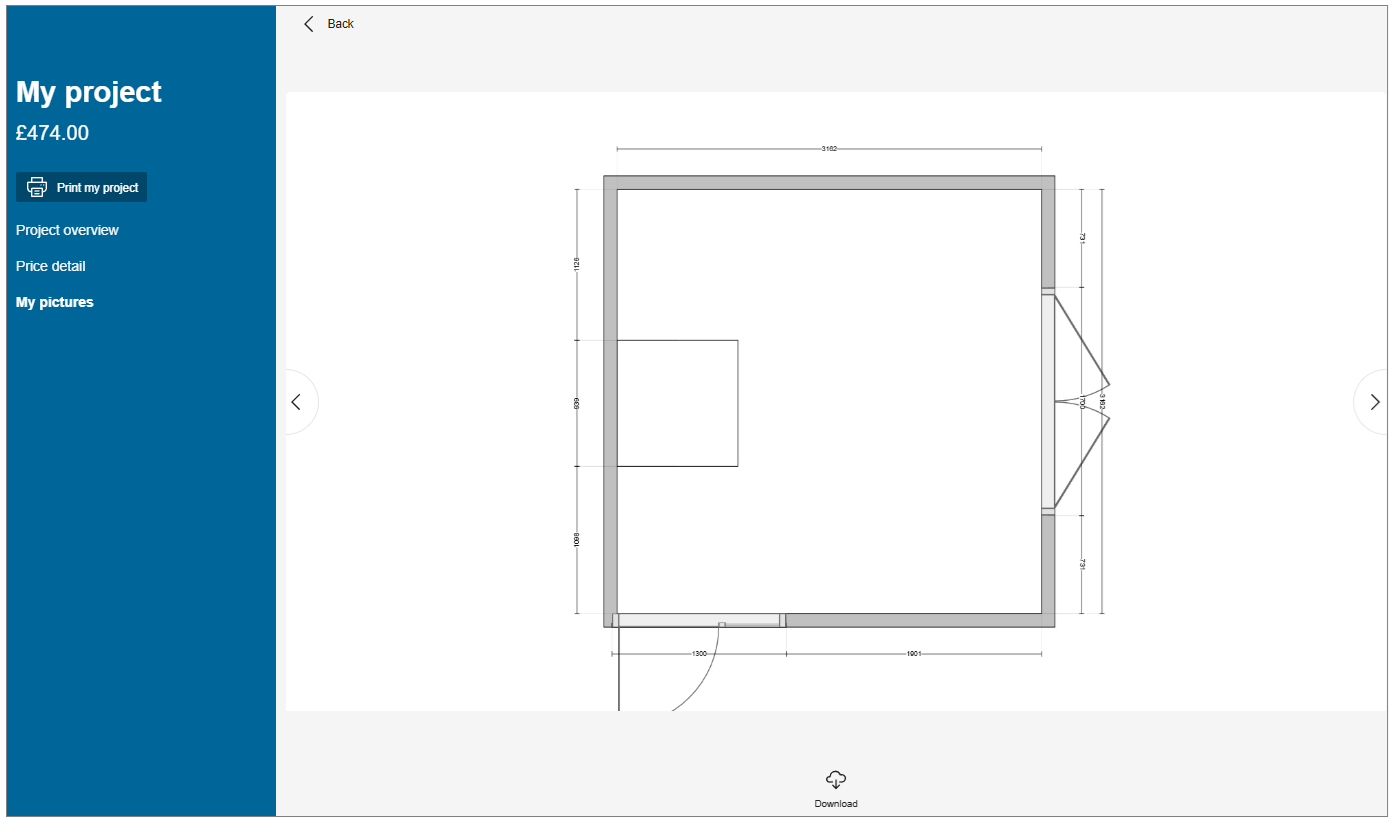
- Click the 2D plan to preview it, as shown below: You can preview the available 2D plans of the project by clicking the previous/next arrow button.
-
Click the
 icon to download the 2D plan.
 -
Click the
 icon.
icon.
The notification We are duplicating your 2D plan window is displayed, as shown below:

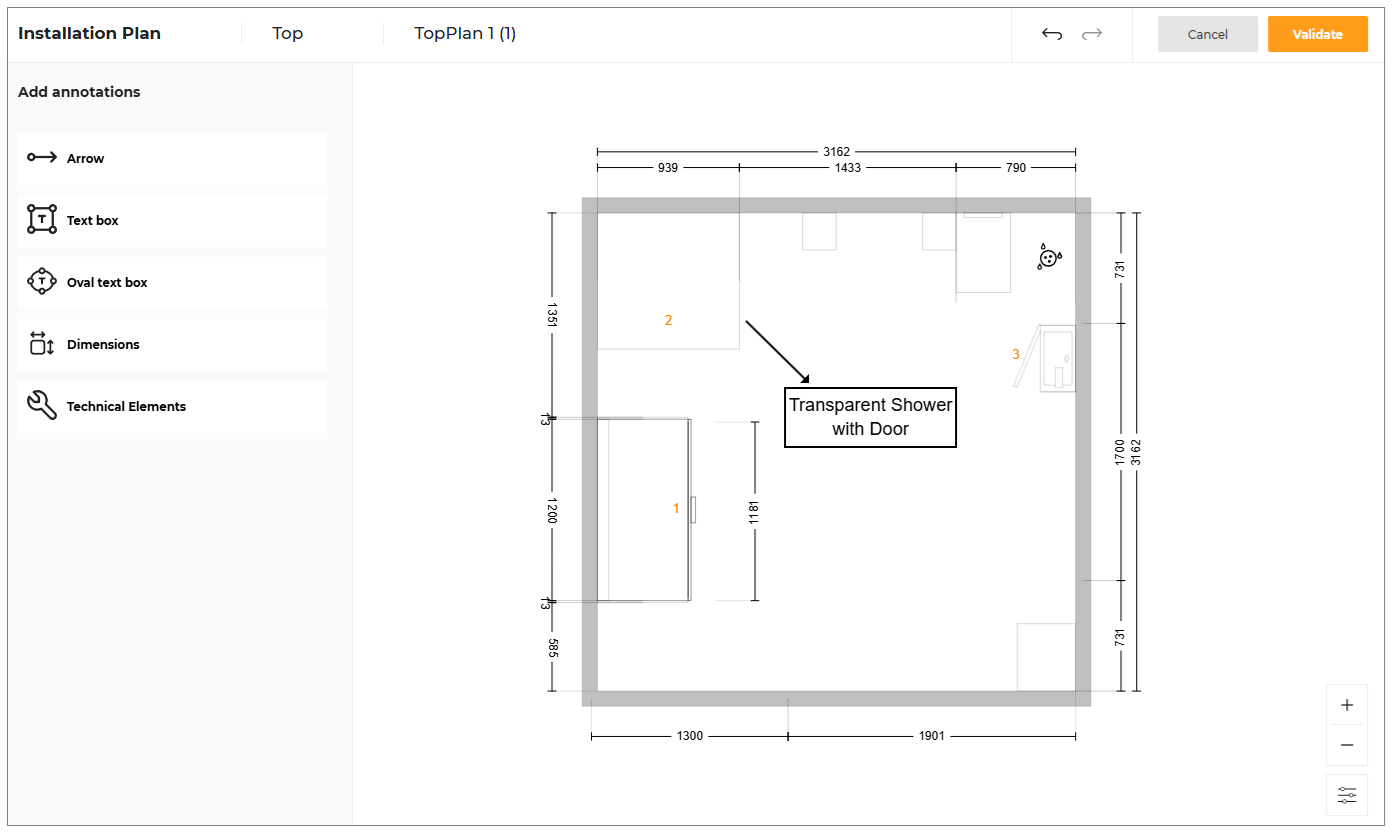
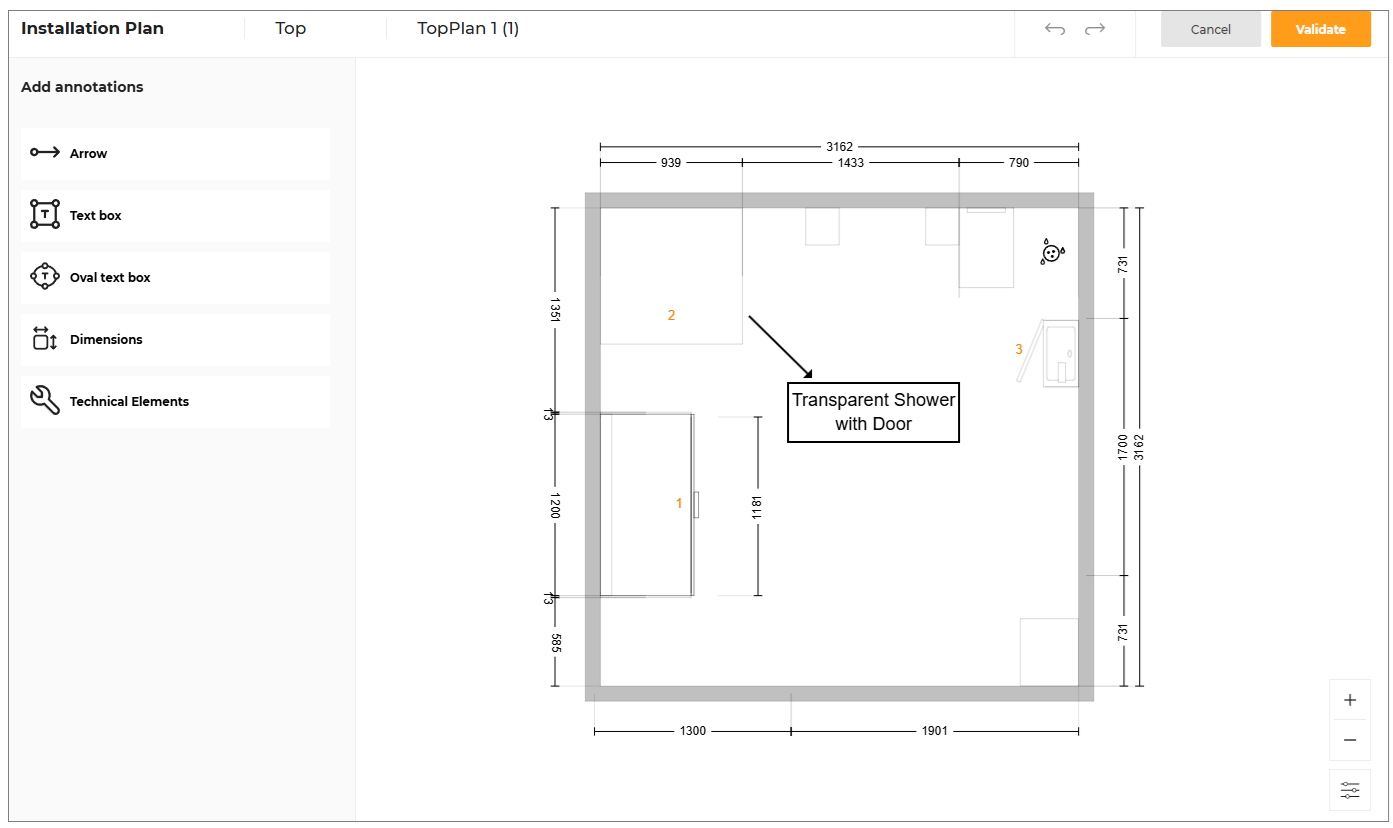
- Select the Annotations options, to add the annotations to the plan, as shown below:
- Click the Validate button once the edit is done.
A copy of the original 2D plan is generated with Custom name.
To view the custom plan, click the View Images.
The 2D plans window is displayed, as shown below:

- The Download, Edit, Duplicate and Delete option is displayed when you hover the mouse cursor over 2D plan, as shown below:

- Click the
 icon.
icon.
The Installation plan edit window is displayed, as shown below:
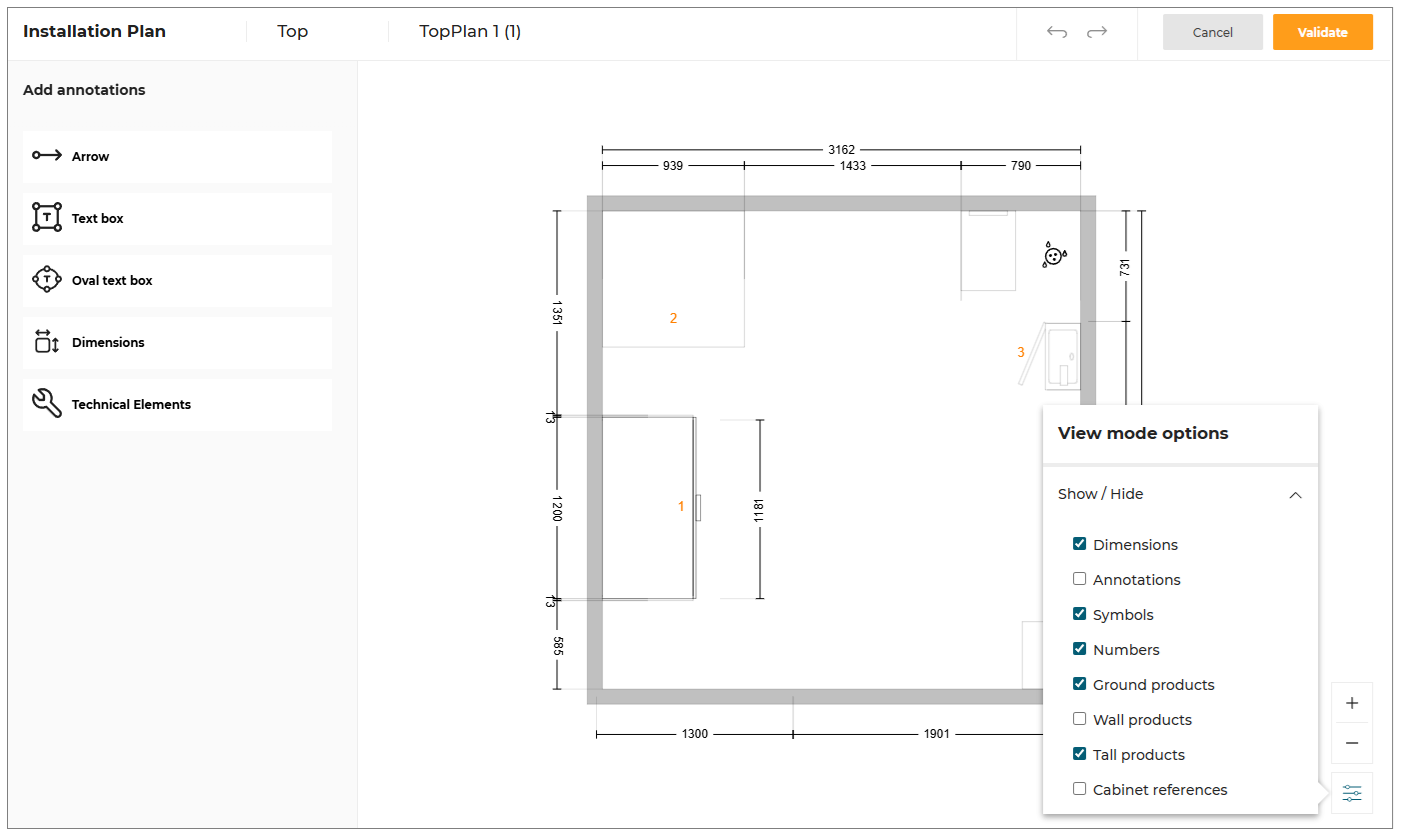
Show/Hide Annotation
You can customize the visibility of various elements within your installation plans to create a cleaner and more focused view. This feature allows you to show or hide specific elements such as cabinets, linear elements, dimensions, symbols, and annotations through a dedicated menu.
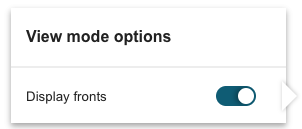
- Click the View mode options button to open the menu for showing or hiding elements in the installation plans, as shown below:
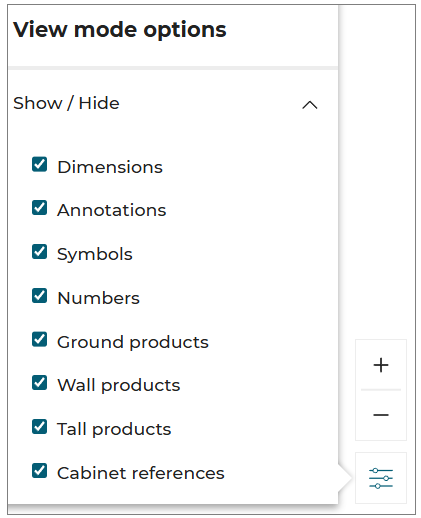
- In the menu, you can select or deselect the elements you want to show or hide, as shown below:
- Click the
 icon, to delete the custom plan.
The Confirm deletion window displayed, as shown below:
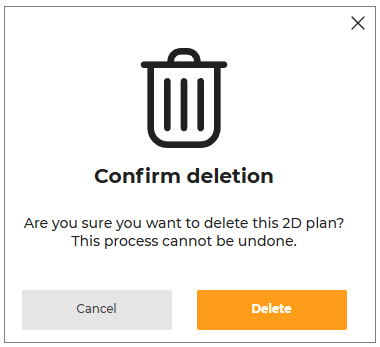
- Click the Delete button to delete the custom plan.
Finalize Bathroom Configuration
When you have finished your Bathroom Configuration, you can click on Validate button displayed at the top right of the configurator.
The Generating 2D Plans notification is displayed to generate the dedicated 2D Plans of your configuration, as shown below:

When this step is done, Home Planner is now displayed with the updated price of your project.
If you would like to see the generated 2D Plans of your configuration, you can click on Project overview link below the total price of your project.

The Project Overview default widget is displayed, you can click on My pictures link to see the medias of your configuration.
For more details about generated 2D Plans, click on the tab 2D Plans.
Click on the thumbnail to see the generated 2D Plans in details.
Click the Download button to download the 2D plans.
Edit My Previous Configuration
If your previous configuration is not finished and you would like to modify it, click on the configuration product.
The Edit button is displayed in the dedicated window.

The Bathroom Configurator is launched and you can proceed to the modifications of your existing configuration.

Create New Configuration
You can create multiple configuration in Home Retailers application.
To create new configuration:
-
Click the Configurators option.
-
Click the Bathroom Configurator option, the window to create a new configuration is displayed, shown below:
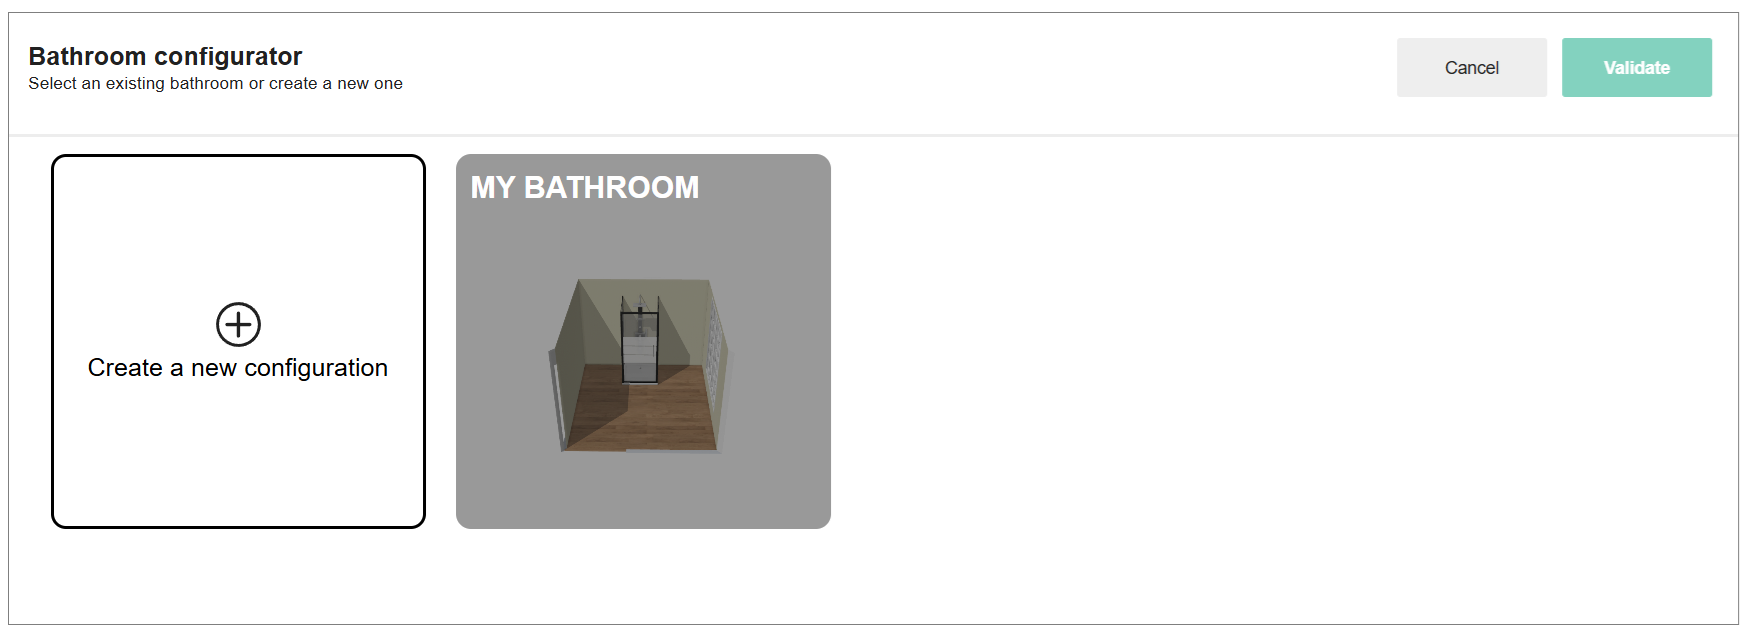
-
Select the Create a new configuration option.
-
Click the Validate button, the configurator is displayed, as shown below:
To open the existing created configuration:
- Select the configuration in the Bathroom configurator, as shown below:
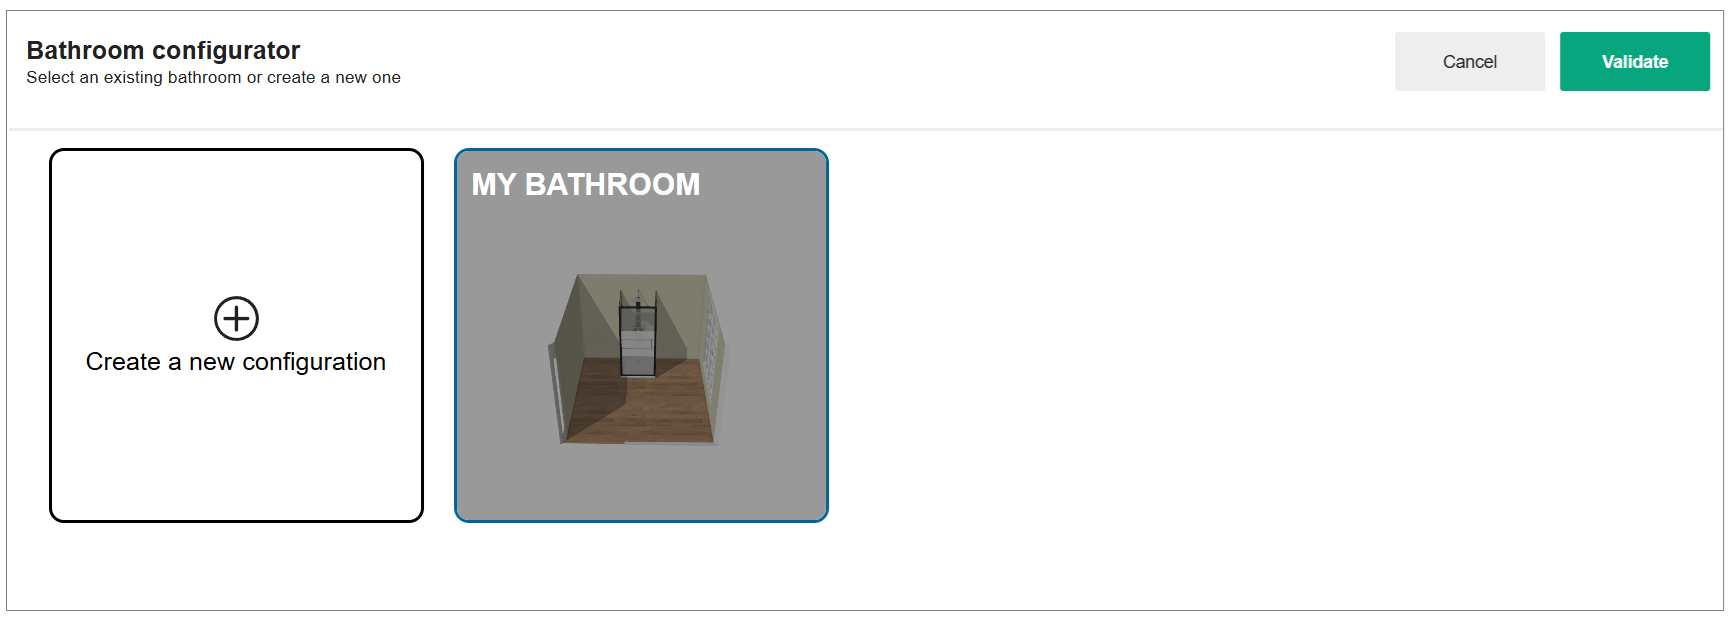
- Click the Validate button.