Standalone Configurator Configuration
How to configure the Storage Configurator
They are two ways of configuring the way the Storage Configurator is displayed:
- Using the Application Distribution "integration" parameter. 🔗
- If necessary from a developer side when using the standalone Storage Configurator, you can use DOM attributes. 🔗
User Interface
This first attribute has some big impact. It chooses if the global User Interface of the configurator is displayed. Only disable this if you want to build your own menus on your website.
The other attributes on this page are sorted in two lists:
- The attributes that can be useful with or without the user interface. 🔗
- The attributes that are only useful if you keep the user interface. 🔗
Note: If you use the Storage Configurator inside the planner, disabling the UI in the application distribution is probably not a good idea. It will hide the menus inside the planner.
| Application Distribution | [Dev] DOM attribute | Possible values | Default value |
|---|---|---|---|
userInterface | data-user-interface | Boolean | true |
Application Distribution example:
{
  "integration": {
    "userInterface": true
  }
}
Attributes
Locale Name
This is the language used by the Storage Configurator. The value to use here is one of the name of the locales you configured in the Application Distribution.
| Application Distribution | [Dev] DOM attribute | Possible values | Default value |
|---|---|---|---|
localeName | data-locale-name | One of the name of the locales you configured in the Application Distribution. | "" |
Application Distribution example:
{
  "integration": {
    "localeName": "fr-FR"
  }
}
Anonymous vs. Logged user (with UI enabled only)
When the user interface is enable, you have the possibility to choose between two users mode: anonynous or logged user.
Anonymous mode
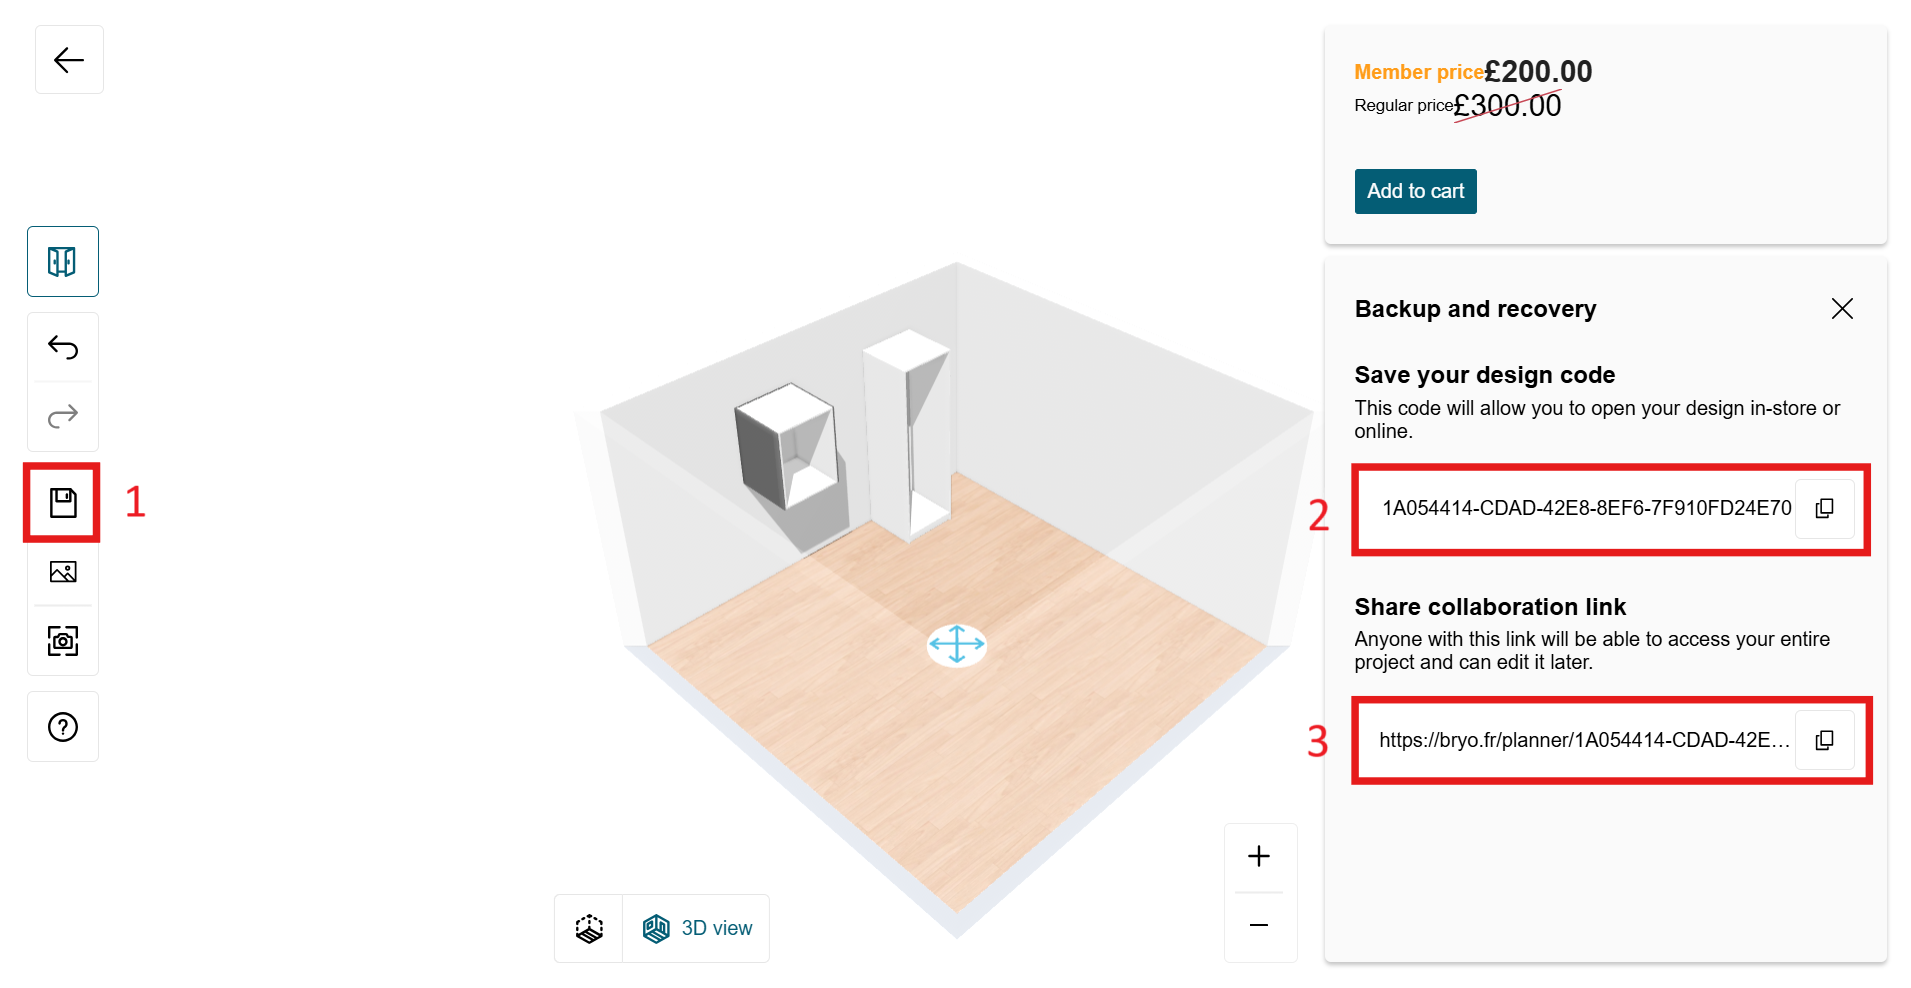
In Anonymous mode, users don't have to create and log in to their account in order to use the configurator. They can save their configuration at any time by clicking on the Save button in the toolbar (1), and they will be prompted a project uuid, or design code (2) that they can use to reload their project later on.
Additionnaly they have the possiblity to reload their project through a project url, or collaboration link (3)
This is the default mode of the Storage configurator and no attribute has to be set in the application distribution parameters or the DOM attributes to benefit from this mode.
In order to reopen a configuration project saved in anonymous mode, you can use the project uuid data attribute, or the "configuratorInit" event, see the initialization page 🔗 to see how.
You can configure the collaboration link base url though the project link url attribute
| Application Distribution | [Dev] DOM attribute | Possible values | Default value |
|---|---|---|---|
projectLinkUrl | data-project-link-url | String | "" |
Application Distribution example:
{
  "features": {
    "projectLinkUrl": "https://bryo.fr/planner"
  }
}
Email service
Additionally, you can allow users to receive their design code (project uuid) or collaboration link (project link url) by email by enabling the email service feature.
| Application Distribution | [Dev] DOM attribute | Possible values | Default value |
|---|---|---|---|
emailService | data-email-service | Boolean | false |
Application Distribution example:
{
  "features": {
    "emailService": true
  }
}
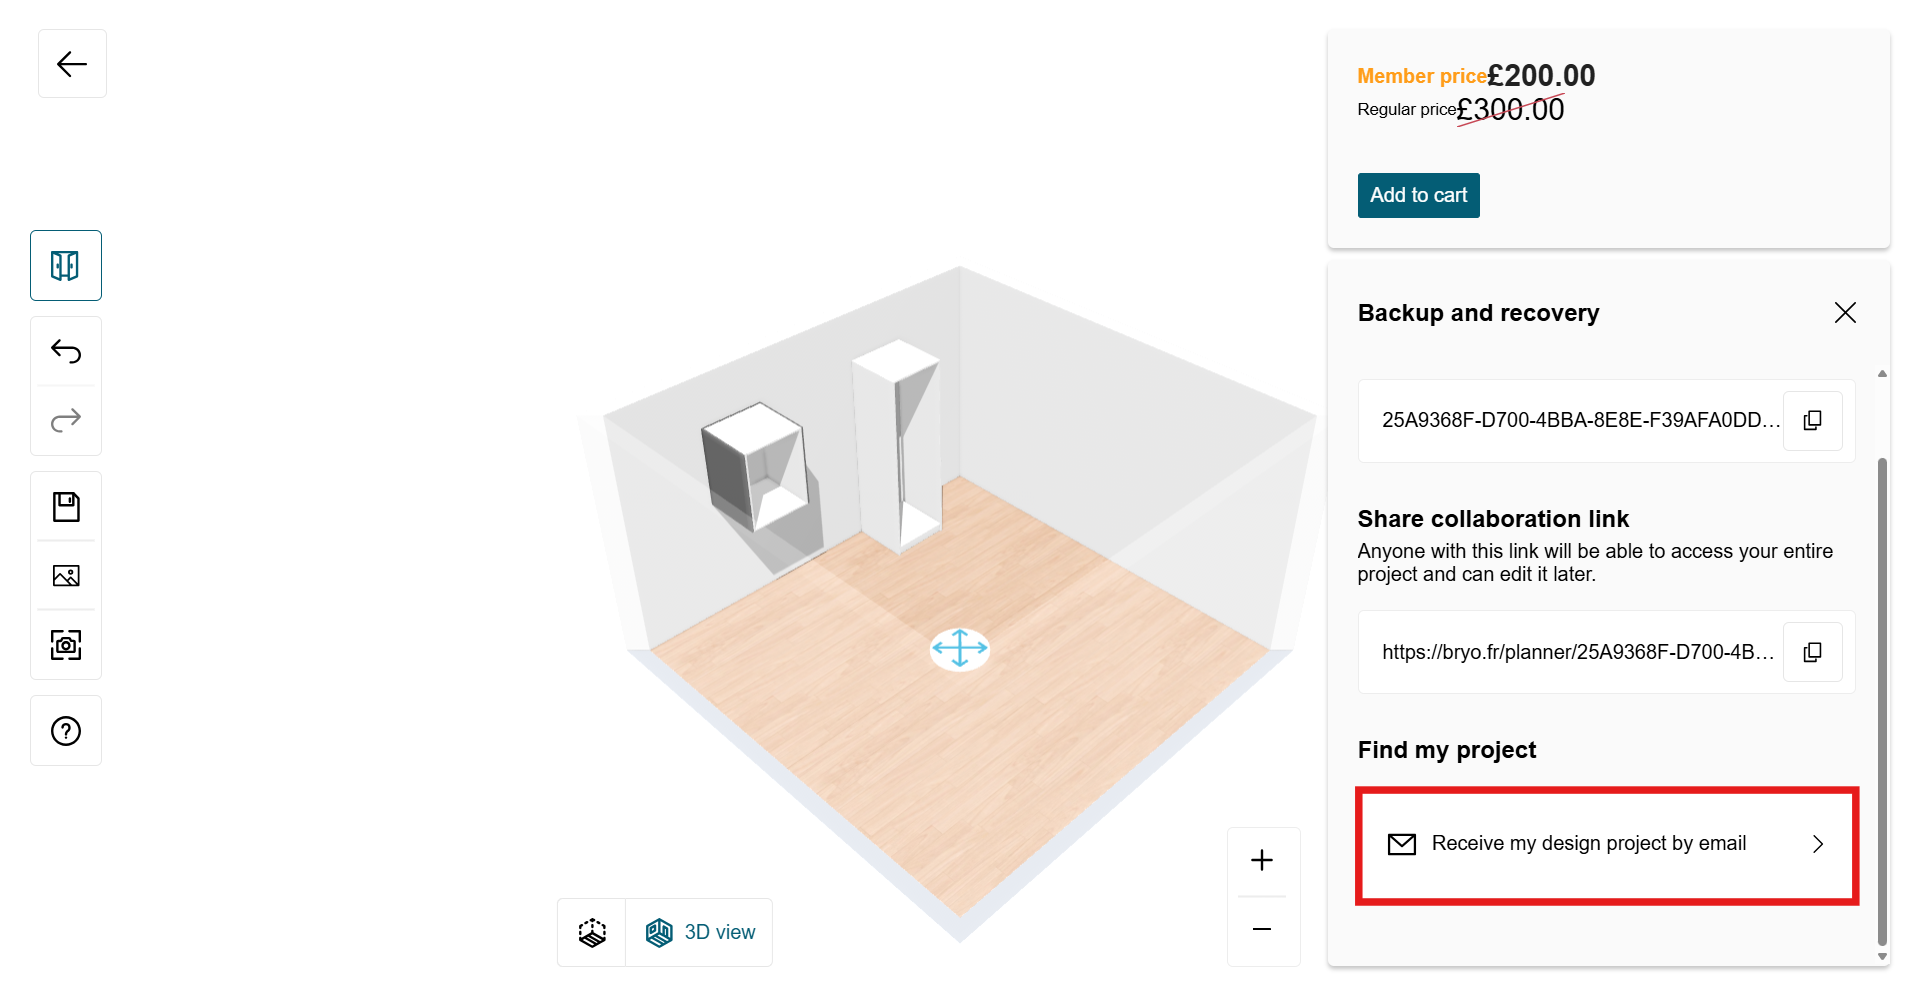
If you do so, it will display a button in the save panel that will allow the user to enter his email address:
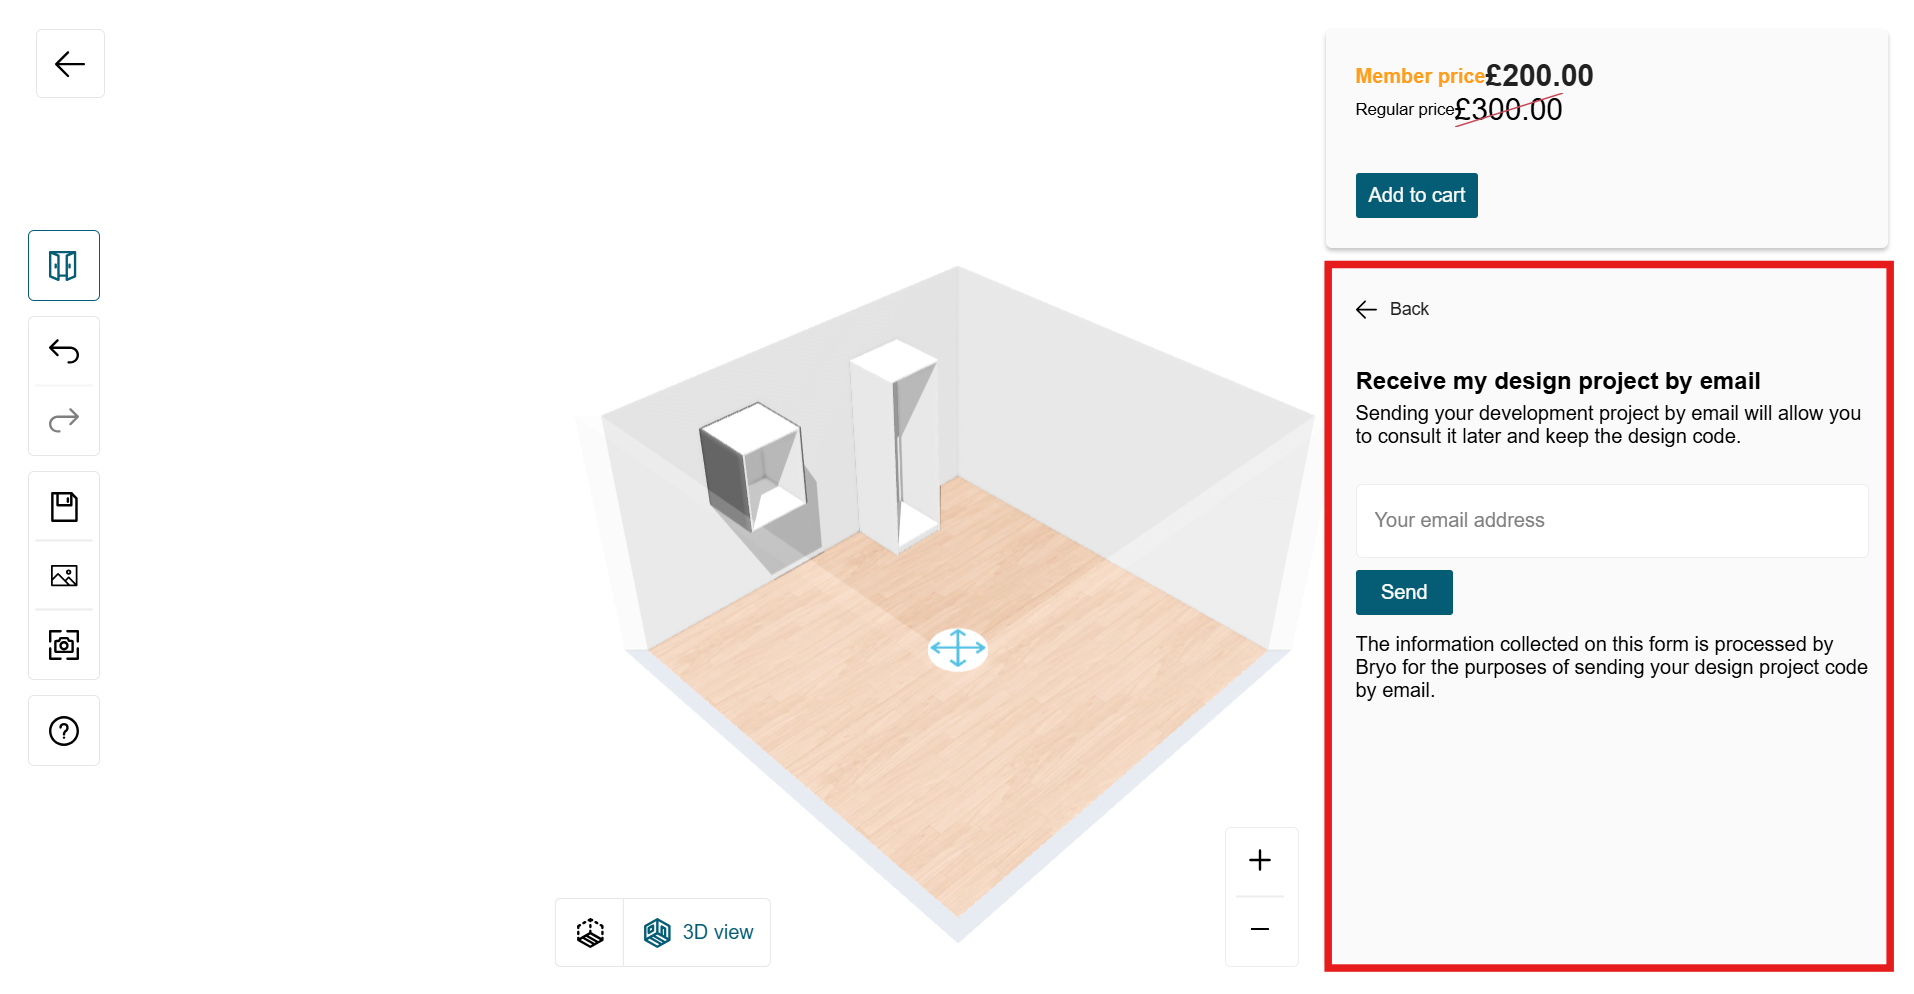
When the Send button is clicked, a "emailInfo" 🔗 custom event is sent, to which you can register to obtain the necessary information to send its project info to the user by email. Once sent, you can send back the "emailSent" event to update the UI accordingly. Check the interaction page 🔗 to see how to register from and send events to the configurator.
Logged user mode
In logged user mode, users have to be logged in in order to save their project. The saved configurations will then be accessible through their user account.
You can activate the logged user mode by setting the saveWithUser feature flag to true in your application distribution parameter:
| Application Distribution | [Dev] DOM attribute | Possible values | Default value |
|---|---|---|---|
saveWithUser | data-save-with-user | Boolean | false |
Application Distribution example:
{
  "features": {
    "saveWithUser": true
  }
}
Then, when clicking the save button in the toolbar, a "loginRequired" event will be sent to which you can register to implement your own log in system. See the communication page 🔗 to see how to register to an event.