Add Products
This section provides detailed information on browsing catalogs and adding the products in the project.
Also, information on searching a product and adding it in the project is provided in this section.
Browse and Add Products
You can add products to your project by browsing them from catalogs.
There are three main catalogs according to products available in them:
Build
Furnish
Decorate
Build
Build catalog contains products useful for designing the building structure of the project.
For example: Doors, Windows, Staircases and Technical Equipment.
Build catalog is divided into five sub-catalogues, according to building product available.
Exterior doors
Example: Front doors, patio doors, and garage doors.
Interior doors
Example: Folding doors, and sliding doors
Windows
Example: Simple windows, double windows, sliding windows, and patio doors.
Staircases
Example: Straight staircases, helical staircases, quarter turn staircases, and double quarter turn staircases.
Technical Equipment
Example: Electricity, heating and cooling, plumbing, and construction.

Steps to add a building product to project:
- Click Build.
- Select product type from building products.
Example: Technical equipment >> electricity.
List of products display.
Recommendation:
To view all products from sub-catalog, click sub-catalog product name.
Example: Build > Technical equipment
Click maximize for better display mode, click minimize for previous mode.
- Select product.
Product is added to project.
After adding a product from the catalog, the product remains in the selected state, so that the manipulator options (like Elevate, Move, Rotate, etc) can be used. Also, the editing toolbar (like Edit, Position, Duplicate and Delete) appears for the inserted product on closing the catalog browser.
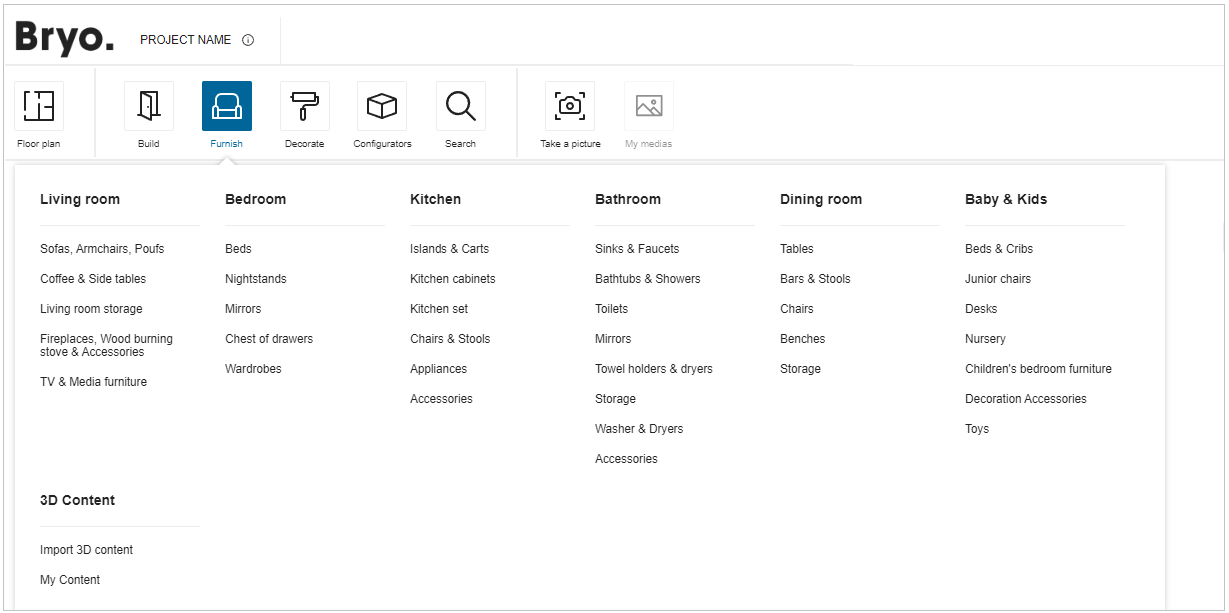
Furnish
Furnish catalog contains products useful for furnishing the home design in project.
For example: Sofas, Beds, Chairs, Mirrors, Toys and etc.
Furnish catalog is divided into six sub-catalogues, according to room types.
Living room
Example: Sofas, armchairs, poufs, coffee and side tables, living room storage, fireplaces, wood burning stove and accessories, and TV and media furniture.
Bedroom
Example: Beds, nightstands, mirrors, chest of drawers, and wardrobes.
Kitchen
Example: Islands and carts, kitchen set, chairs and stools, appliances, and accessories.
Bathroom
Example: Sinks and faucets, bathtubs and showers, toilets, mirrors, towel holders and dryers, storage, washer and dryers, and accessories.
Dining room Example: Tables, bars and stools, chairs, benches, storage.
Baby and Kids
Example: Beds and cribs, junior chairs, desks, nursery, children’s bedroom furniture, decoration accessories and toys.
3D Content
You can import the 3D Content to the planner and view the 3D content in the My Content section.
Steps to add a furnishing product to project:
- Click Furnish.
- Select product type from home furnishing products.
Example: Baby and Kids >> Toys.
List of products display.
Recommendation:
To view all products from sub-catalog, click sub-catalog product name.
Example: Furnish > Baby and Kids.
Click maximize for better display mode, click minimize for previous mode.
- Select product. Product is added to project.
Import 3D content
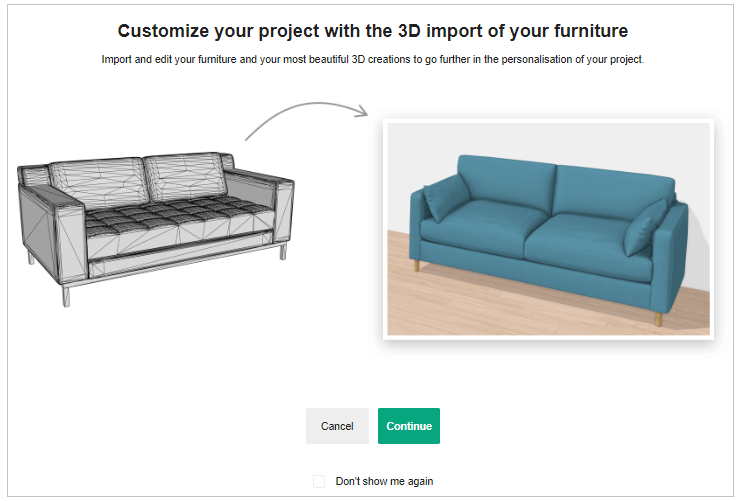
This section explains the steps to import the 3D content in the planner.
- Click the Import 3D content option, the login window is displayed if not logged in, as shown below:

- Click the Continue button, the 3D Upload window appears, as shown below:
- Click the Select your file(s) option to upload the 3D model file from the folder.
Also, you can drag and drop the 3d model file.
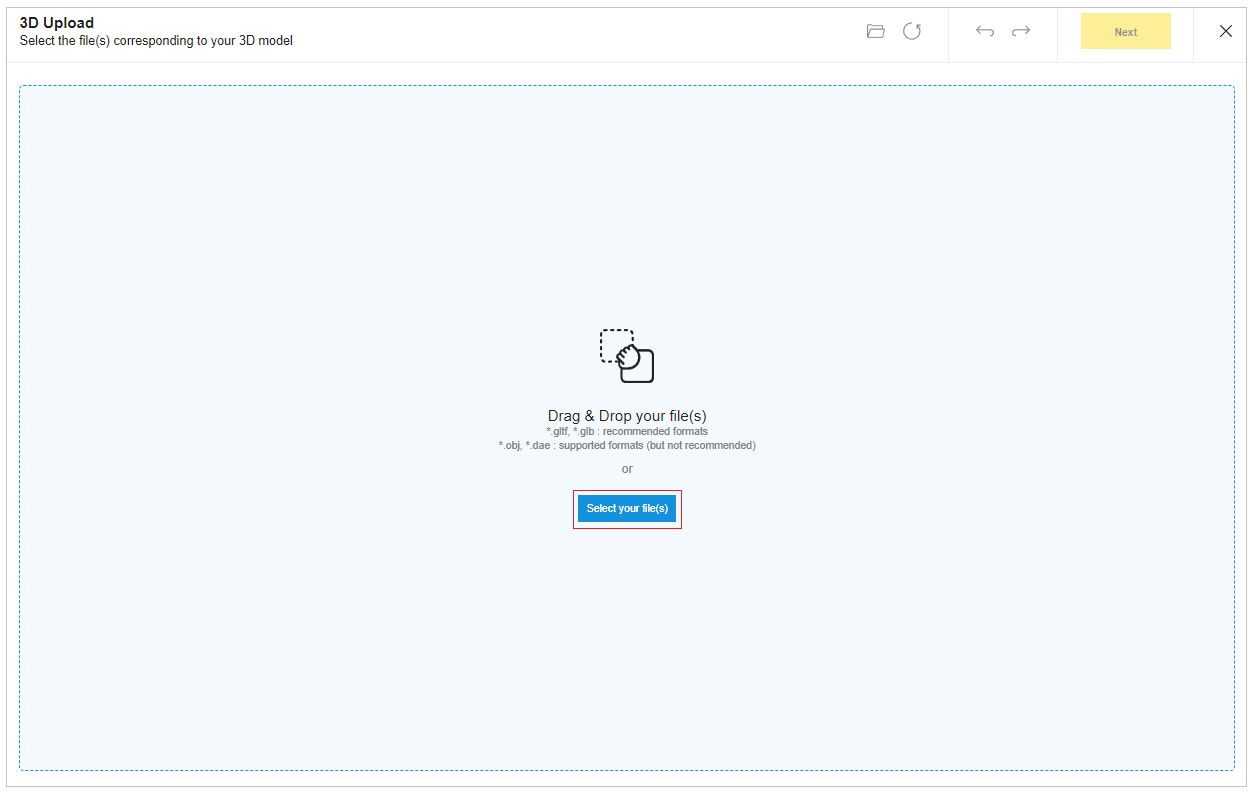
- To upload the file.
Select .obj, .gltf, .glb or .dae format file from the folder, the file is uploaded as shown below:
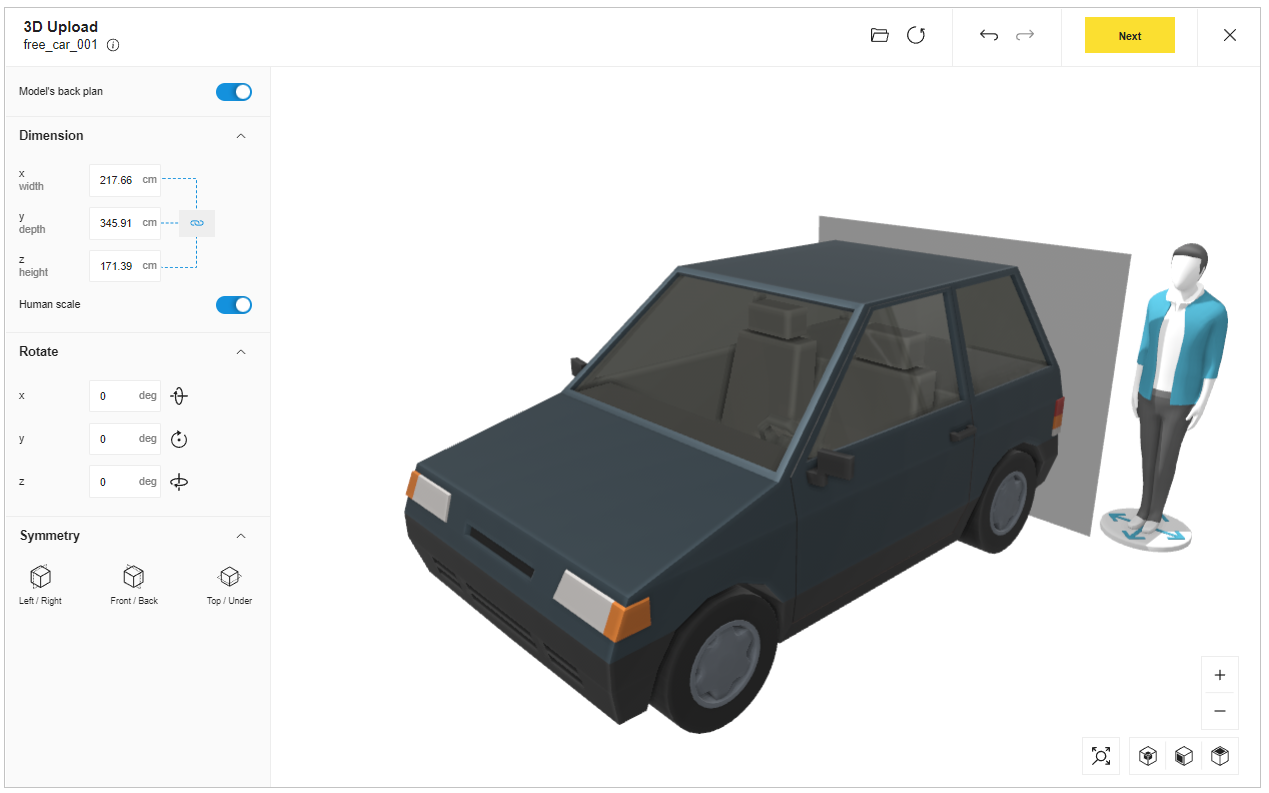
Model's back plan
Toggle on/off the Model's back plan option to
Human scale
Toggle on/off the Human scale option to activate/deactivate the human avatar.
- Dimension
You can modify the x(width), (y)depth and (z)height dimension of the 3D model, as shown below:

- Rotate
The rotate function allows you to set a rotation angle on X, Y and Z axes, as shown below:
The values are in degrees.

- Symmetry
You can apply the symmetry to your 3D model along the X(left/right), Y(front/back), and Z(top/bottom) axes.

The Common Toolbar
Following commands are available in this section:
| Icon | Function | Description |
|---|---|---|
| Toggle measure lock | To enable/disable independent measurement along the X, Y, and Z axes. | |
| X axis rotate | To rotate the 3D model along the X axis. | |
| Y axis rotate | To rotate the 3D model along the Y axis. | |
| Z axis rotate | To rotate the 3D model along the Z axis. | |
| Left/Right | To symmetry 3D model along the X(left/right) axes. | |
| Front/Back | To symmetry 3D model along the Y(front/back) axes. | |
| Top/Under | To symmetry 3D model along the Z(top/bottom) axes. | |
| Center model | To center the 3D model. | |
| Angle view | To side view the 3D model. | |
| Front view | To front view the 3D model. | |
| Top view | To top view the 3D model. | |
| Zoom | To zoom in the 3D model. | |
| Unzoom | To zoom out the 3D model. | |
| Open from disk | To open the 3D model from disk. | |
| Restore default model | To restore the default 3D model. |
- Click the Next button, the window to Upload your model is displayed, as shown below:
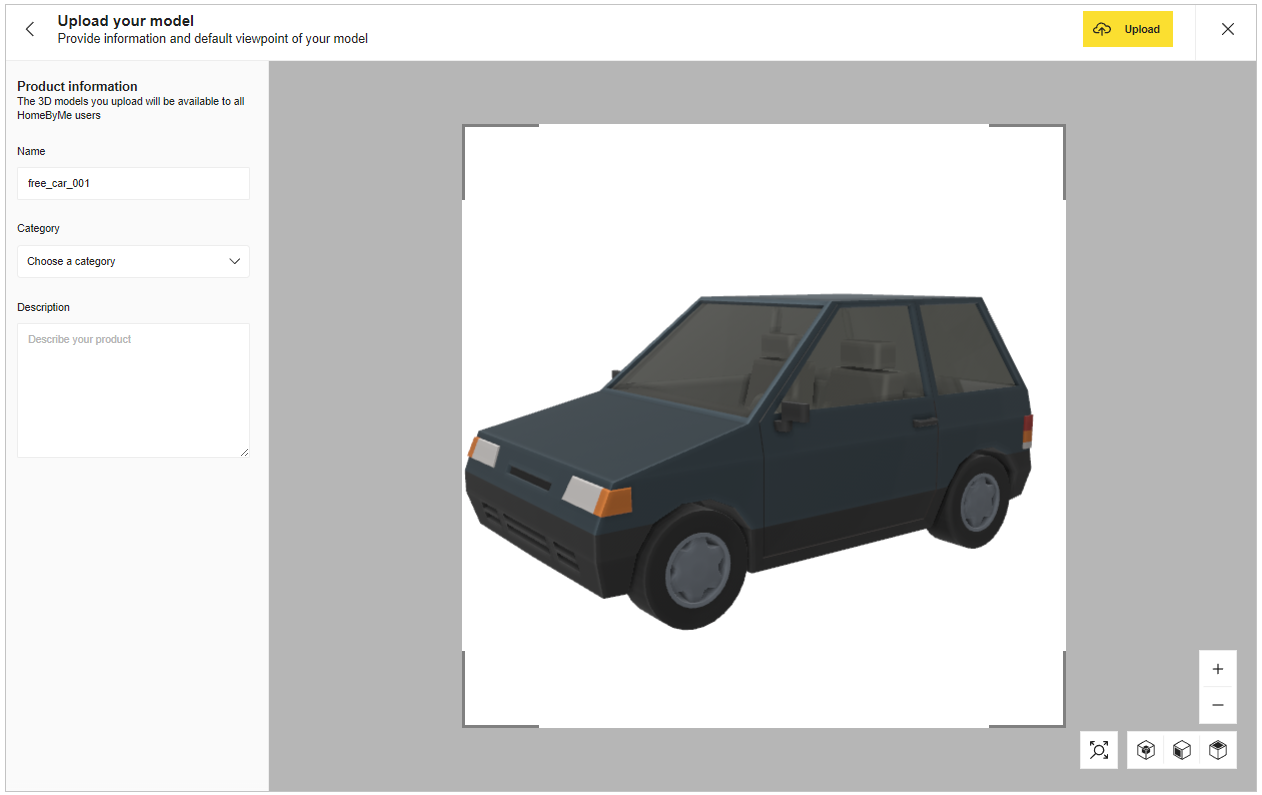
Product Information
In this section you can modify the product information.
-
Name
You can modify the name of your 3D model. -
Category
You can choose the category from the different categories available, as shown below:

- Description
You can provide a detailed description about your 3D model.
- Click the Upload button to upload your 3D model.
A pop up is displayed once the model is uploaded, as shown below:

My content
You can view the uploaded 3D model in My content section, as shown below:
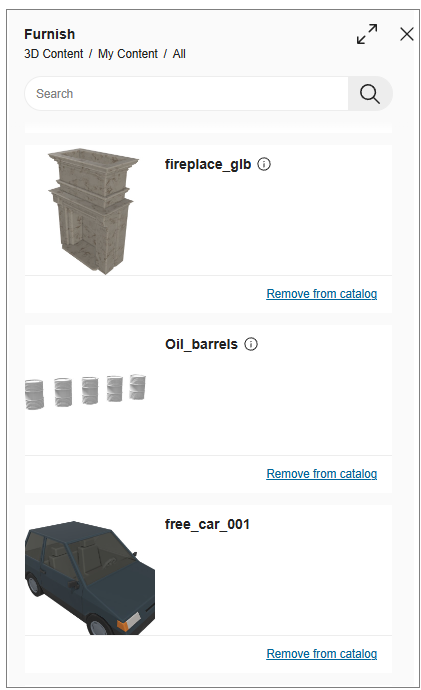
My content
You can view the uploaded 3D model in My content section, as shown below:
To Remove the 3D model:
- Click the Remove from catalog option.
The pop-up window appears, as shown below:

- Click the Remove button, to remove the 3D model.
A notification appears confirming Model removed successfully!, as shown below:

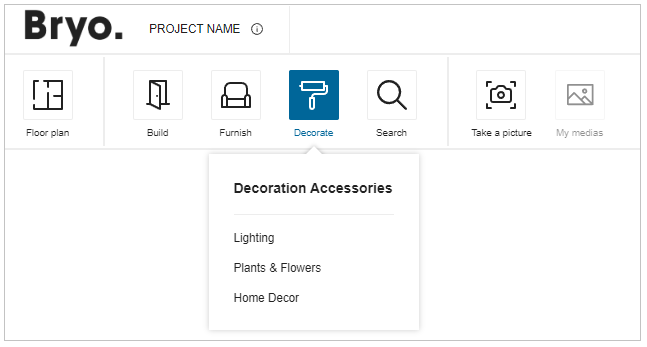
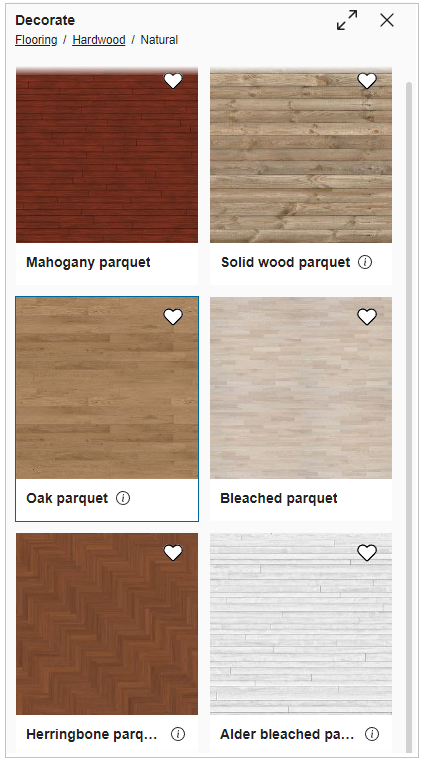
Decorate
Decorate catalog contains products useful for decorating the home with colors and accessories in project.
For example: Lighting, plants and flowers, etc.
Decorate catalog is divided into four sub-catalogues, according to decoration type.
Decoration Accessories
Example: Lighting, plants and flowers and home decor.
Steps to add a decoration to project:
- Click the Decorate option.
- Select product type from decoration products.
Example: Decoration Accessories >> Lighting.
List of products display, as shown below:

Recommendation:
To view all products from sub-catalog, click sub-catalog product name.
Example: Decoration Accessories >> Lighting.
Click maximize for better display mode, click minimize for previous mode.
- Select product.
- Select wall/floor to add product to it.
Product is added to project. - Click close after applying the product.
On adding products to project, if there is no enough space for the product, it will be added in front of the avatar.
Expired products
If your project consists of expired product, you can replace or delete the product.
- Click the
 icon, the Help center is displayed, as shown below:

To locate the expired product in the project, click the Show in 3D option, the product is displayed, as shown below:
- To replace the expired product:
- Click the Replace button.
The Replace an expired product pop-up is displayed, as shown below:
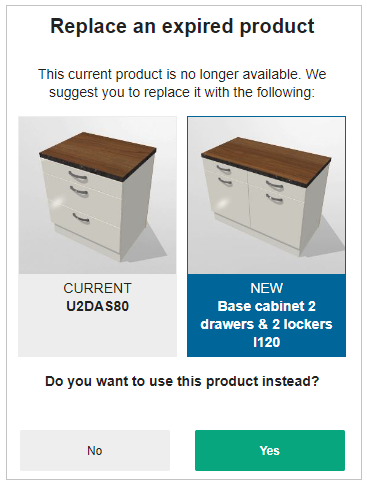
- Select the Yes option, to replace the product.
If there is no replacement possible for the expired product, the Price is not available is displayed for project price.
- To delete the expired product:
- Click the Delete button.
The confirmation pop-up message to delete the expired product is displayed, as shown below:
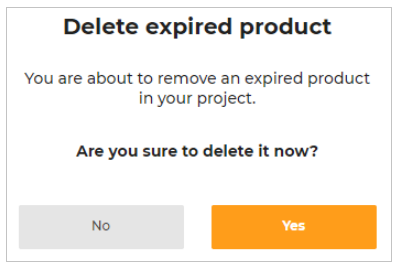
- Select the Yes option, to delete the expired product.
Coverings
This section explains the steps to add coverings on the walls and floors.
You can add the coverings in 2D/3D view.
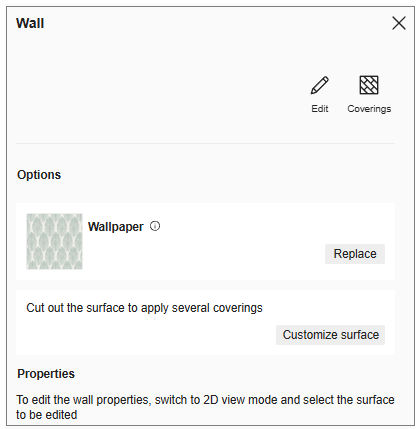
- Select the wall in the 2D view, and the property window is displayed, as shown below:

Click the Coverings option from the property window and,
Select the required material from the catalog, as shown below:
The coverings can be added by using one of the following methods:
Apply to all option applies covering to all walls and free shapes.
Apply option applies covering to selected floor, wall or free shapes.

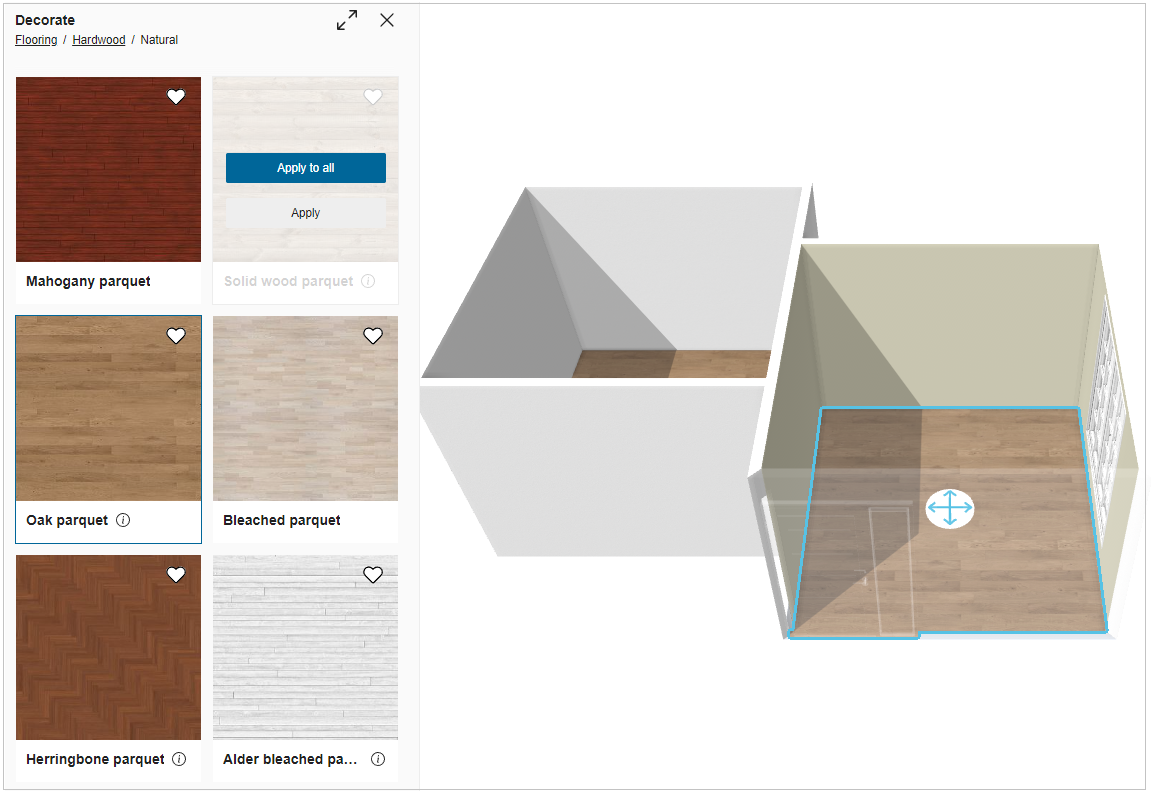
You can add floor coverings by selecting the room floor. The property window is displayed, as shown below:

Click the Coverings option from the property window and select the required material from the catalog displayed, as shown below:
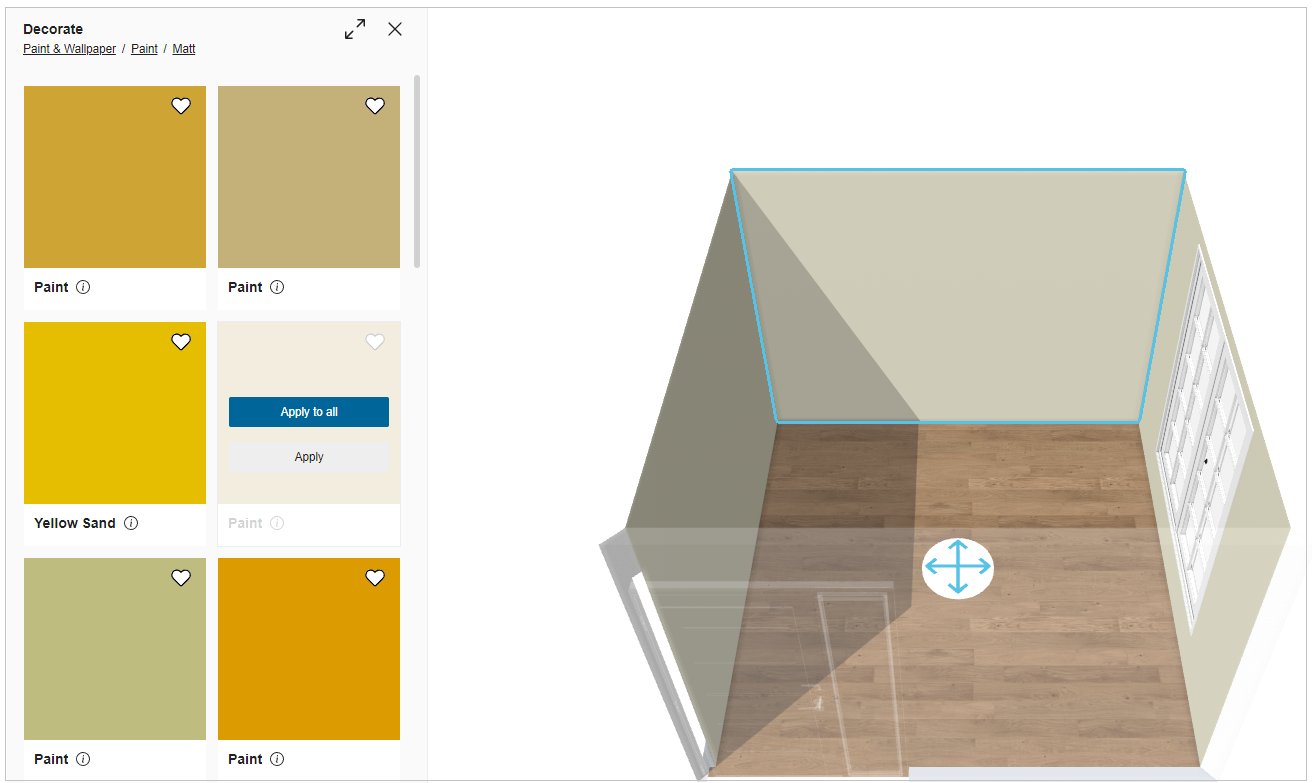
- Select the wall in the 3D view, and the paint catalog is displayed, as shown below:

You can add floor coverings by selecting the room floor. The coverings catalog is displayed, as shown below:
- Last used material
The materials which are applied to the walls and floors are displayed in the Last used list, as shown below:
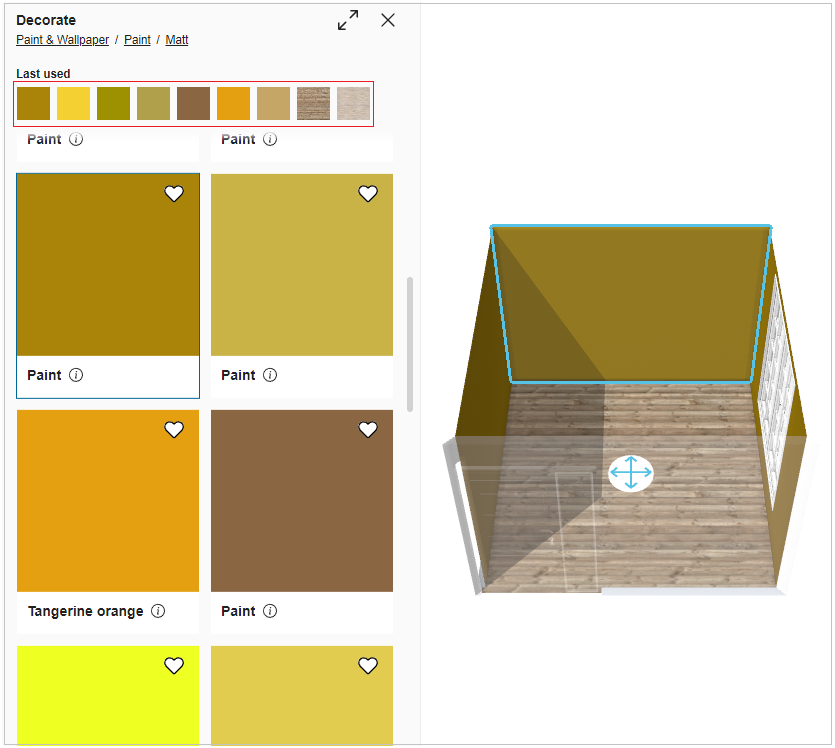
The last used material can be applied by selecting the wall or floor and clicking the required material from the list.
Customize Surface
You can customize the covering surface.
- Select the wall in the 3D view, the edit wall window is displayed, as shown below:

- Select the wall in the 2D view, the property window is displayed, as shown below:

- In the 2D view click the Coverings options, the edit wall window is displayed, as shown below:
- Click the Edit button, the customize surface option is displayed, as shown below:
- Click the Customize surface button, the Customize surface window is displayed, as shown below:
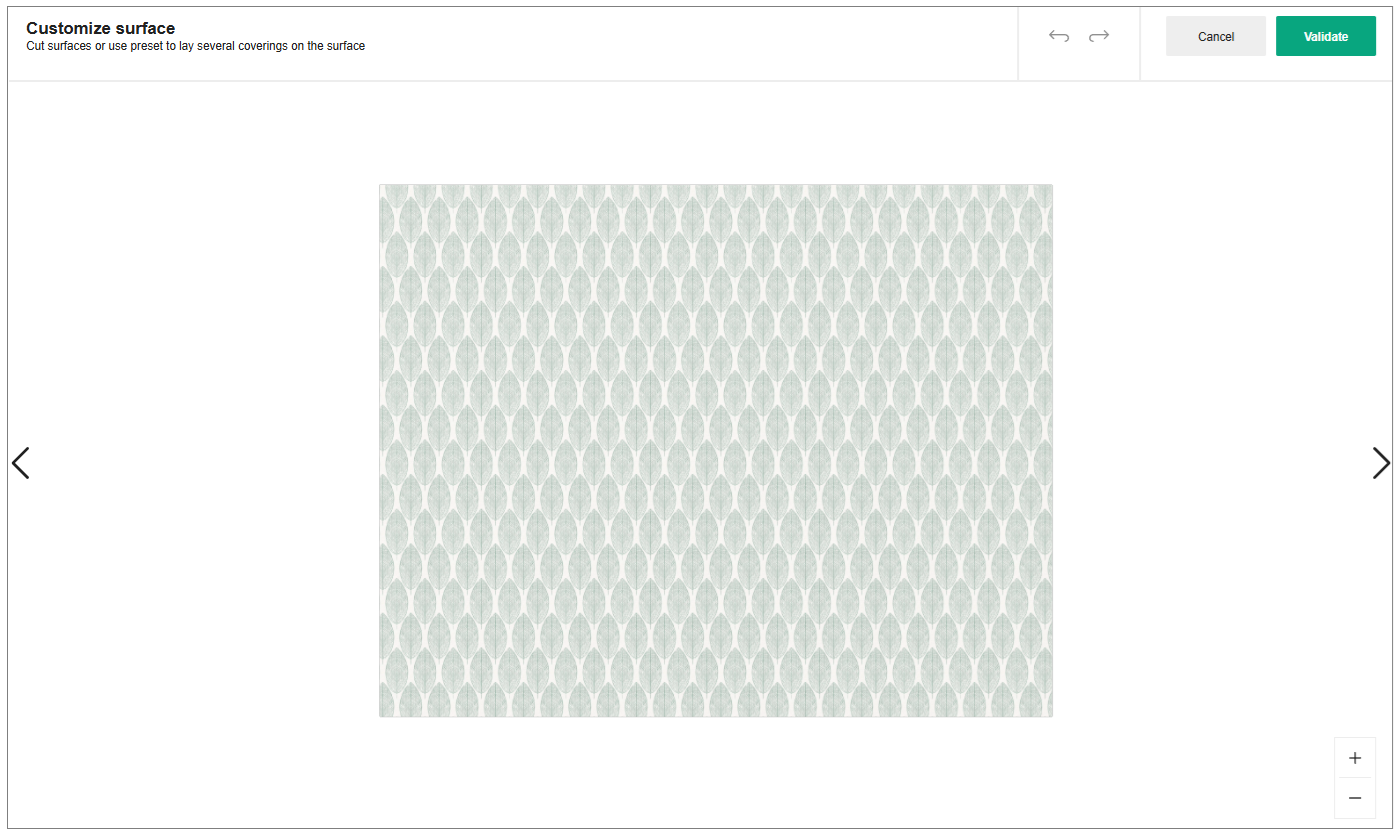
Edit Surface
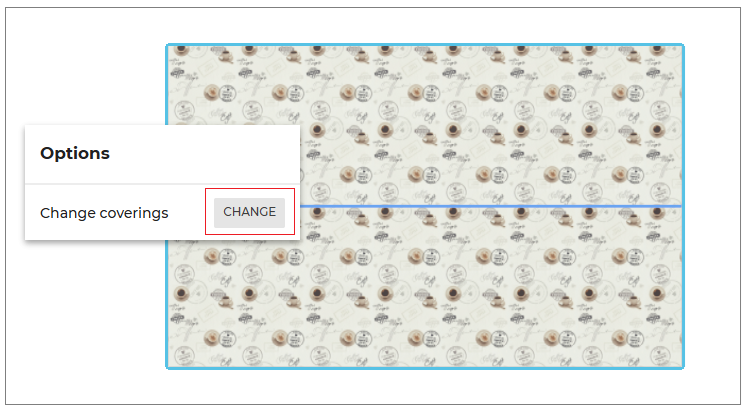
- Select the surface, the Options window is displayed, as shown below:
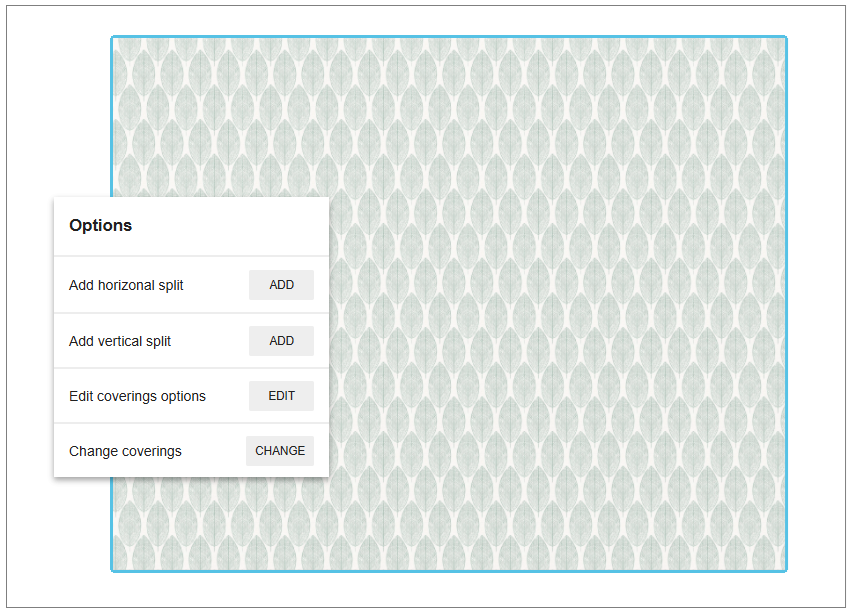
Split
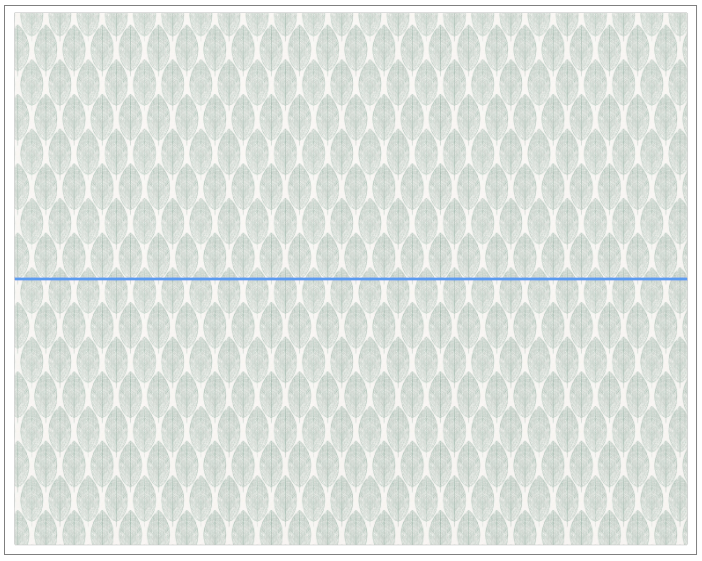
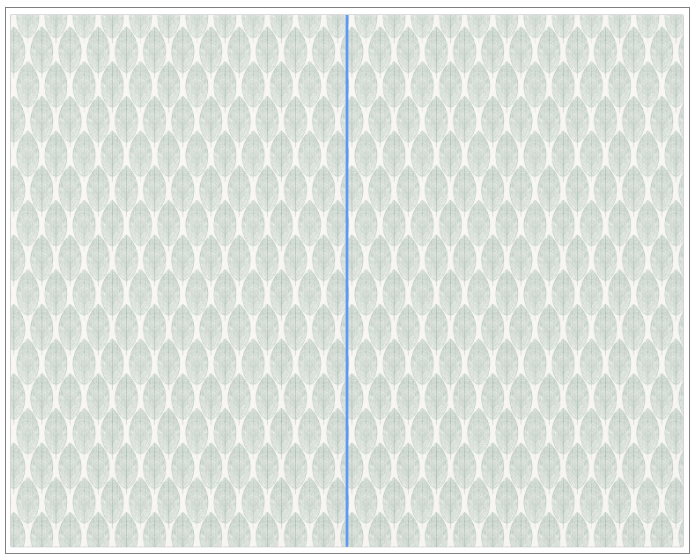
You can split the covering surface in horizontal and vertical direction.
To split the surface in horizontal direction:
- Click the ADD button of the Add horizontal split option.
The horizontal split surface is displayed, as shown below:
- Click the ADD button of the Add vertical split option.
The vertical split surface is displayed, as shown below:
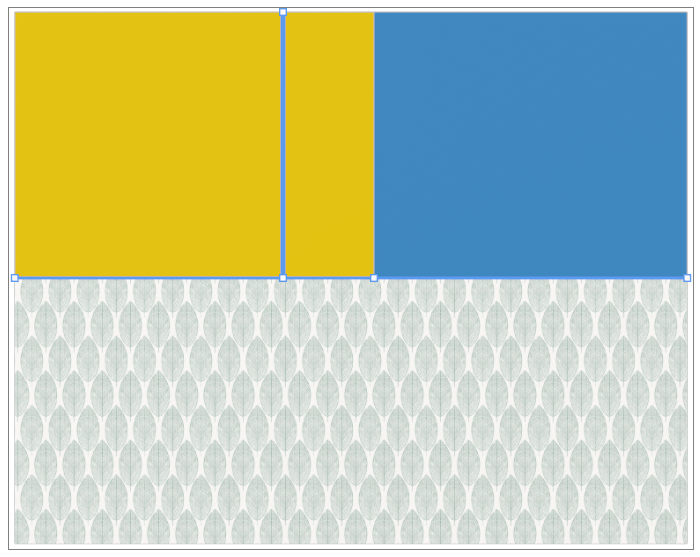
You can drag and drop to adjust the size and position of the horizontal and vertical splits, as shown below:
Edit coverings options
You can edit the coverings.
To edit the coverings surface:
- Click the EDIT button of the Edit coverings options.
The Edit coverings options panel is displayed, as shown below:

- Click the rotate icon, to rotate the surface in anti clockwise or clockwise direction respectively.
The covering surface is displayed after rotating the surface, as shown below:
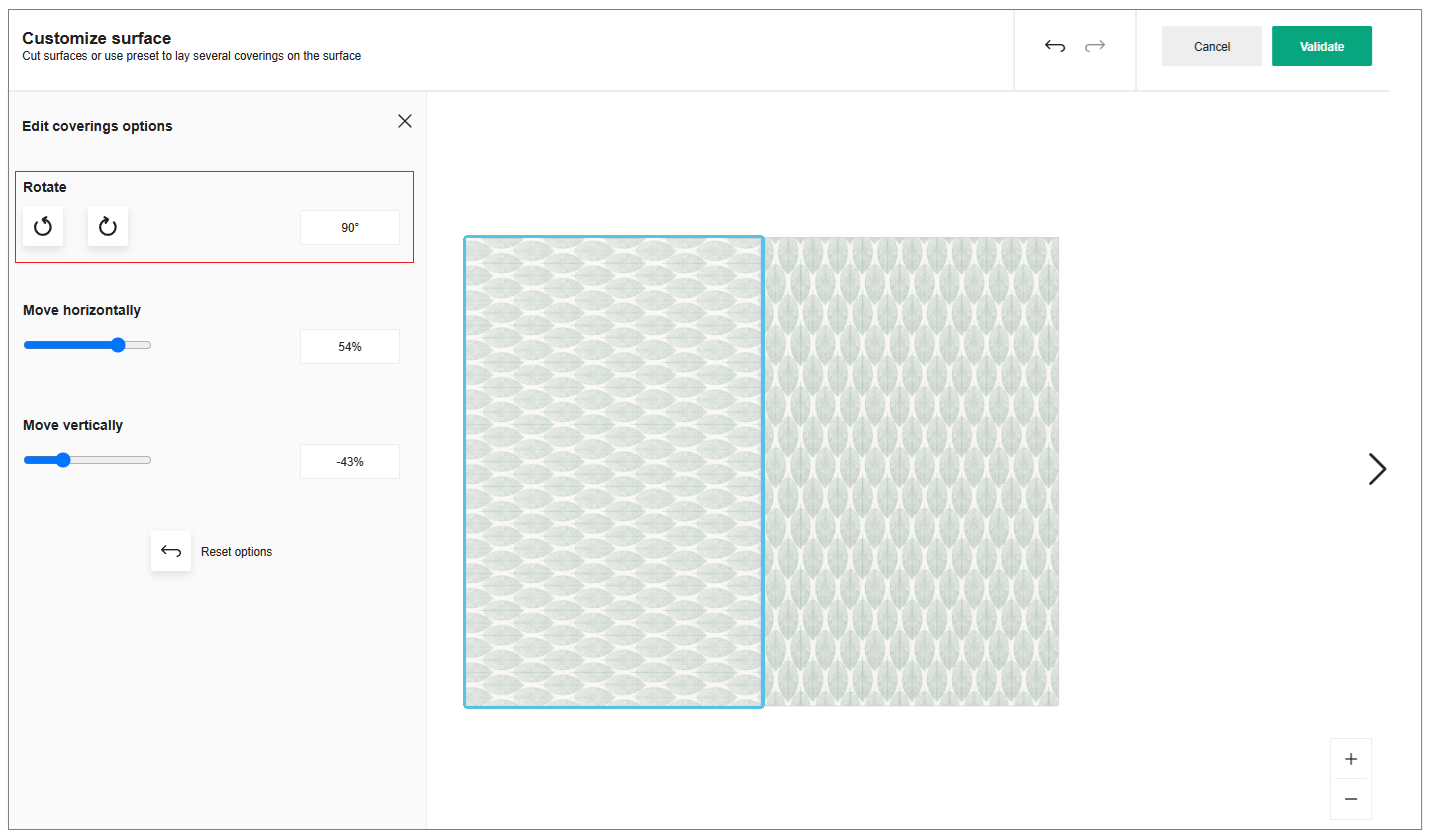
Translate Covering Surface
You can move the covering surface in horizontal and vertical direction.
- Click in the input box to enter the value, as shown below:

-
You can also toggle left/right side to move the covering surface in horizontal/vertical direction.
-
Click the reset icon, to reset the modified values.
The minimum and maximum value to move the surface horizontally and vertically is -100% and 100% respectively.
Change coverings
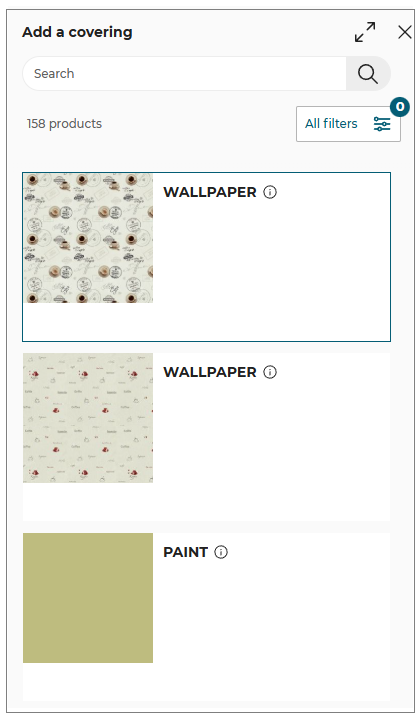
- Click the CHANGE button of the Change coverings option.
The coverings catalog is displayed, as shown below:
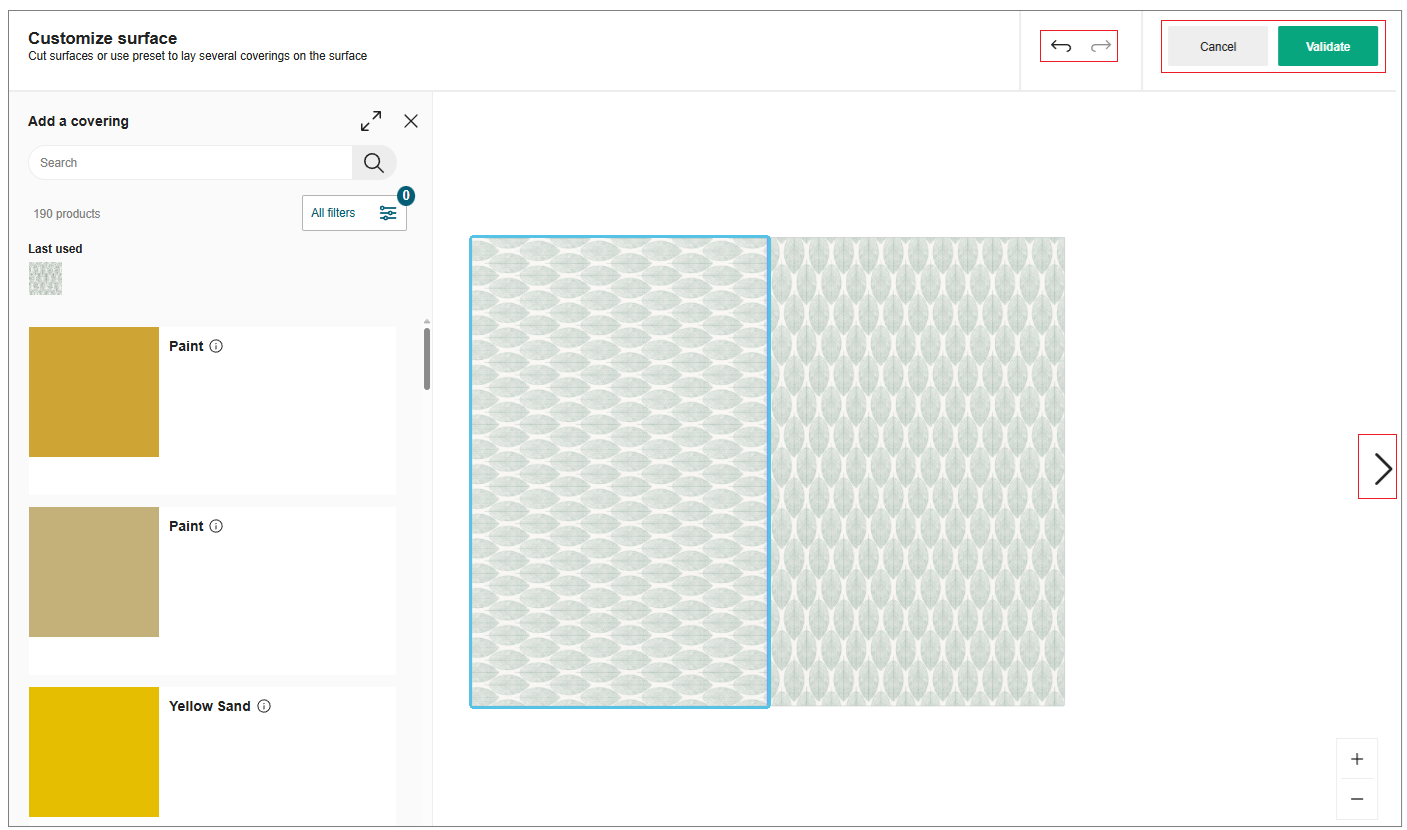
Select the required material from the catalog to apply.
You can select multiple faces and apply or change the covering material to the walls/floors.
- Select the Ctrl button and click the multiple face.
The option to change the material is displayed, as shown below:
- Click the CHANGE button. The covering catalog is displayed, as shown below:
- Select the required material from the catalog to apply.
Undo/Redo
- To undo the previous action, click the
 icon.
icon. - To redo an action, click the
 icon.
icon.
-
Select the Next view/previous view option to preview the covering surfaces.
-
Click the Validate button once the covering surface is customized accordingly.
Search and Add Products
You can search a product in search bar to add to your project.
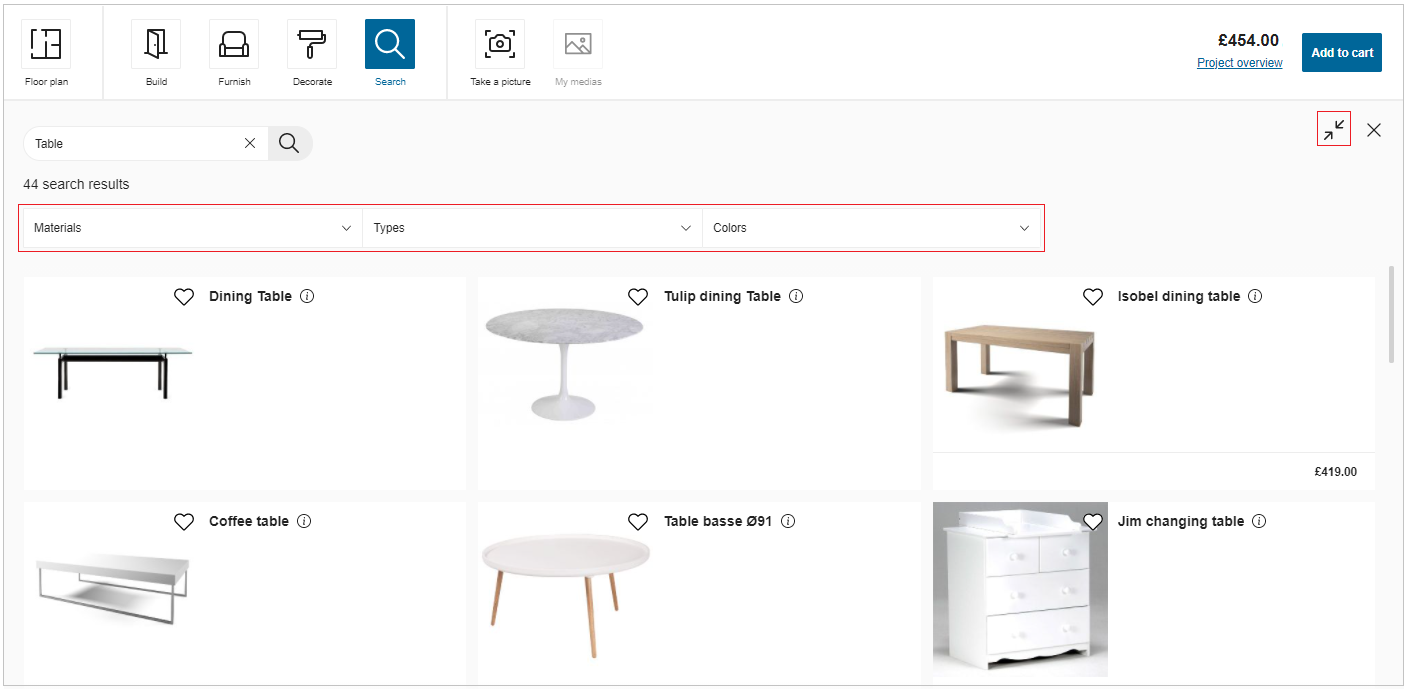
To search for a product, click Search.
You can search a product by its feature (type/reference/color/material, etc.).
- Enter the product feature.
- Click search.
List of products display. Click maximize for better display mode, click minimize for previous mode. - Filter products for certain type of products to display.
- Select product to add to project.
Note:
On adding products to project, if there is no enough space for the product, it will be added in front of the person placer.