Get Started
This section provides information on how to launch and begin 3D planning in the "HomeByMe for Home Retailers" website along with the information about the icons used in the application.
Supported languages
Bathroom application only supports the following languages by default:
- English
- French
- Spanish
- Deutch
You can of course add other languages depending on your business unit by sending the translations through our dedicated API. Please visit the following link PUT Translations 🔗.
Launch 3D planning experience
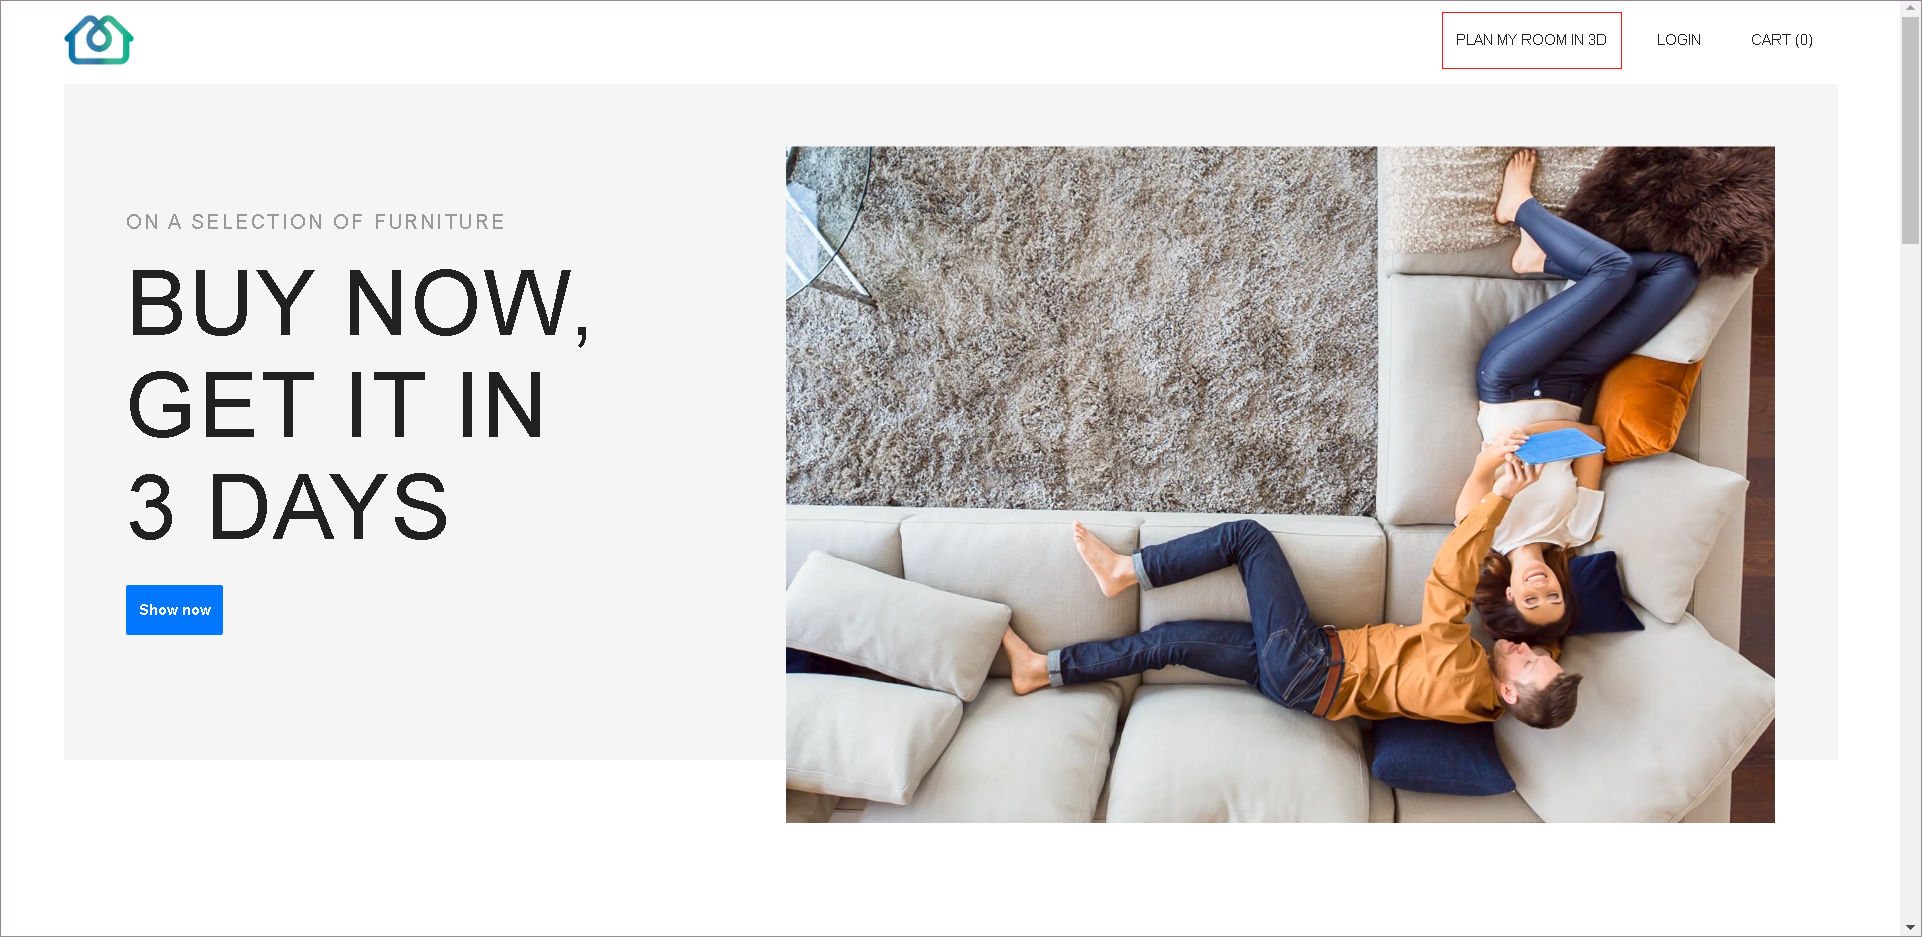
Visit HomeByMe for Home Retailers to explore the application and its products.
Launch the Home Retailers Planner
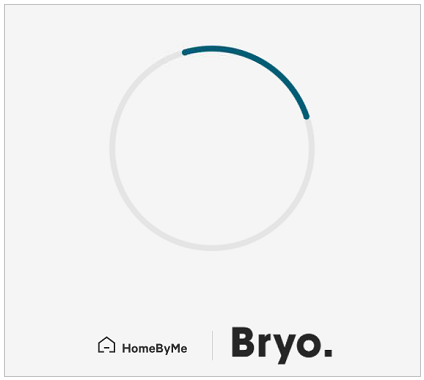
While opening the home Retailers planner, the loader appears with the brand logo before loading the home Retailers planner, as shown below:
The color of the spinner changes from black to blue.
Start From A Room
You can plan your 3D design in planner. Steps to launch planner:
- To launch planner, click Plan my room in 3D, welcome page launches.
- Select room type, surface area of room and click Launch planner. Tick the checkbox Do not show again to discard this step.
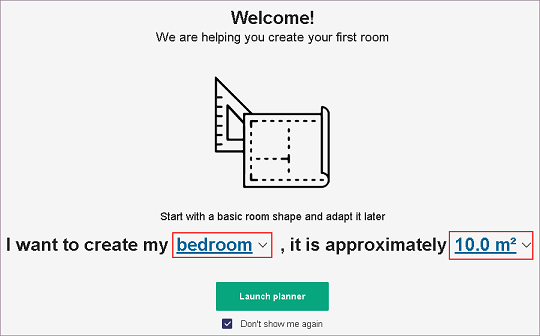
Planner launches.
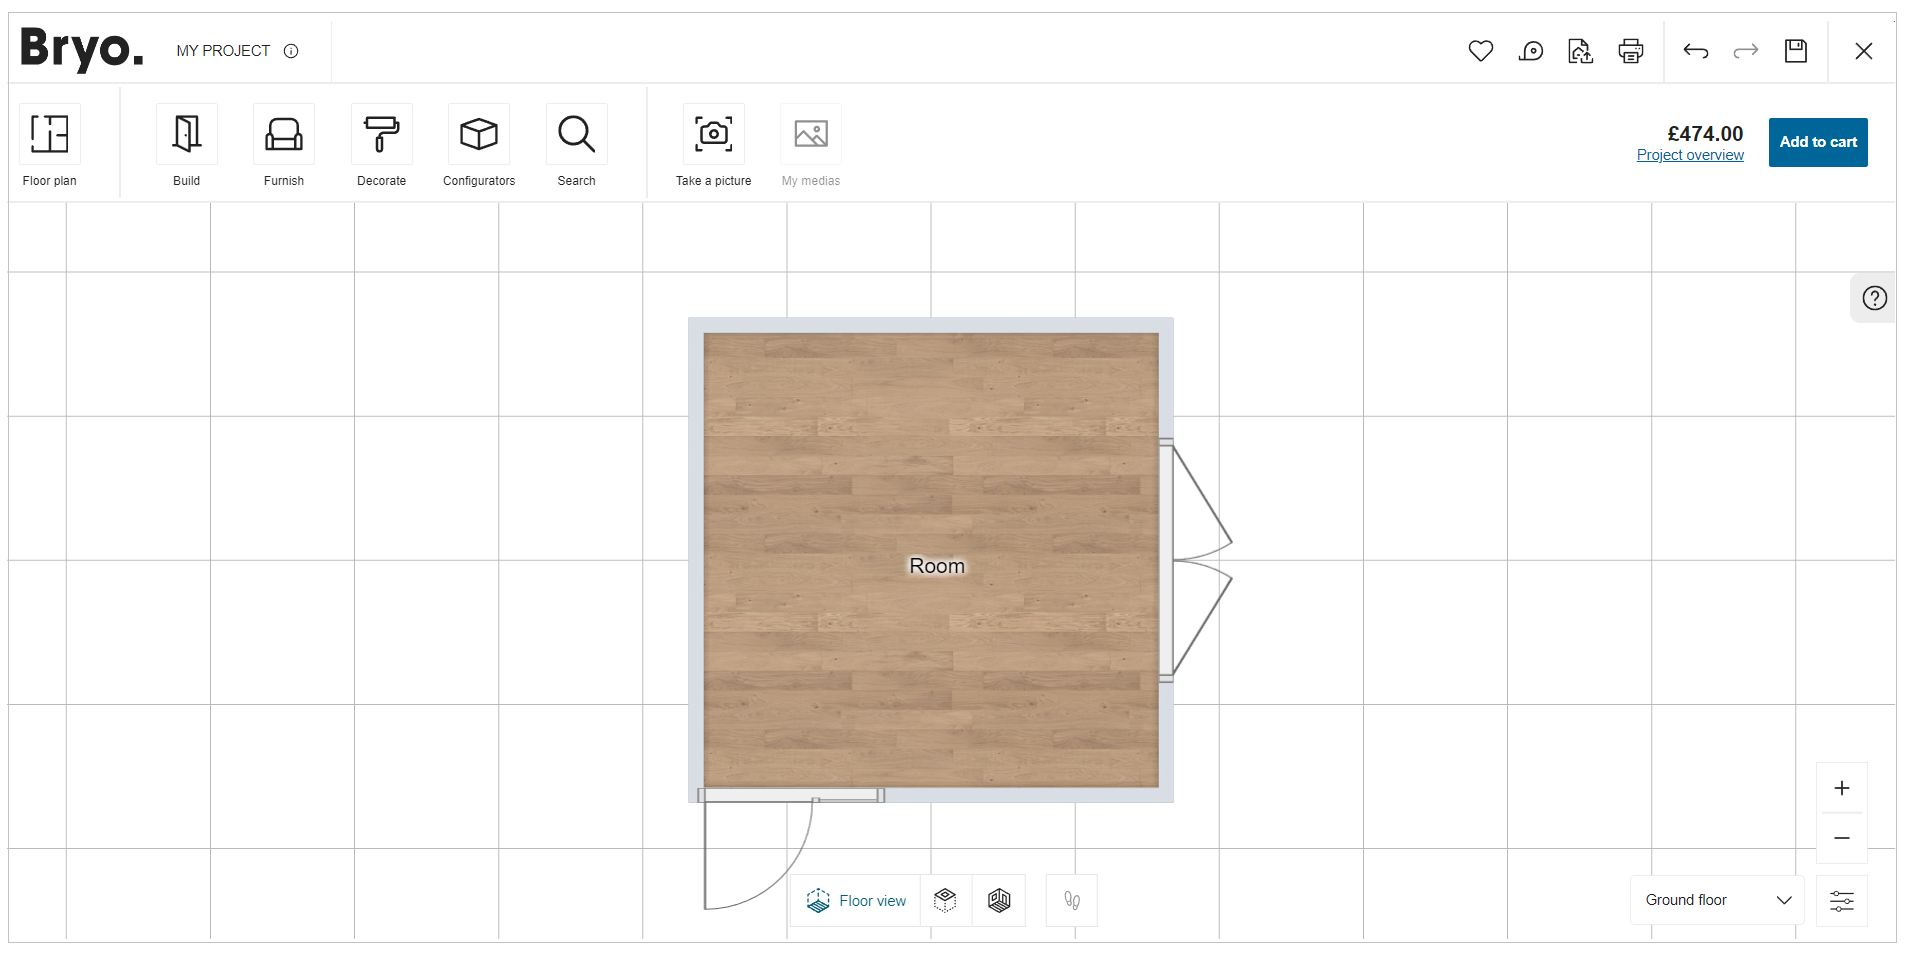
Icons Used in the Application
Before you begin with the application, it is helpful to know how to access the HomeByMe for Home Retailers features. Many of the features you use are accessible on the planner with printed commands on them.
These features are context sensitive, which means that commands are grayed out if the features are not available for your current task. Sometimes, the features do not appear at all, so it is helpful to know where you can access them.
HomeByMe for Home Retailers:
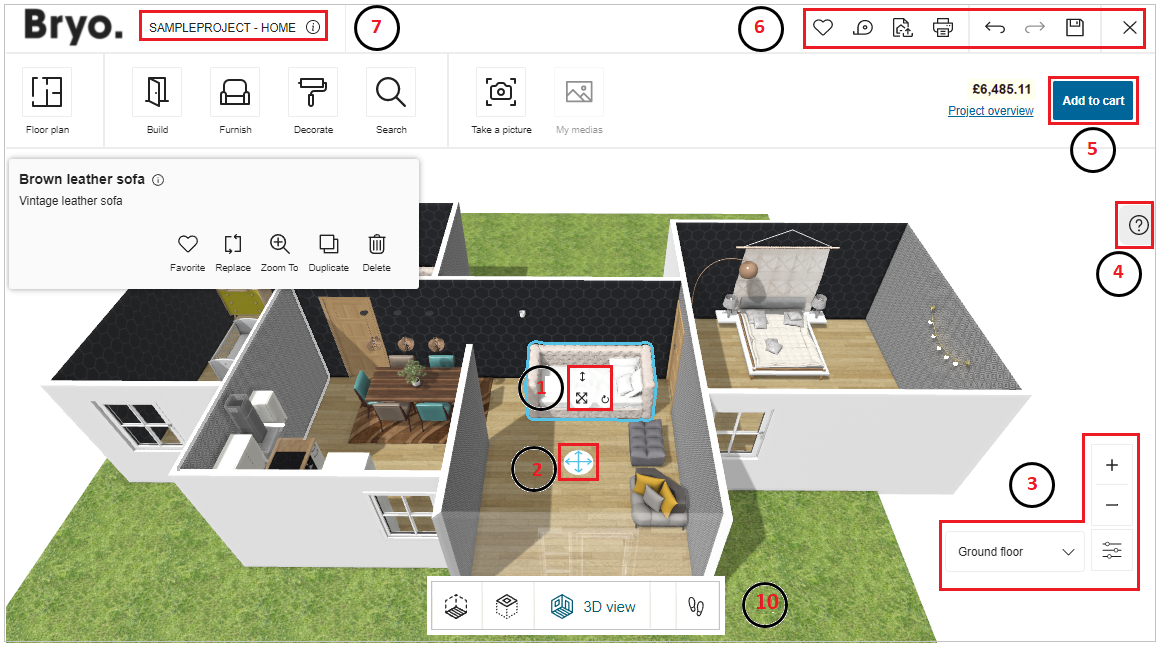
Features that have text command printed on them are not mentioned below.
1. Manipulators
| Feature | Icon | Command | Command Location |
|---|---|---|---|
| Move | Allows moving the product | Planner | |
| Rotate | Allows rotating the project/product | Planner | |
| Elevate | Allows elevating the product | Planner |
2. Avatar/Person Placer
| Feature | Icon | Command | Command Location |
|---|---|---|---|
| Avatar | Allows moving the avatar from one room to another, displaying most products of the room | Planner |
3. View Mode Options
| Feature | Icon | Command | Command Location |
|---|---|---|---|
| Reset View | Appears (a) When the 2D project is out of view, or (B) The avatar is outside the 3D project. | Above view options | |
| Zoom-in | Moves you closer | Above view options | |
| Zoom-out | Moves you away | Above view options | |
| View Mode Options | Avails view mode options | View options | |
| Height | Allows avatar height modification | View options |
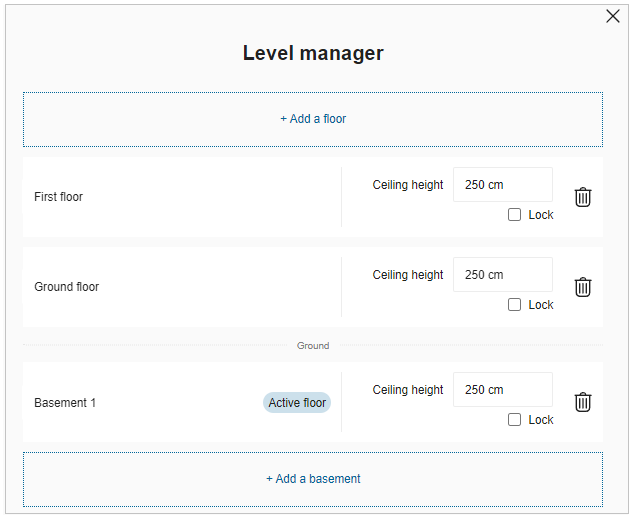
Manage Levels
You can change/add floors in between designing the project.
- Click the Floor name the option to Manage levels is displayed, as shown below:

- Click the Manage levels, the option to manage/add floors is displayed, as shown below:

- Click the Add a floor option to add floor.

- Click the Add a basement option to add a basement, as shown below:
The Current floor is highlighted with Active floor mentioned on it.
-
To rename the floors, select the Floor name.
-
To modify ceiling height, select the Ceiling height number box.
-
To delete the floor, click the delete button.
Click the yes button to confirm deletion. -
To lock the floor, select the check box of Lock option, as shown below:
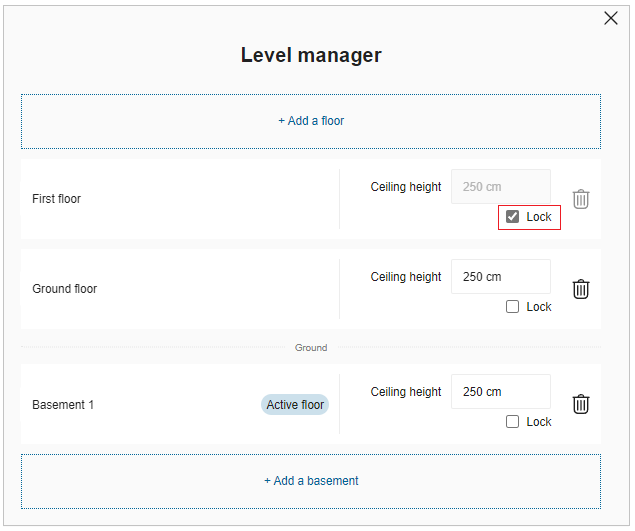
You cannot add the Build products to the locked floor.
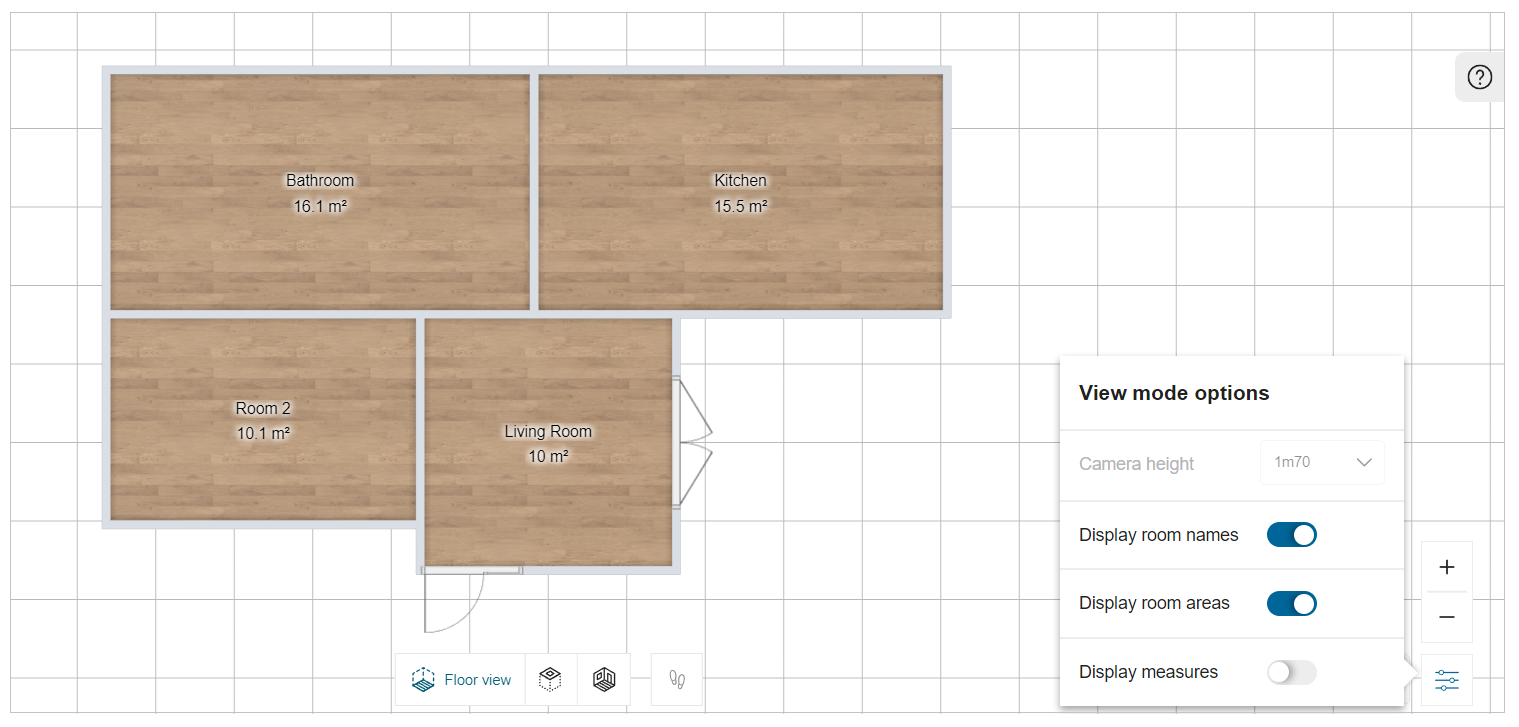
View Mode Options
You can select the View mode options in 2D/3D view.
- Click the
 icon. The view mode options are displayed, as shown below:

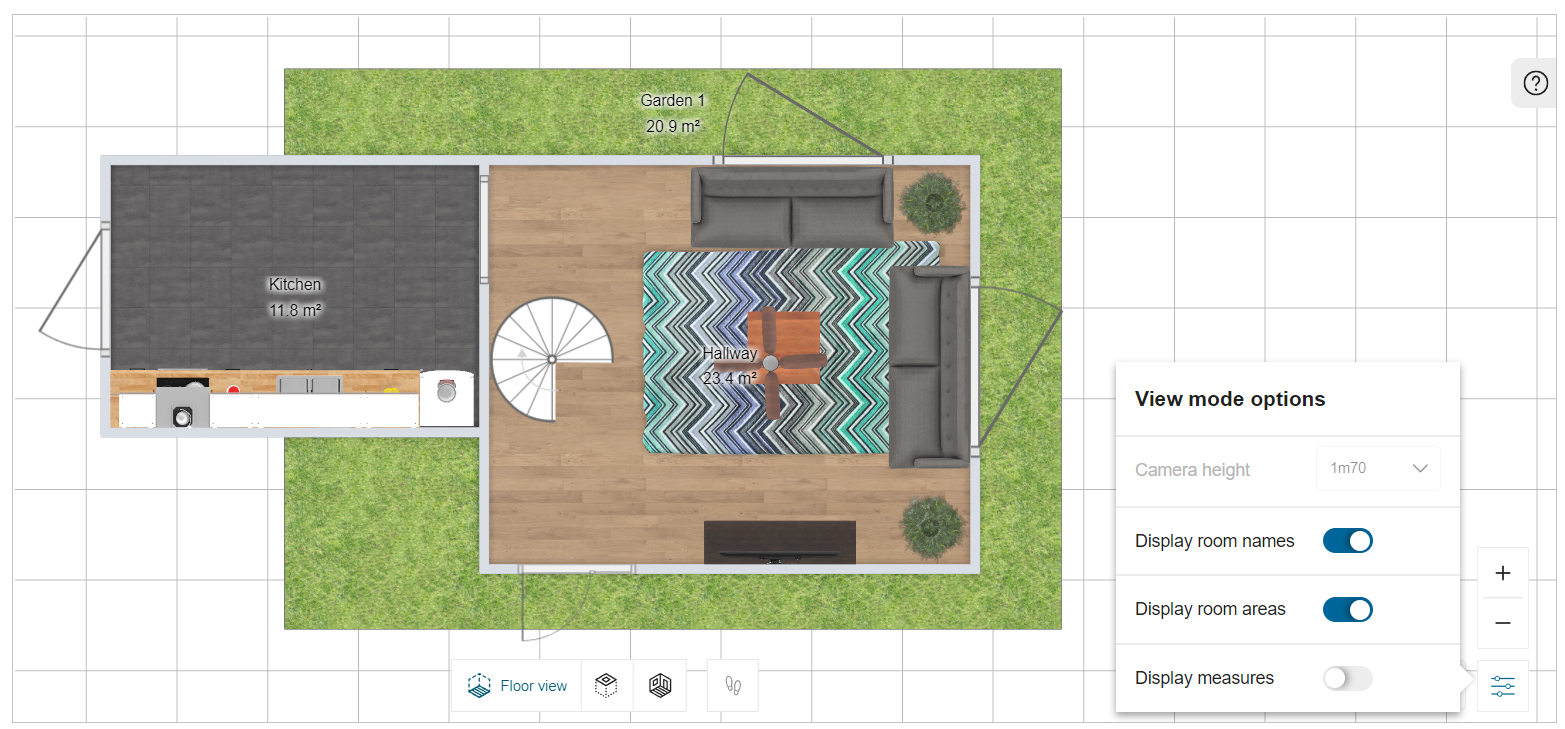
- Display room names
This allows you to hide/show the room names.

- Display room areas
This allows you to hide/show the room surface areas.
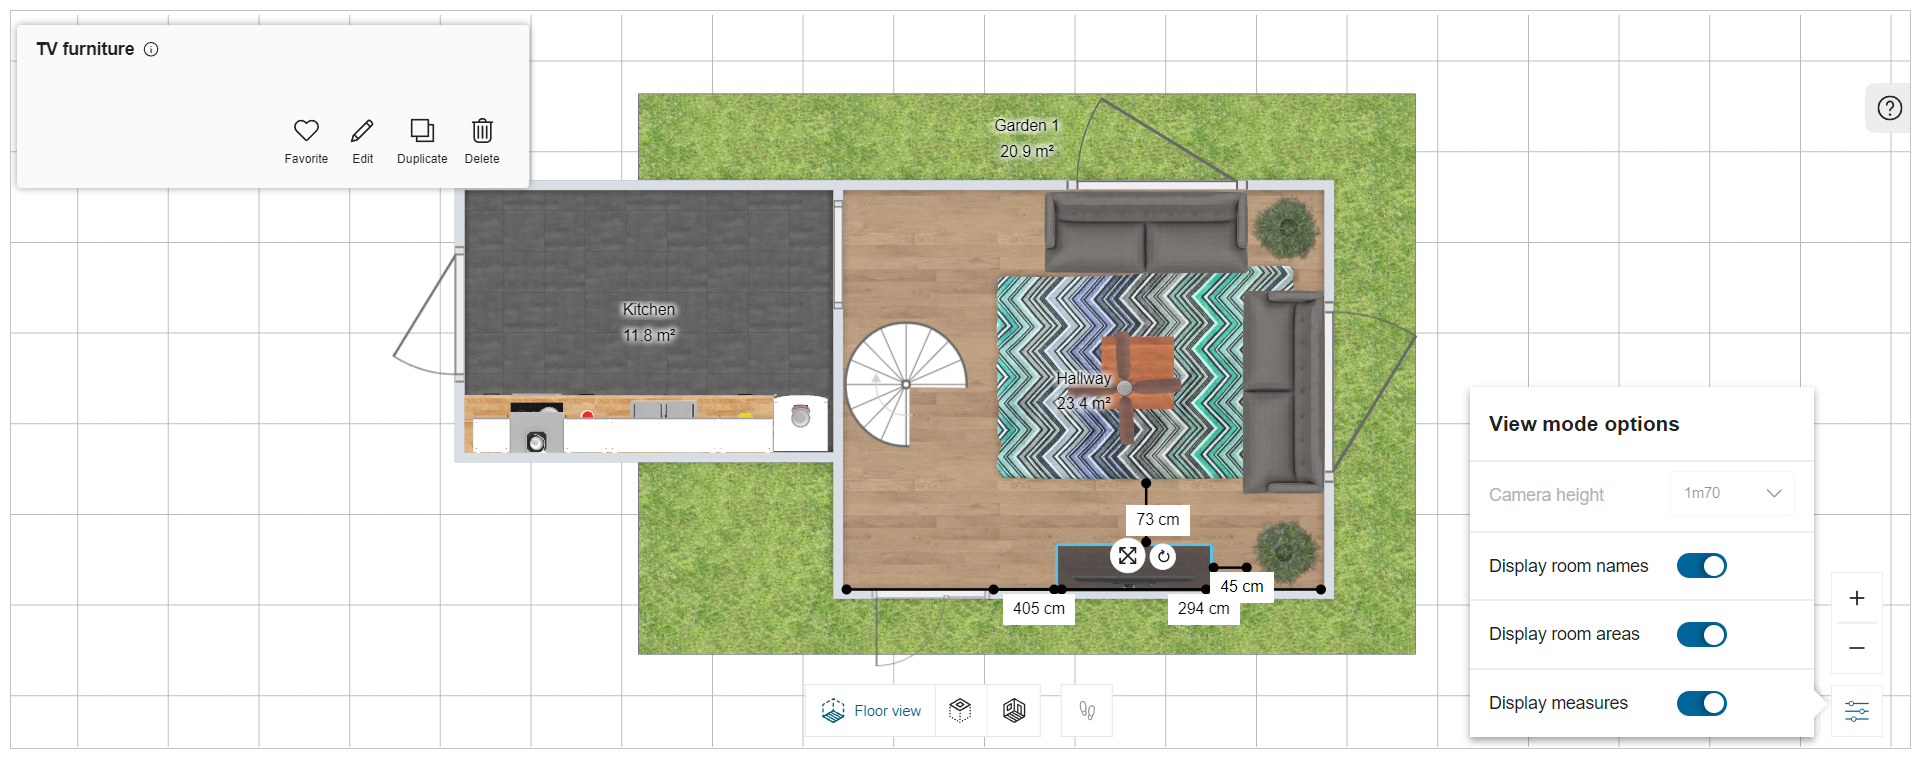
- Display measures
To display the furniture measurements, select the furniture and click the view mode option, as shown below:
Click the toggle button of Display measures, the available space to place the product is displayed, as shown below:
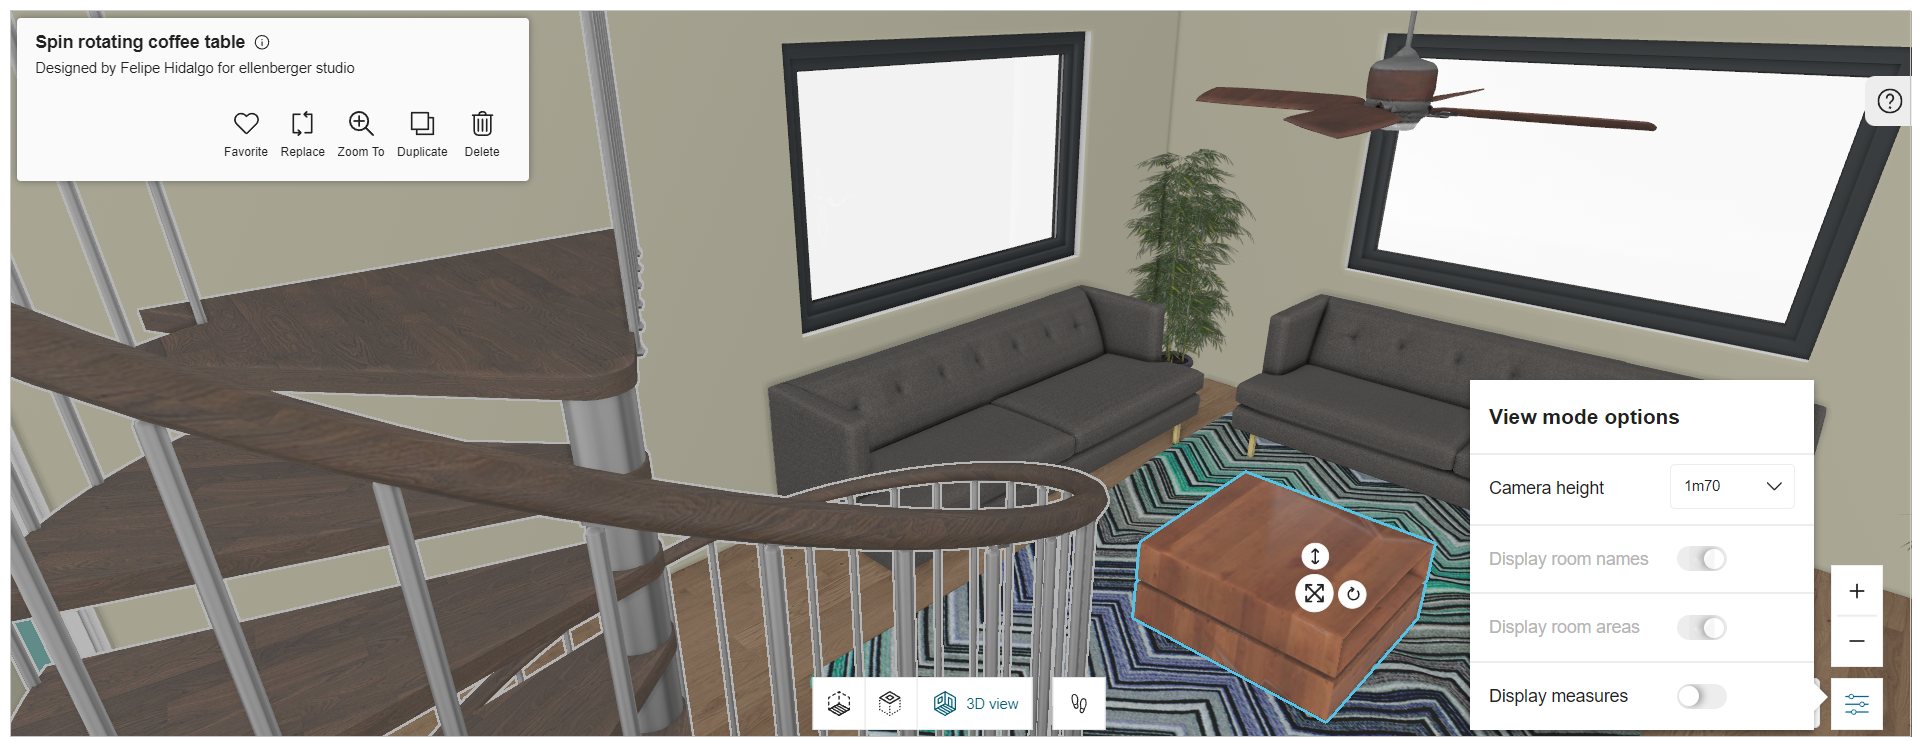
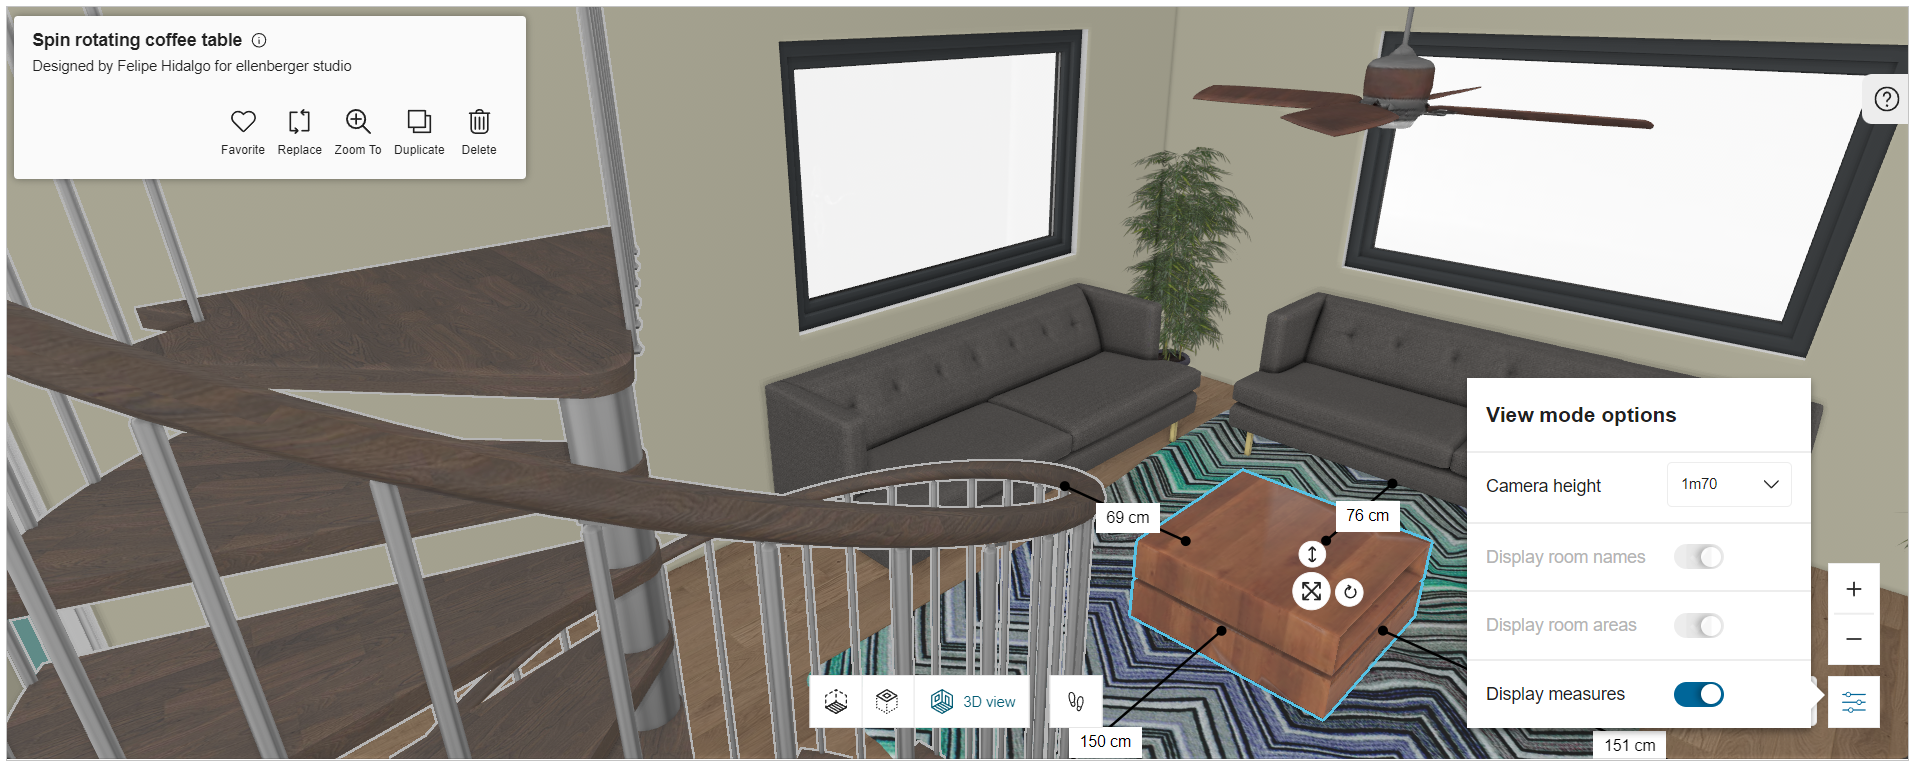
- Click the icon in 3D view. The View mode options are displayed, as shown below:

- Camera height
This allows you to change the camera height for better view. There are different camera height options.
This mode is enabled only in 3D and first person view.

- Display measures:
To display the cabinet measurements, select the cabinet and click the view mode option, as shown below:
Click the toggle button of Display measures, the available space to place the cabinet is displayed, as shown below:
To edit the distance:
- Click the value of the measurement to modify the distance as required or, By dragging the selected cabinet within the room, the real-time value of measurement updates accordingly.
- By default, the toggle button for Display measures is off.
- The value of the Display measures option in 2D view is independent to 3D view.
- While selecting and dragging the furniture, the measuring value recalculate accordingly.
4. Help Center
| Feature | Icon | Command | Command Location |
|---|---|---|---|
| Show Help | Displays tips | Beside planner | |
| Close Help | Hides tips | Beside planner |
Help Centre helps you with tips.
- Click Show Help
 icon, present on right hand side corner.
 - Click Close Help
 icon, to close the help center.
Help Centre:
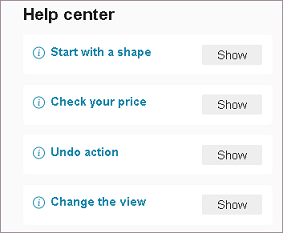
These tips are short general instructions.
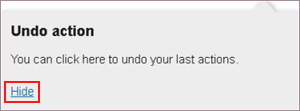
Click Show for instruction.
Click Hide to close the instruction.
Tip:
5. Cart
| Feature | Icon | Command | Command Location |
|---|---|---|---|
| Add to cart | Opens list of products used in the project | Beside project overview |
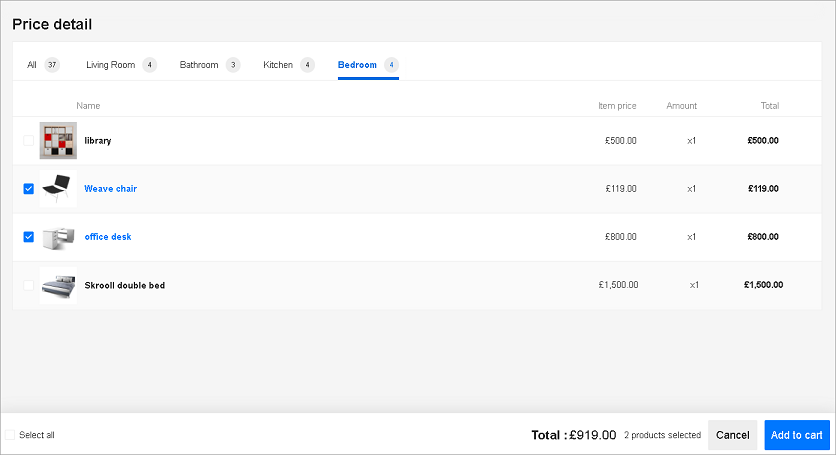
Cart has list of products along with their price and quantity. Products are separated according to their room name.
Steps to view cart products:
- Click Add to cart.
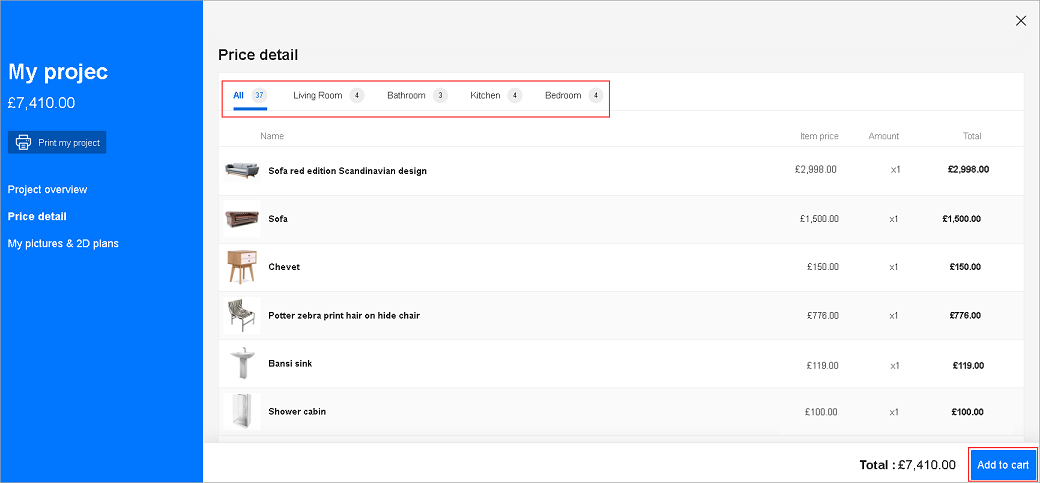
- Select the room name, to view products in that room.
- To choose and add products in the cart, click Add to cart.
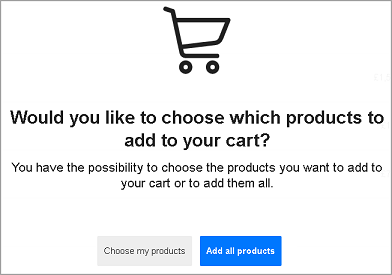
- To choose the products and add, click Choose my products.
Select the products and click Add to cart.
Total price calculated will be according to the selected products.
To add all products, click Add all products.
6. Command Bar
| Feature | Icon | Command | Command Location |
|---|---|---|---|
| Favorite | Adds/removes product from favorite list | Command bar | |
| Measure | Allows distance measurement | Command bar | |
| Export | Allows project export | Command bar | |
| Displays project shopping lists and medias to print | Command bar | ||
| Item Notes | To add either project notes and/or item notes | Command bar | |
| Next | Displays next picture | My medias | |
| Undo | Cancels the previous action | Command bar | |
| Redo | Repeats the previous action | Command bar | |
| Save | Saves the project | Command bar | |
| Close | Closes the project | Command bar |
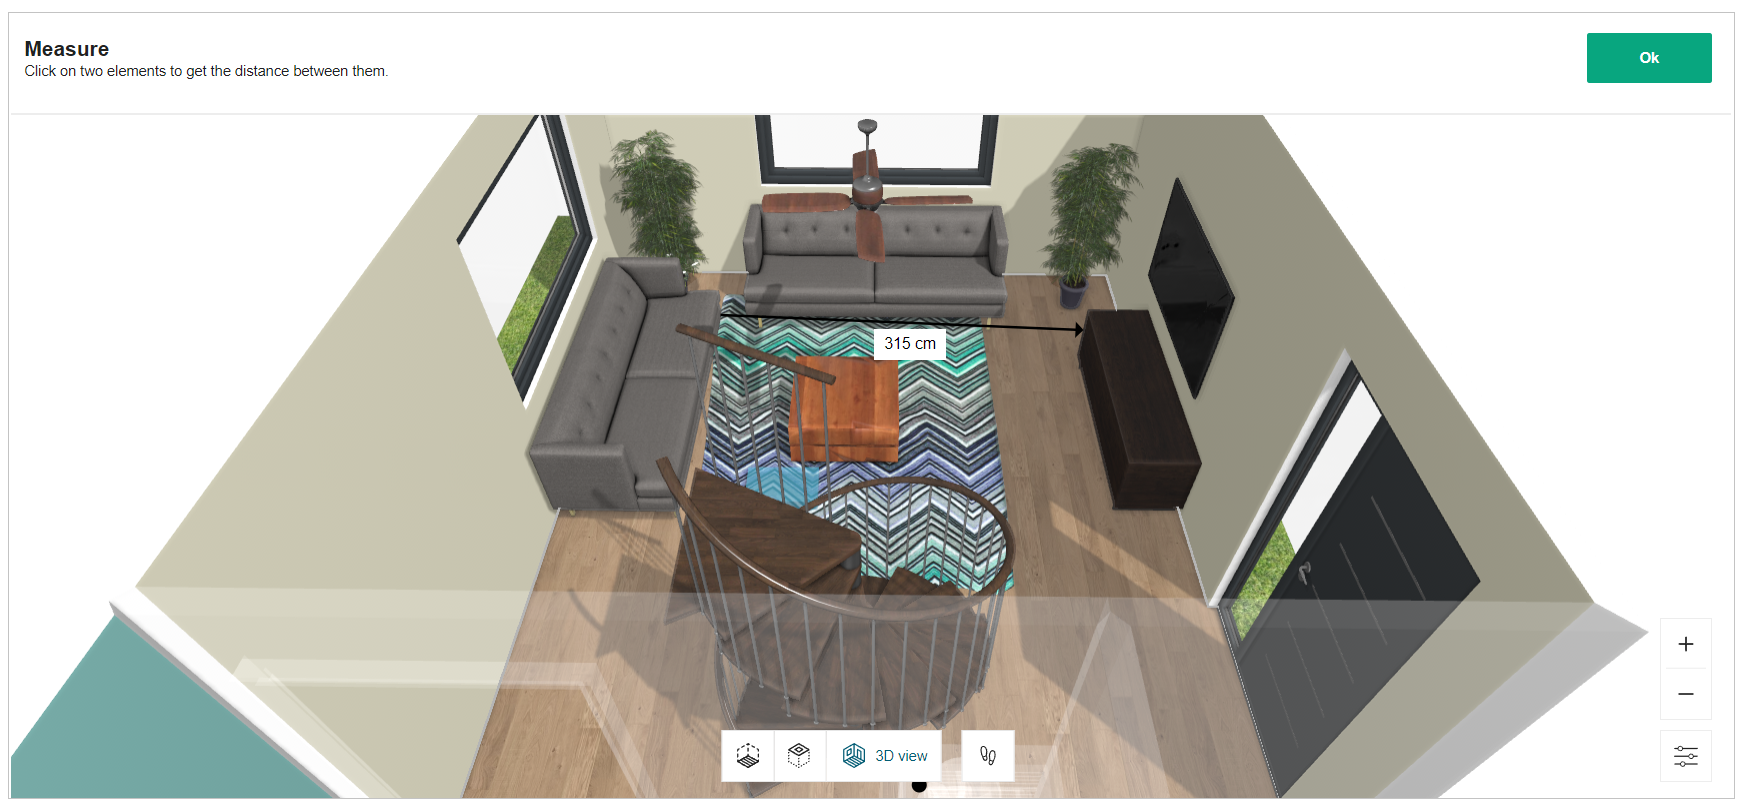
Measure
You can measure the distances in the project.
Steps to measure:
- Click Measure.
- Click one point followed by another point.
Distance between the points is displayed.
Note: Only two points distance is displayed at once.
- Click Ok to close.
Export
Refer to Export Project for more information.
Print
Refer to Print Project for more information.
Annotations
You can add the annotations in ceiling/floor view for the products in the planner.
- Click the
 icon, the options to add the annotations are displayed, as shown below:

- Click the
 icon, to select the Linear arrow option.
To add the linear arrow click in the planner, as shown below:
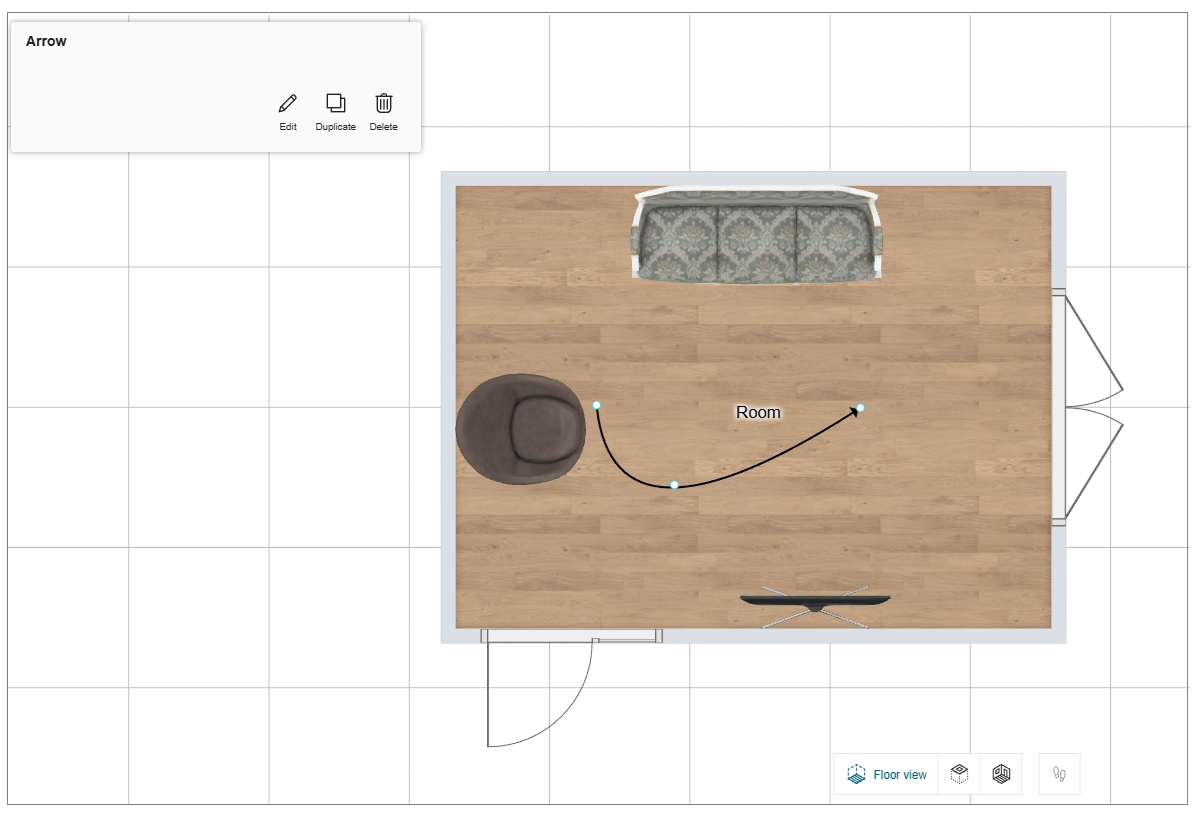
You can shape the arrow by selecting the points of the linear arrow.
- Click the Edit button, the options to edit the linear arrow are displayed, as shown below:

- Click the
 icon, to add the annotation text.
To add the annotation text click in the planner, as shown below:
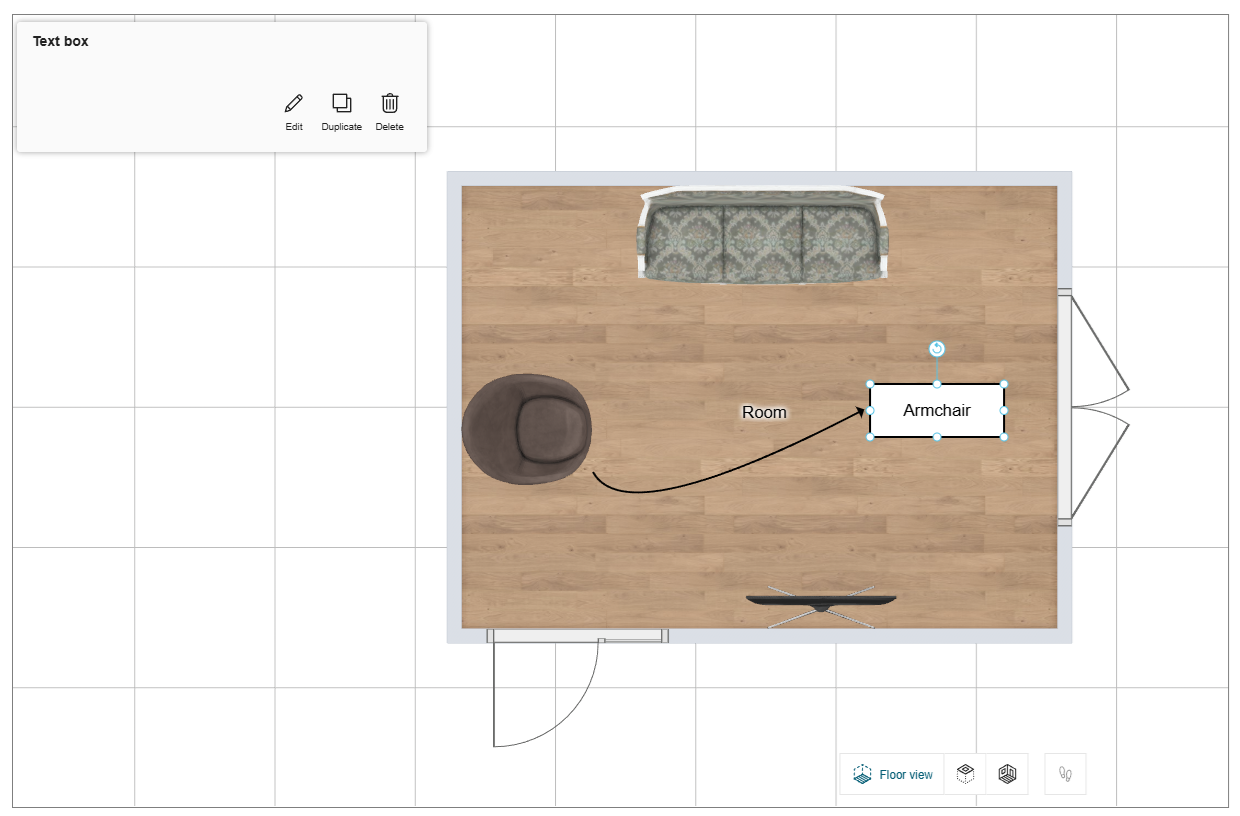
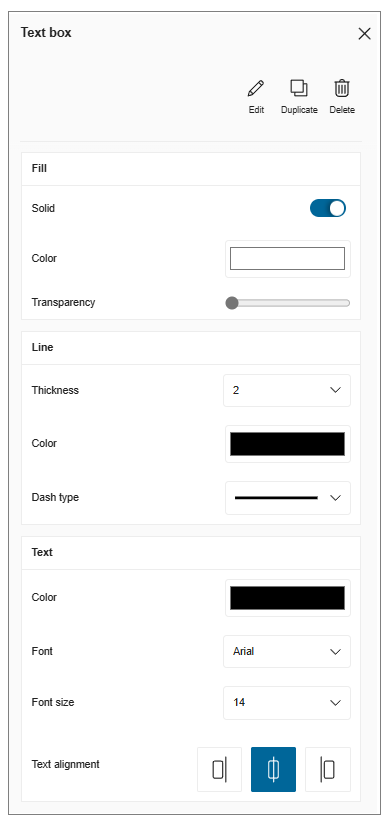
- Click the Edit button, the options to edit the text and text box are displayed, as shown below:
- Click the
 icon, to select the Oval Annotations Box option.
To add the oval annotation box click in the planner, as shown below:
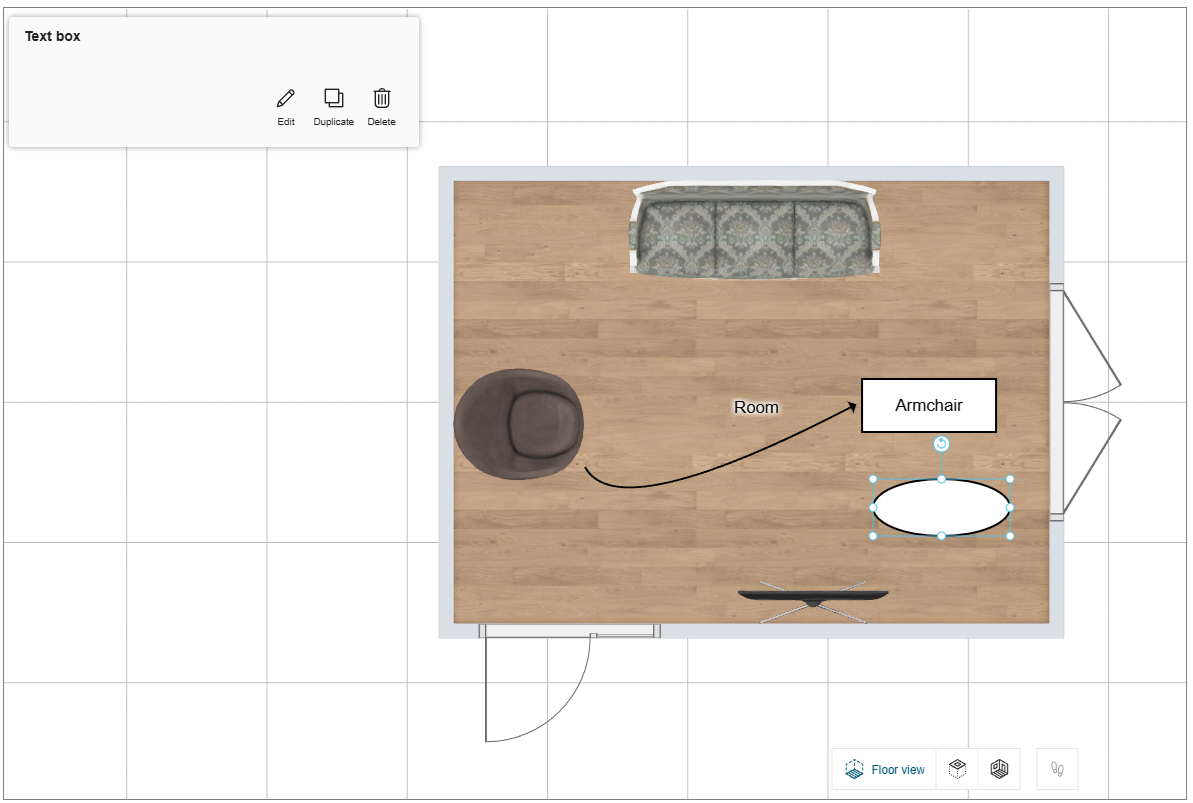
You can shape the oval annotation box by selecting the points of the box.
Images
You can upload the images in front/floor view in the planner.
- Click the
 icon to upload the image file.
The uploaded image is displayed, as shown below:
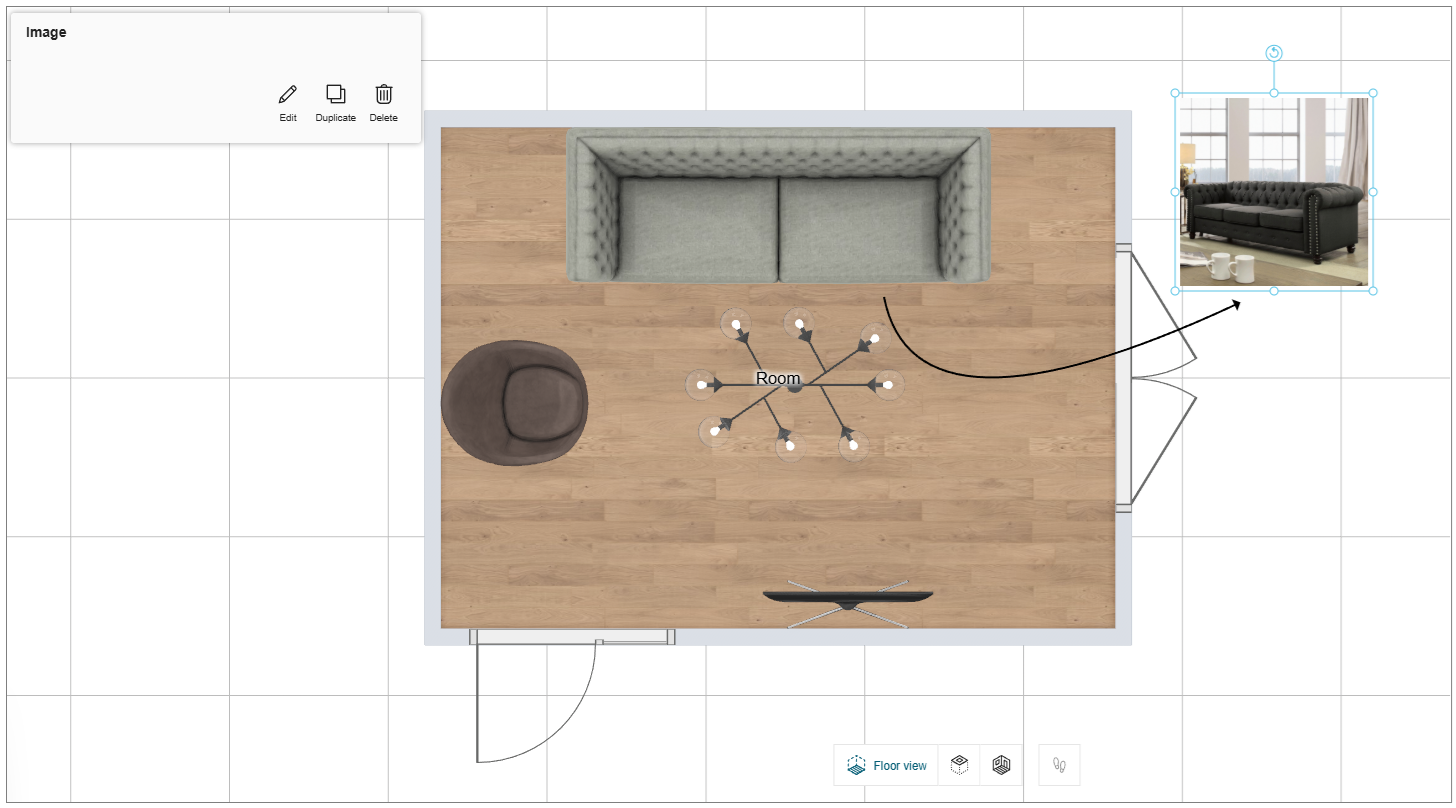
You can shape the image by selecting the points of the image.
- Click the Edit button, the options to edit the image are displayed, as shown below:

- You can upload the images in .png, .jpeg, or jpg file format.
- The Save your project window appears if the project is not already saved.
Technical elements
You can add the symbols of the technical elements to the products in the planner.
- Click the
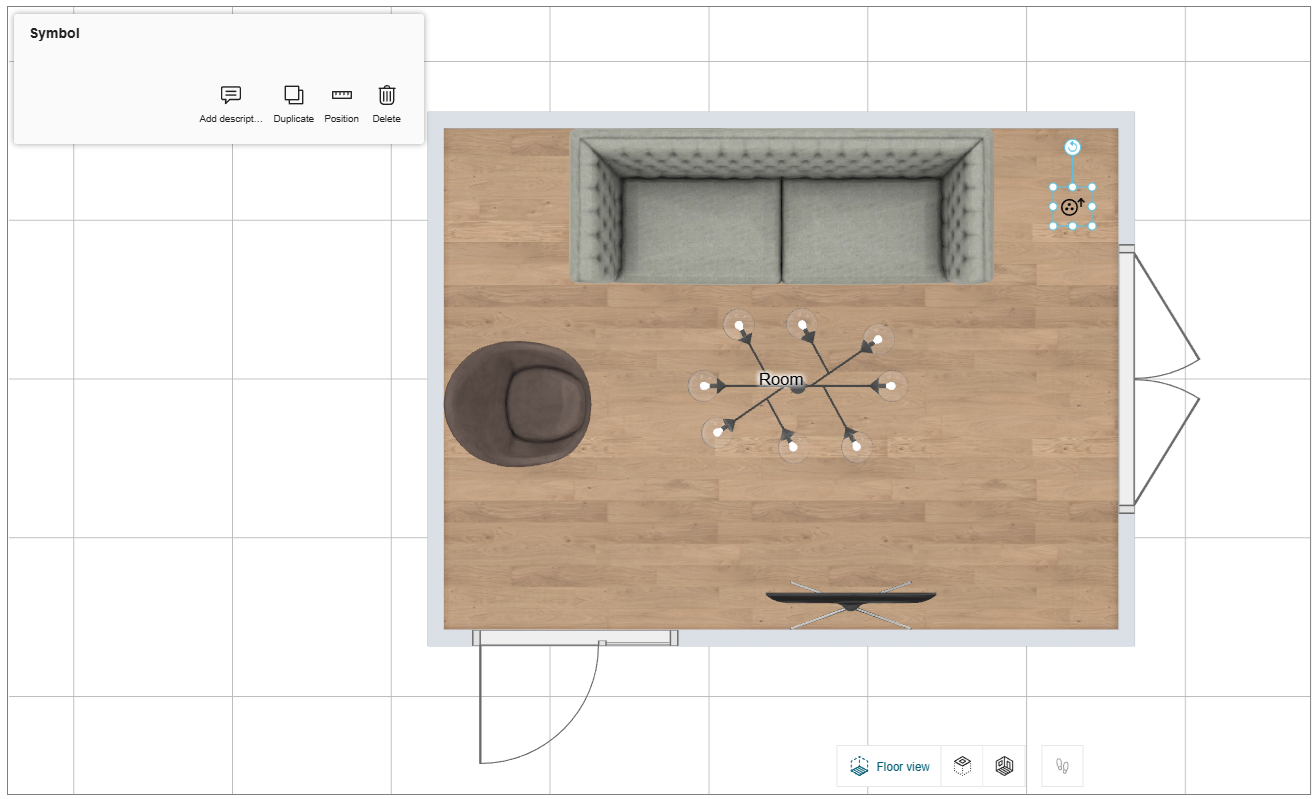
 icon, to add the technical element symbol.
The technical element symbol catalog is displayed, as shown below:
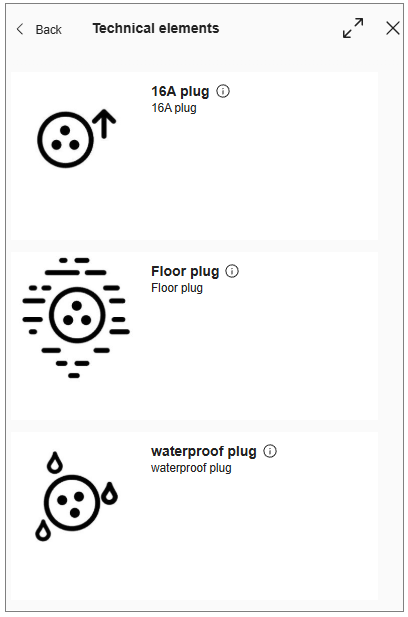
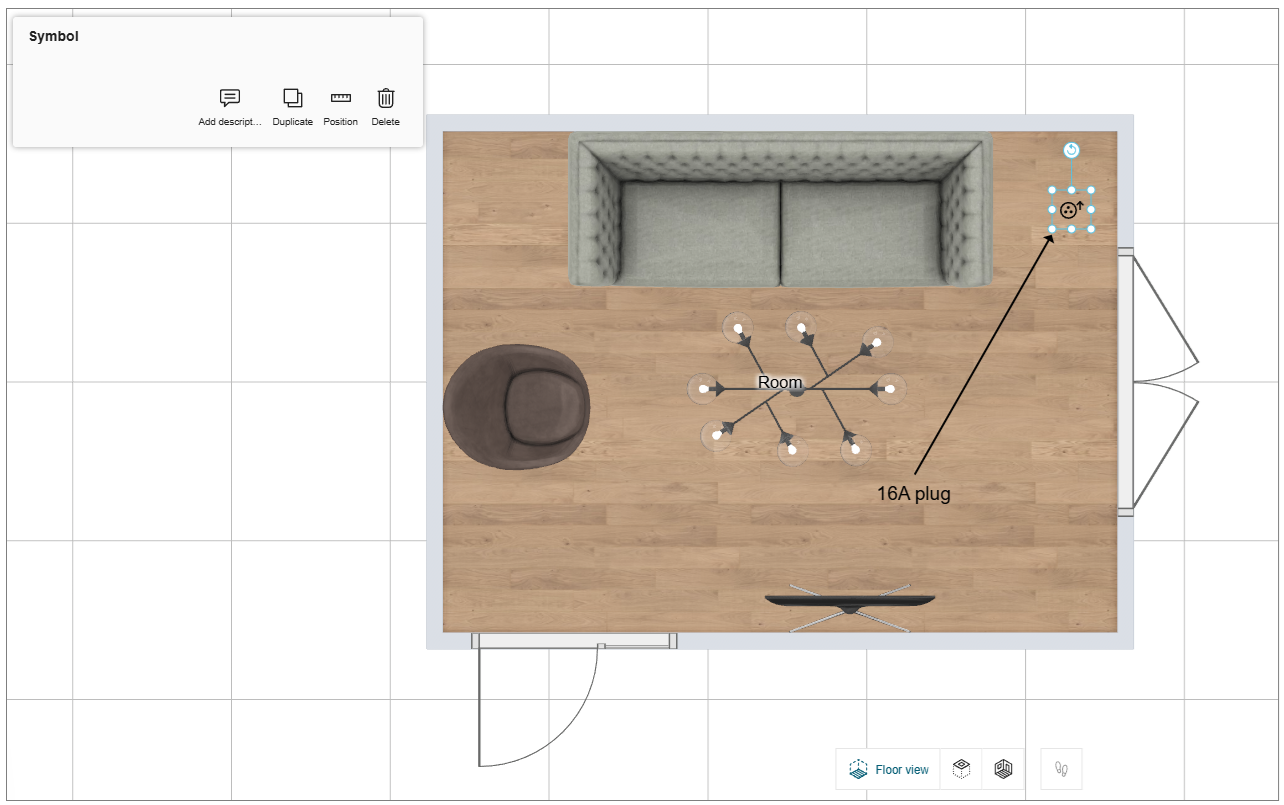
- Select the required symbol from the catalog and click in the planner, as shown below:
- Click the Add description option to add the description to the symbol, as shown below:
Display Annotations
You can hide/show the annotations in Floor view and Ceiling view.
- Click the
 icon, the View mode options are displayed, as shown below:

- Toggle ON/OFF the Display annotations option to hide/show the annotations.
The Display annotations option is available for the Floor view and Ceiling view.
The Project Note
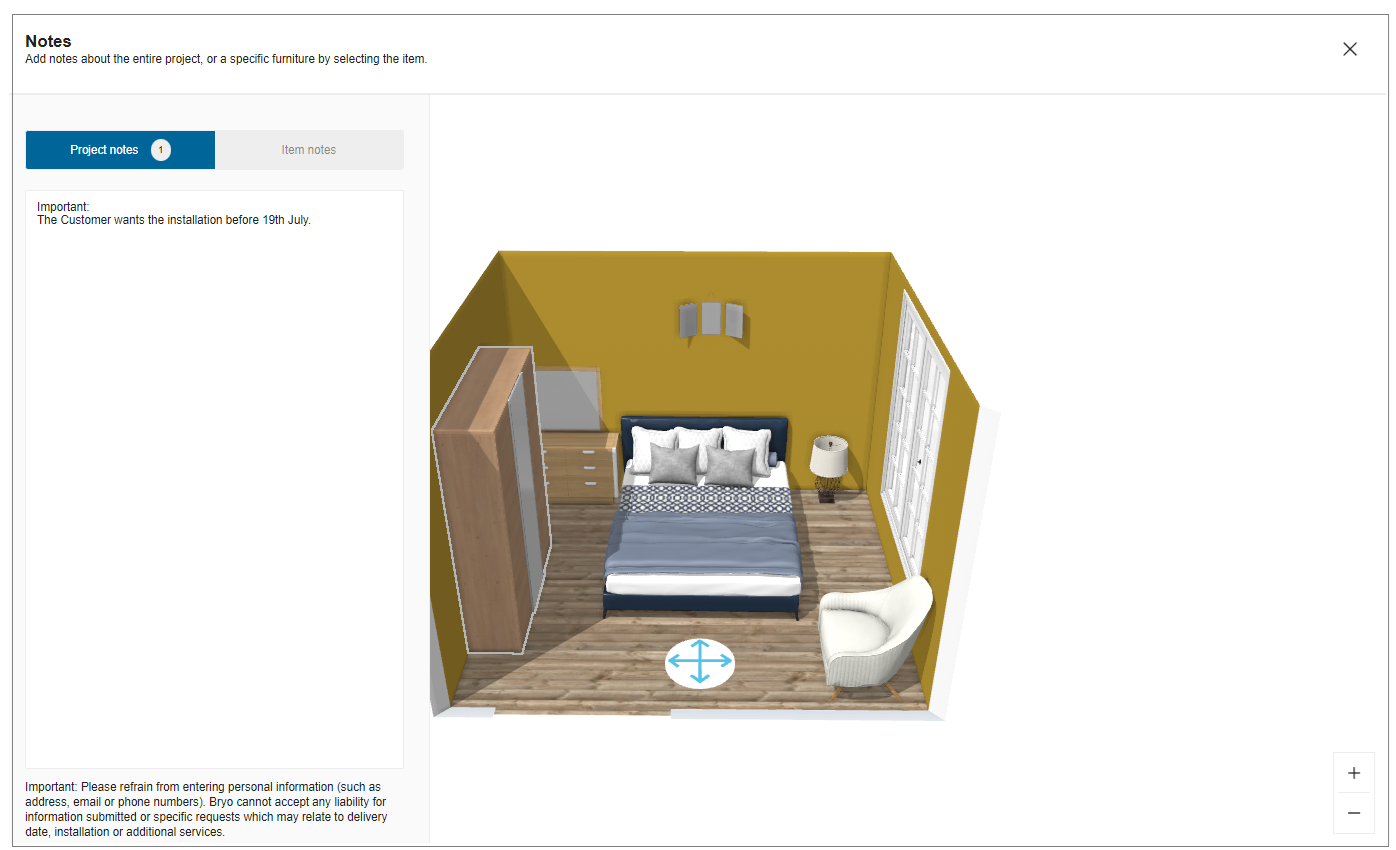
You can add the Project notes and Item notes to capture important details or reminders.
- Project Notes
The user can add the project notes to the project.
To add a project note:
Select the Item Note from the command bar, write project note.
A project may only have 1 project note.
- Item Notes
The user can add the notes to the items in the project.
To add item note:
Select an item in the project, write note.
A project may have multiple item notes.
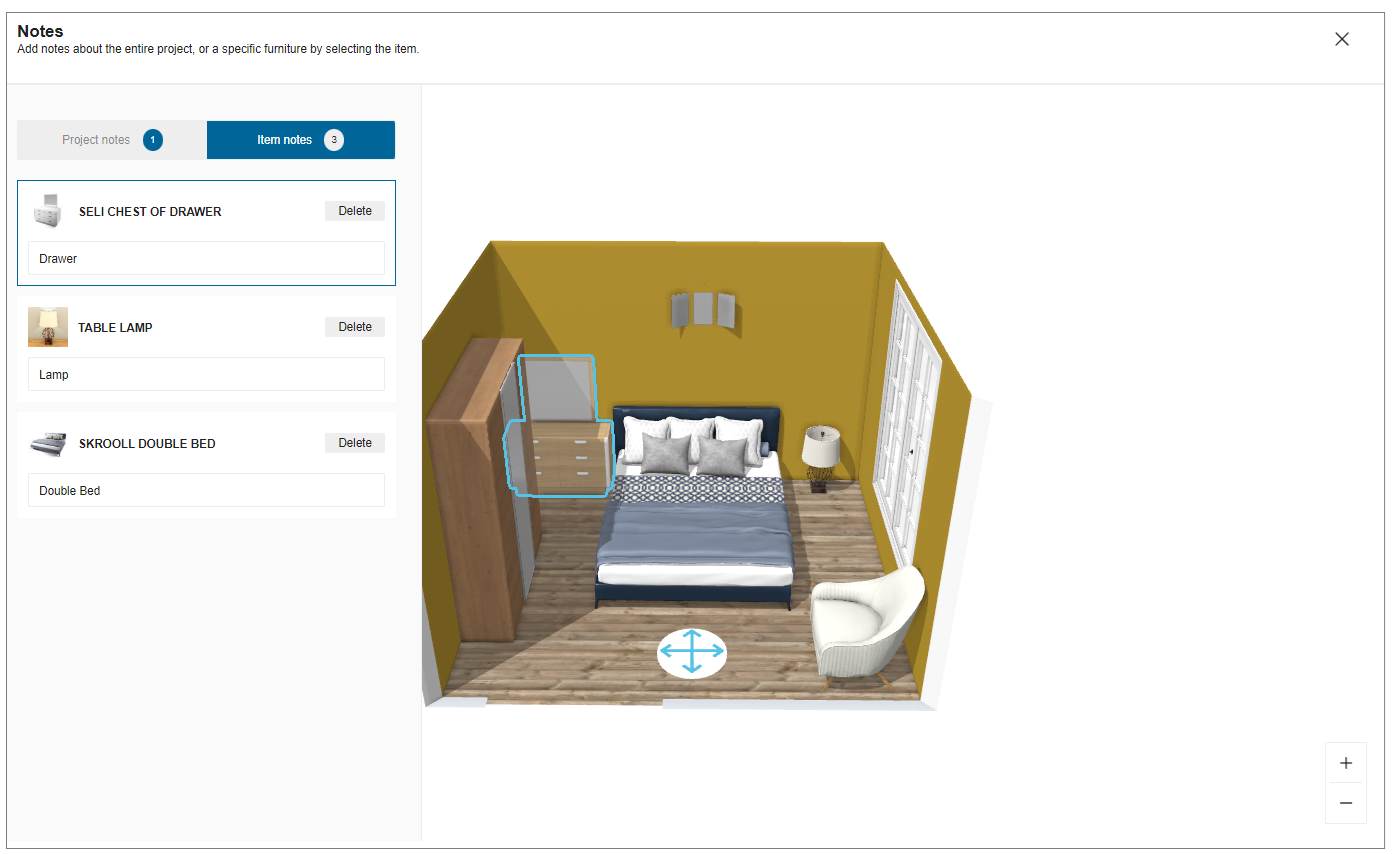
- The total number of notes i.e. sum of project notes and item notes is shown in the toolbar.
- Item notes can be added to all items that are numbered in 2D plans, with the exception of linears.
- On replacing an item, the associated item note is deleted.
- It is recommended to add a note after finalizing the item.
Undo/Redo
There are two commands – undo and redo.
To undo the previous action, click Undo.
To redo the previous action, click Redo.
Save Project
Steps to save project:
- Click Save.
- Login to your account is requested. Enter your credentials and click Login.
- Project rename option displays.
Note: If you have already logged in, rename option displays.

4. Rename your project, add description and click Save.
On completion of save, a notification is displayed.
Close
On completion of project, click Close.
You can access your saved projects from my account. Refer My account for more information.
7. Project Information
| Feature | Icon | Command | Command Location |
|---|---|---|---|
| Information | Provides project information | Beside project name |
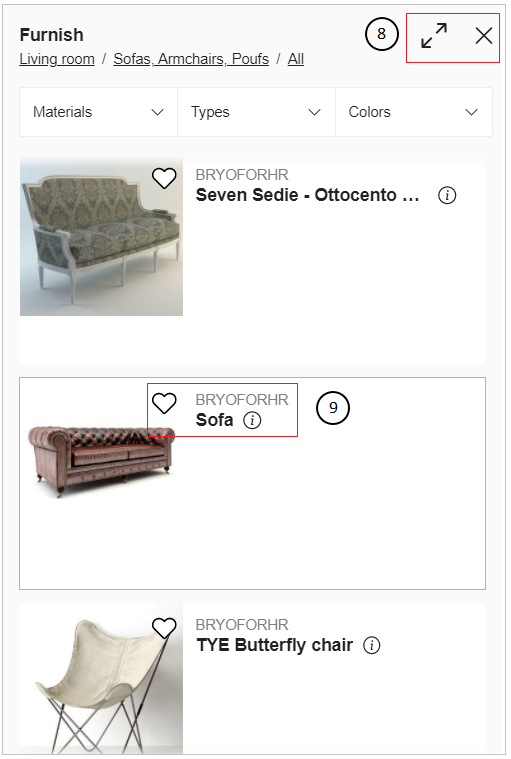
8. Catalog View
| Feature | Icon | Command | Command Location |
|---|---|---|---|
| Maximize | Display mode broadens to full screen | Catalog list | |
| Minimize | Display mode narrows to sidebar panel | Catalog list | |
| Close | Closes the catalog | Catalog list |
9. Product Information
| Feature | Icon | Command | Command Location |
|---|---|---|---|
| Favorite | Adds/removes product from favorite list | Beside product name | |
| Information | Provides product information | Beside product name |
The Available Shortcuts
Several shortcuts are allowed in the planner to do some actions, the list is described below:
| Shortcut (Windows) | Shortcut (Mac) | Description |
|---|---|---|
| Ctrl + A | Cmd + A | Select all the products in the project |
| Ctrl + C | Cmd + C | Copy the current selection |
| Ctrl + V | Cmd + V | Paste the current selection |
| Ctrl + S | Cmd + S | Save the current project |
| Ctrl + Z | Cmd + Z | Undo the last action in the planner |
| Ctrl + Y | Cmd + Y | Redo the last action in the planner |
| Delete | Delete | Delete the current selection |
| ↑ | ↑ | Move up the avatar |
| ↓ | ↓ | Move down the avatar |
| ← | ← | Rotate the avatar clockwise |
| → | → | Rotate the avatar counterclockwise |
| Ctrl + Click Left | Cmd + Click Left | Multi-selection of the elements in the planner |
| Ctrl + U | Cmd + U | Change unit measure dynamically in the application |
| Ctrl + F6 | Cmd + fn + F6 | Switch between 2D, 3D, and Front Elevation views |
- You can also copy/paste the products from one project to another with the copy (Ctrl+C) and paste (Ctrl+V) shortcuts except opening/bay products like door/windows.
- You can select multiple products by simultaneously pressing the Ctrl key, left click of the mouse and dragging the cursor over the desired products.
10. Navigation Icons
The navigation icons allow you to switch from a 3D view to a ceiling view, 2D or first person view.
| Feature | Icon | Command | Command Location |
|---|---|---|---|
| 2D view | Activates the 2D view. You can edit walls, measurements, and furniture in this view. You can also view room names and their measurements. | Planner | |
| Ceiling view | Activates the ceiling view. You can visualize the ceiling view of the home. | Planner | |
| 3D view | Activates the 3D view. You can visualize a 3D view of the home. | Planner | |
| First Person view | Activates the first-person view, to give the real-life experience of the home. | Planner |
The First person view option is disabled in 2D view and becomes active only when switched to 3D view or Ceiling view.