From the Scratch
This section provides detailed steps on planning a project from the scratch by adding rooms, walls, separators, sloped ceilings and exteriors.
Add a Room
You can add rooms to your project.
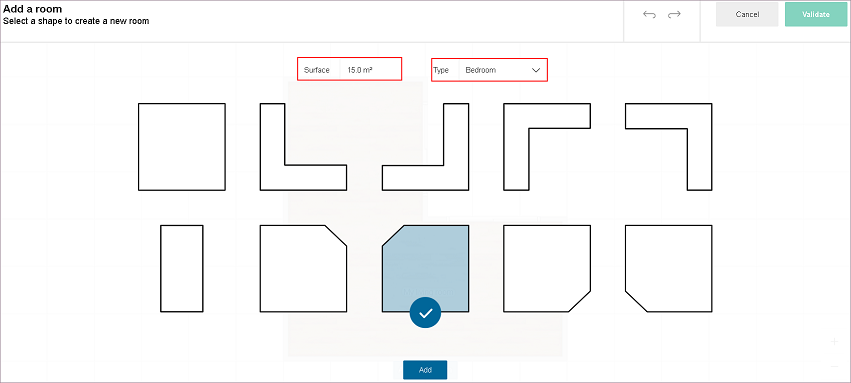
Steps to add a room:
-
Click Draw plan > Add a room.
-
Enter the surface area, room type.
-
Select the room shape, click Add.
Room Selection:
-
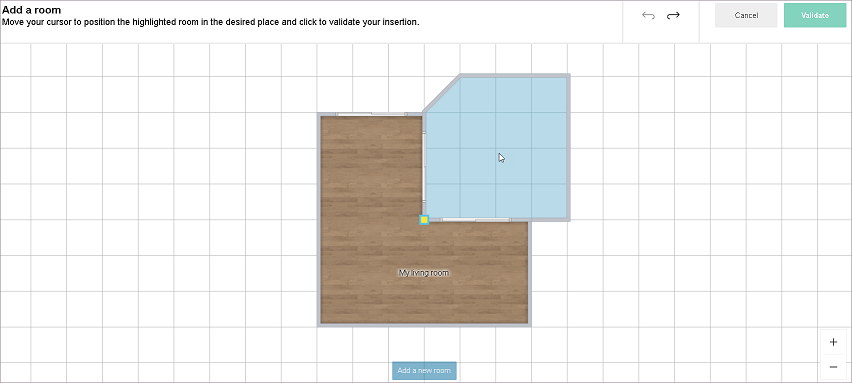
Position the room.
To add another room, click Add a new room, repeat from step 2.
Room Position:
-
Click Validate.
Rooms are added to the project.
Use a measuring code
You can use a measuring code to add a room.
- Click the Floor plan > Use a measure code option.
Select the required .json format file from the folder.
A popup message to notify Your measurements have been imported appears, as shown below:
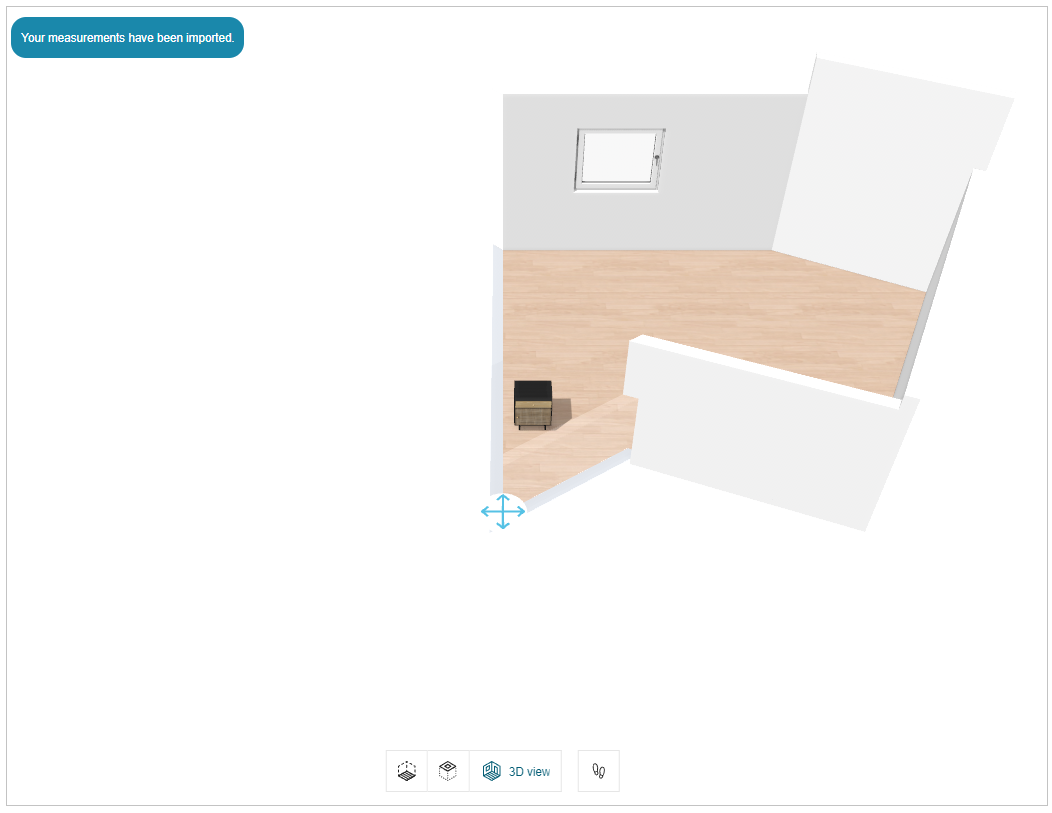
The existing project has been updated accordingly and the room products are not positioned after importing the measurement code.
You have to manually drag and drop the products to position them inside the room.
- To position the products drag and drop the products inside the room.
The original room shape is updated based on the measurement been imported.
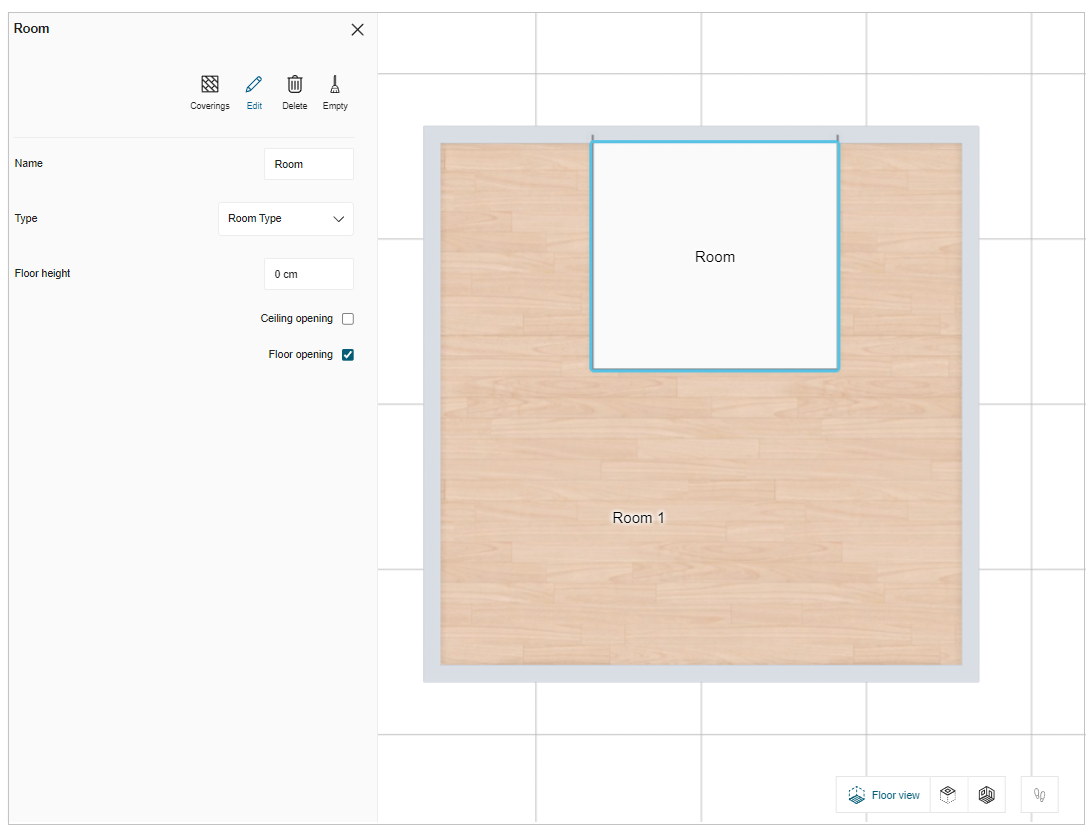
Rename room
You can modify the room, room type, modify the floor height and empty room.
- Click the room floor, the property panel is displayed, as shown below:

- Click the Edit option, the edit panel is displayed, as shown below:

-
Name- Select the room name and modify the required name of the room.
-
Type- Select the room type from the drop-down menu, as shown below:
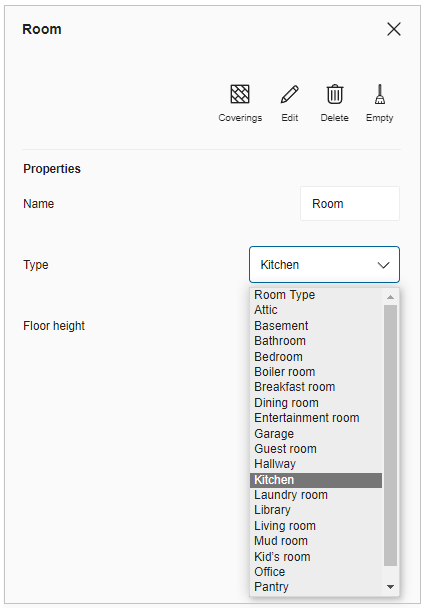
- Floor height- To modify the height of the floor in the same room or different rooms:
- Select the value of the floor height and modify the required floor height, and a success message displays, as shown below:

- To check the applied floor height, click the See how it looks from the pop-up message. The applied floor height is displayed, as shown below:
Floor and Ceiling Opening
You can add a floor and ceiling opening to the room.
-
Click the Floor plan > Add a separation.
-
Draw the required area for opening using sketcher, as shown below:
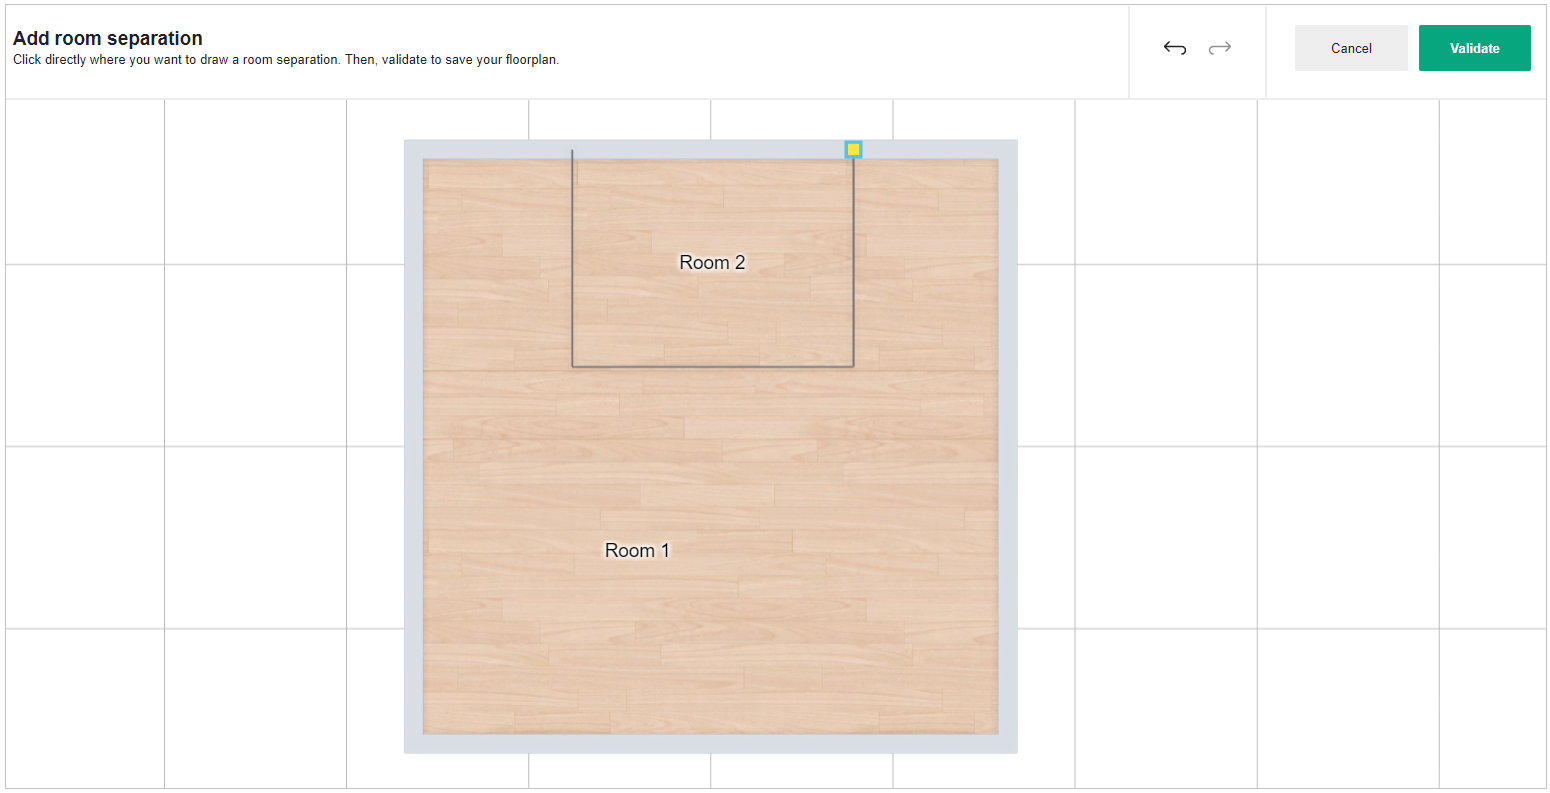
-
Click the Validate button.
-
Select the separator area for the opening and click the Edit button, as shown below:
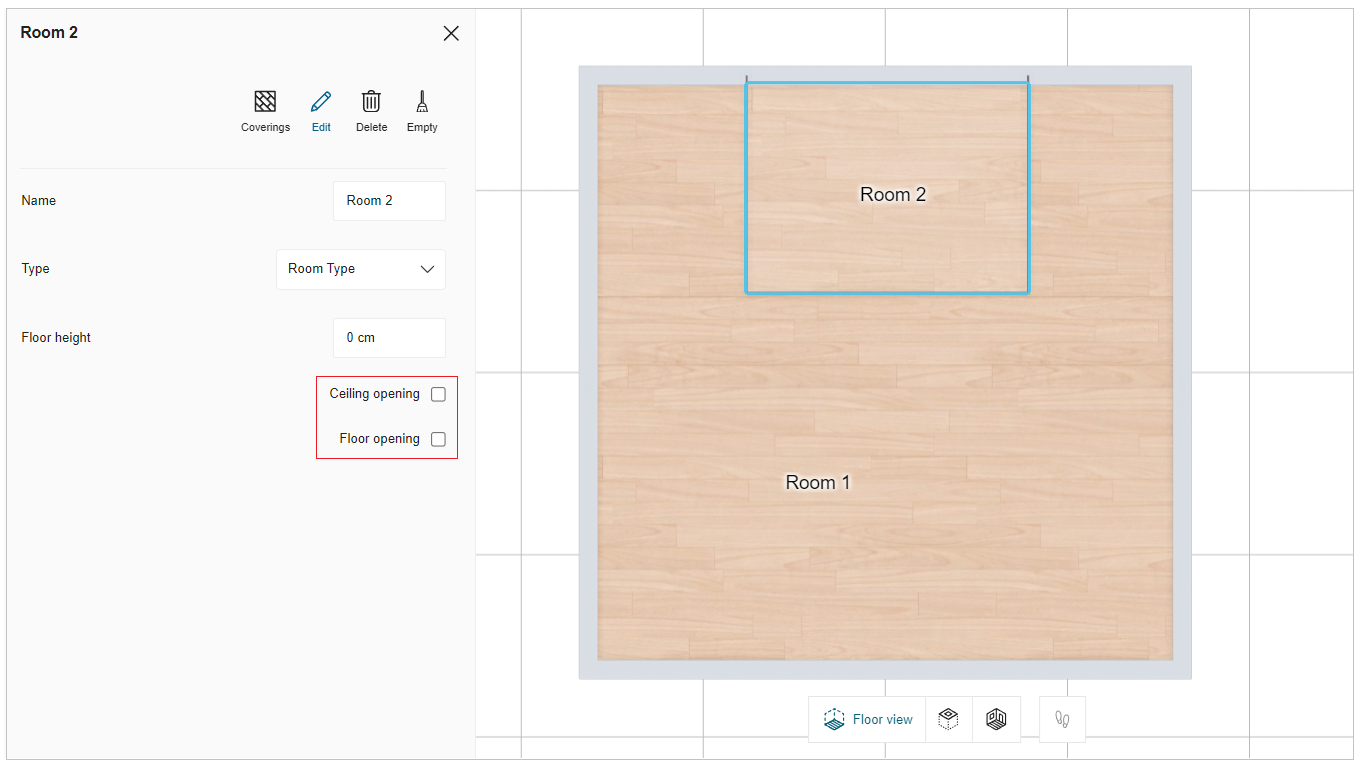
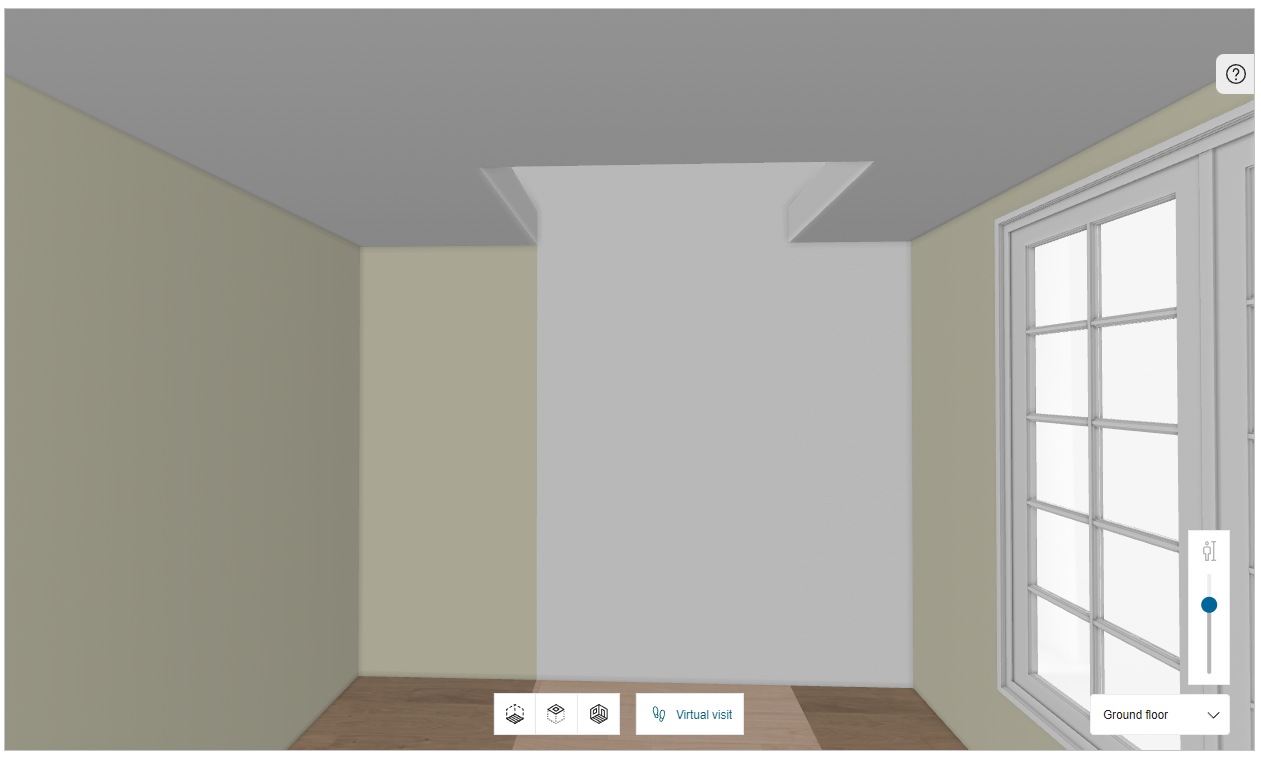
- Ceiling Opening - You can add the ceiling opening to the room.
- Click the check box of Ceiling Opening, as shown below:
![]()
- The applied ceiling opening is displayed, as shown below:
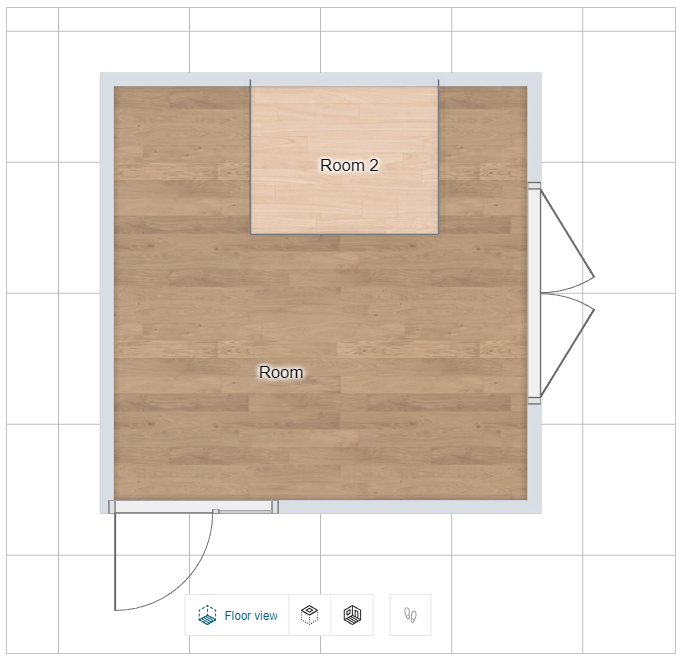
- Floor Opening - You can add the floor opening to the room.
- Click the check box of Floor Opening, as shown below:

- The applied floor opening is displayed, as shown below:
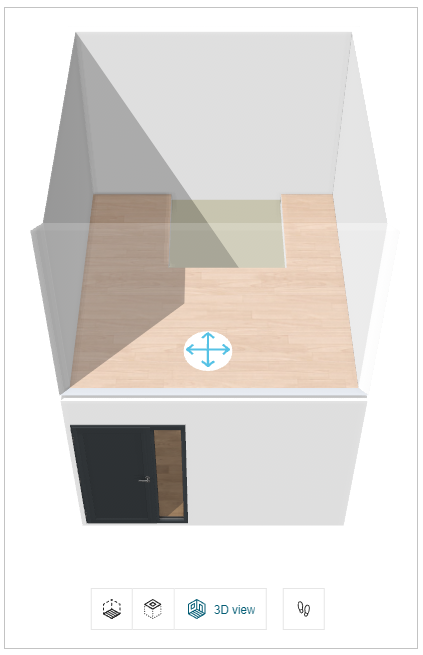
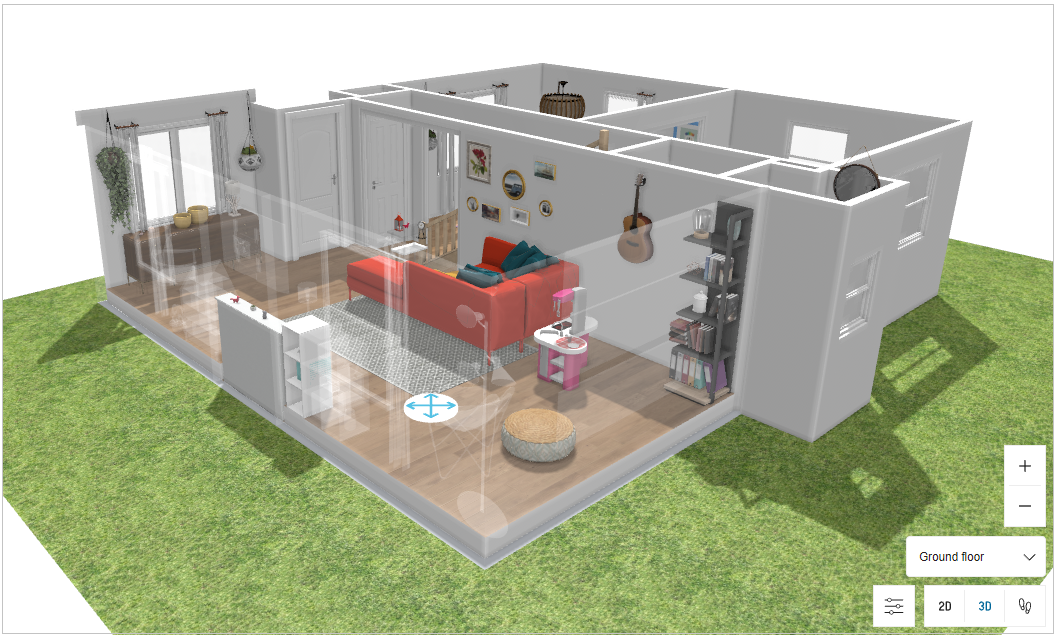
Navigation Panel
You can switch the room view to Floor view, Ceiling view, 3D view, or First person view.
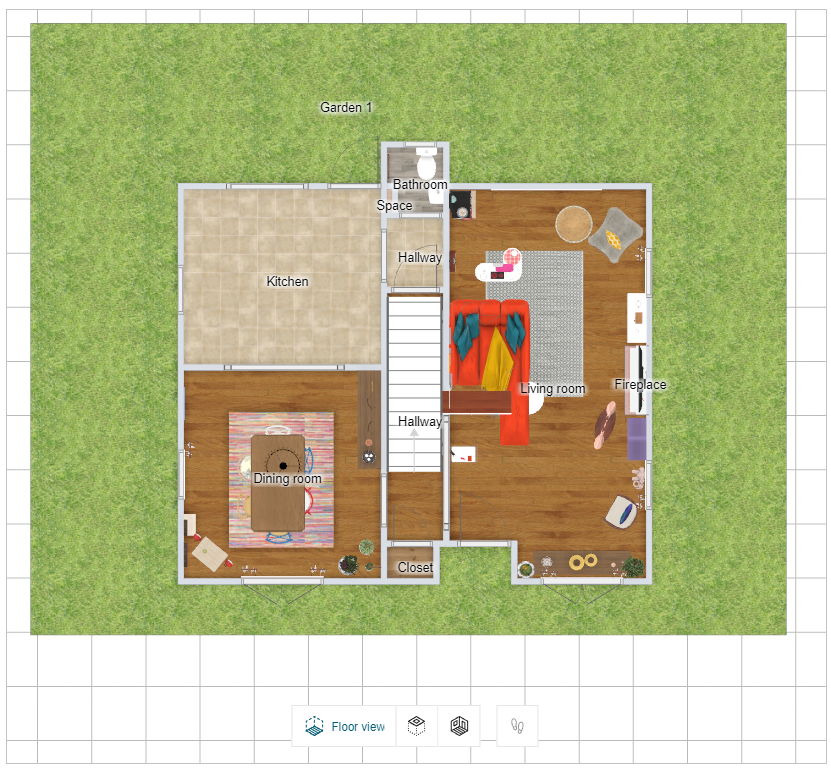
Floor view:
- Click the
 icon in the navigation panel. The floor view is displayed, as shown below:
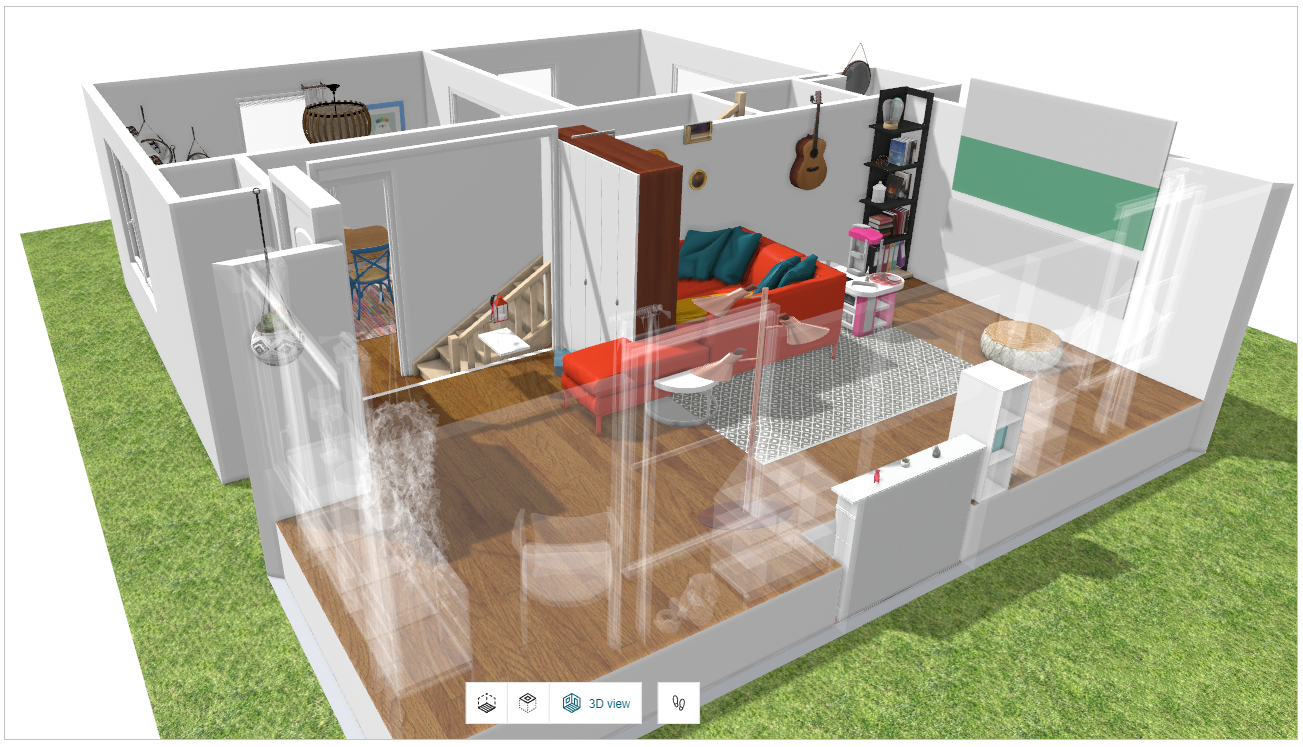
3D view:
- Click the
 icon in the navigation panel. The 3D view is displayed, as shown below:
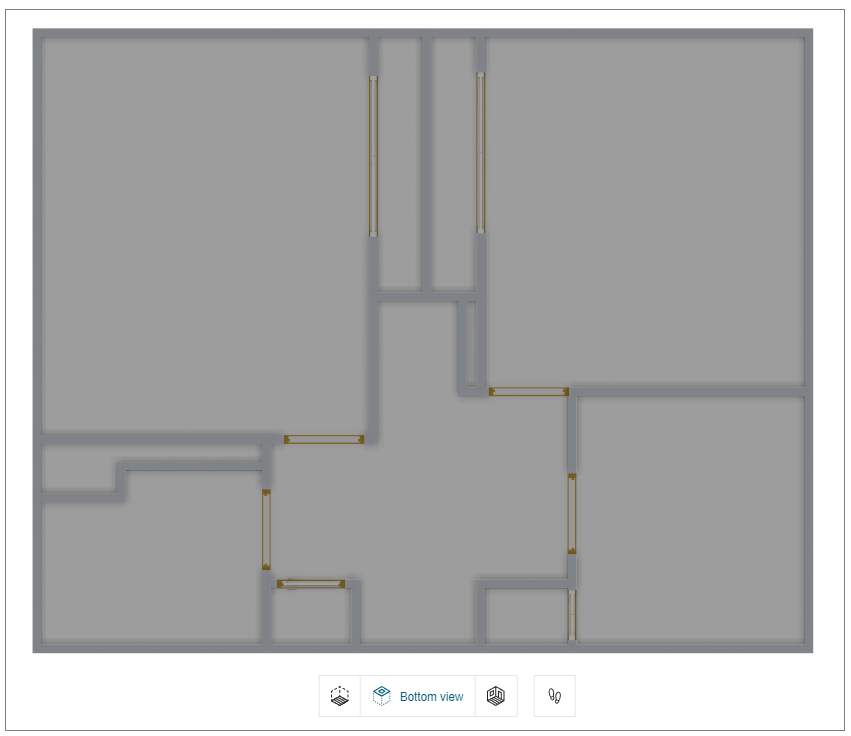
Ceiling view:
- Click the
 icon in the navigation panel. The front view is displayed, as shown below:
First person view
- Click the
 icon in the navigation panel. The First person view is displayed, as shown below:
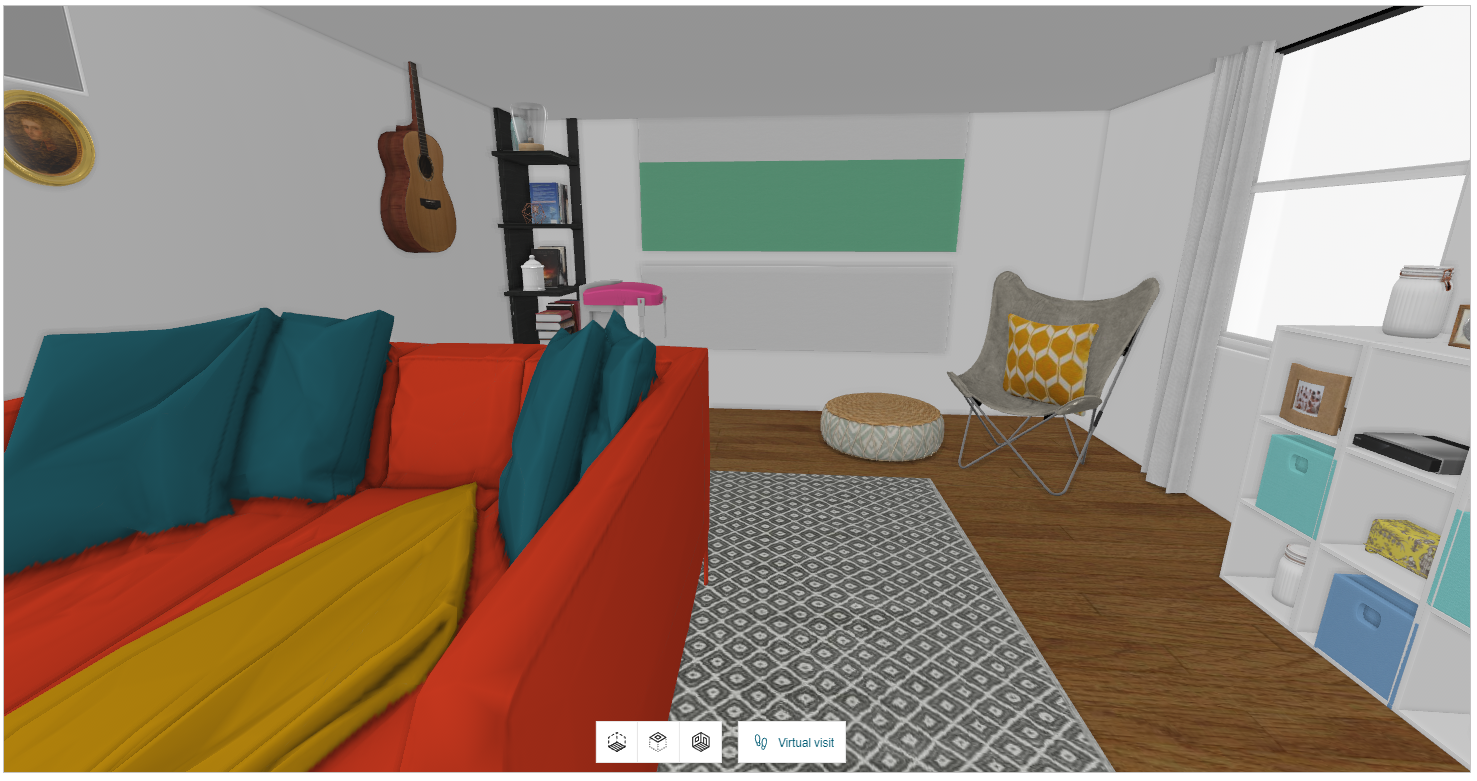
The First person view option is disabled in 2D view and becomes active only when switched to 3D view or ceiling view.
Empty room
You can empty the room by deleting all the products from the room at once.
In 2D view, select the room floor, the property panel is displayed, as shown below:
- Click the
 icon, a notification for confirmation appears, as shown below:

- Click the Yes option to continue.
You can undo the action by clicking the Undo button.
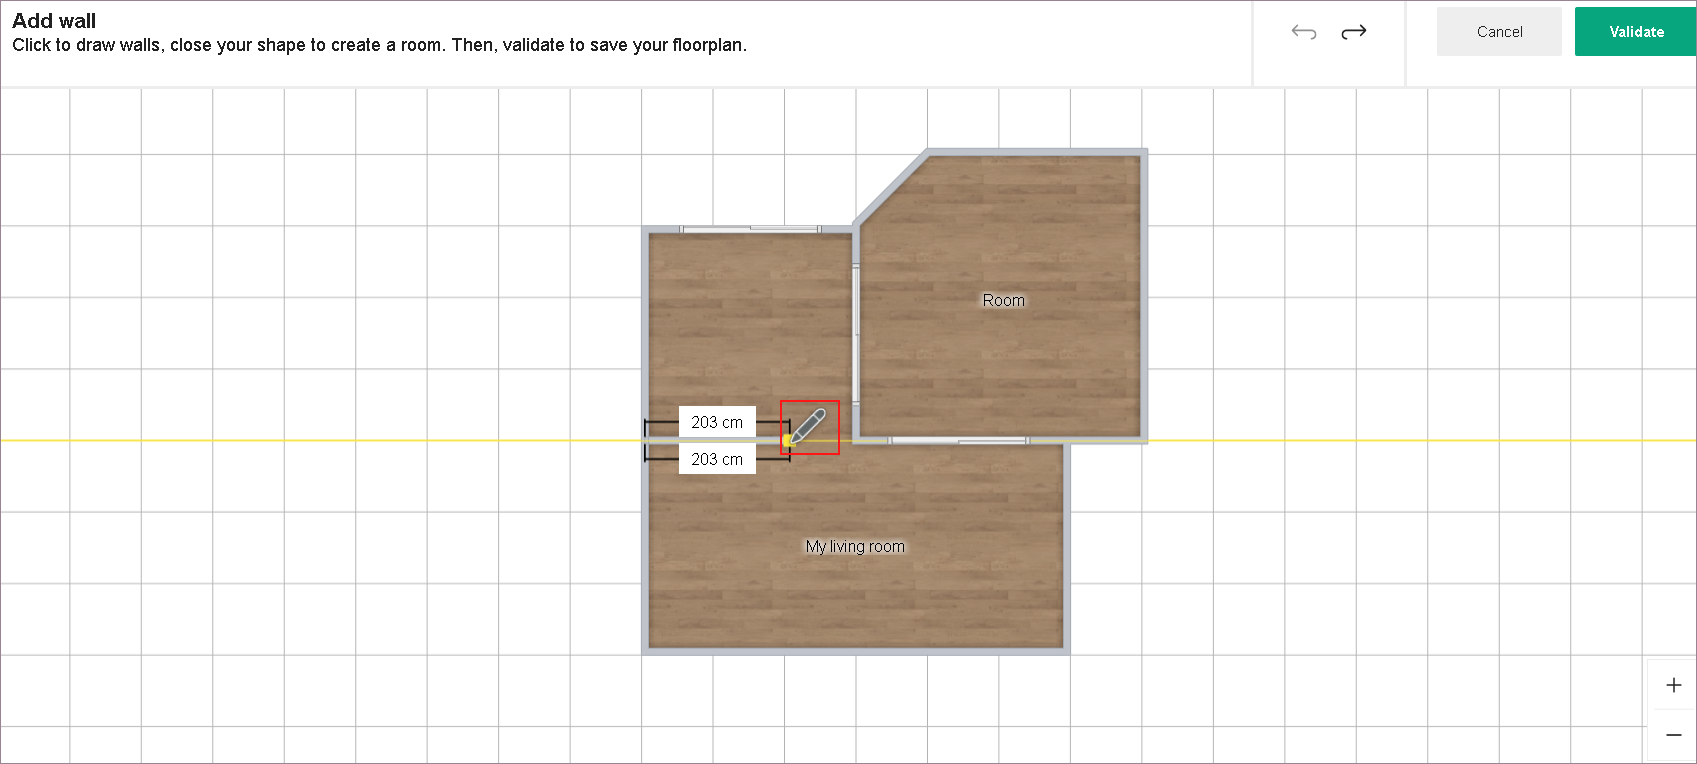
Add a Wall
You can add walls to your project.
Steps to add a wall:
-
Click Draw plan > Add a wall.
-
Draw wall with the help of sketcher.
Add Walls:
Feature Icon Command Command Location Sketcher 
Helps in drawing walls Draw plan -
Click Validate. Walls are added to the project.
Add a Separation
You can add room separations to your project.
Steps to add a room separator:
-
Click Draw plan > Add a separation.
-
Draw separator with the help of sketcher.
Add Separators:
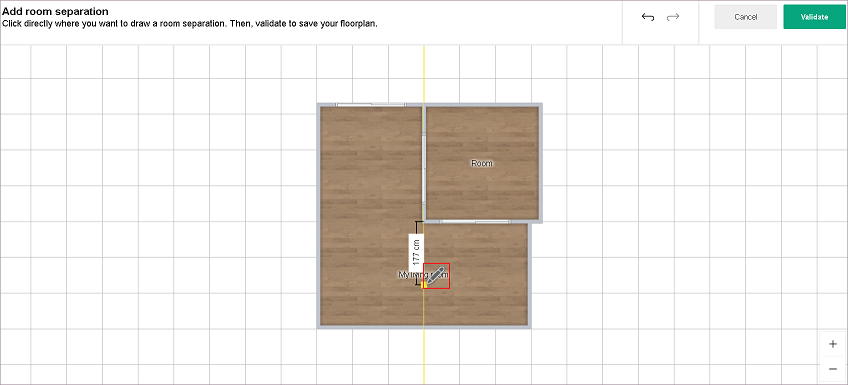
Feature Icon Command Command Location Sketcher Helps in drawing separators Draw plan -
Click Validate.
Room separators are added to the project.
Modifying the Wall Dimension
The dimensions of the walls can be modified by dragging the wall or by specifying the required dimension.
To modify the dimension of the wall in the planner:
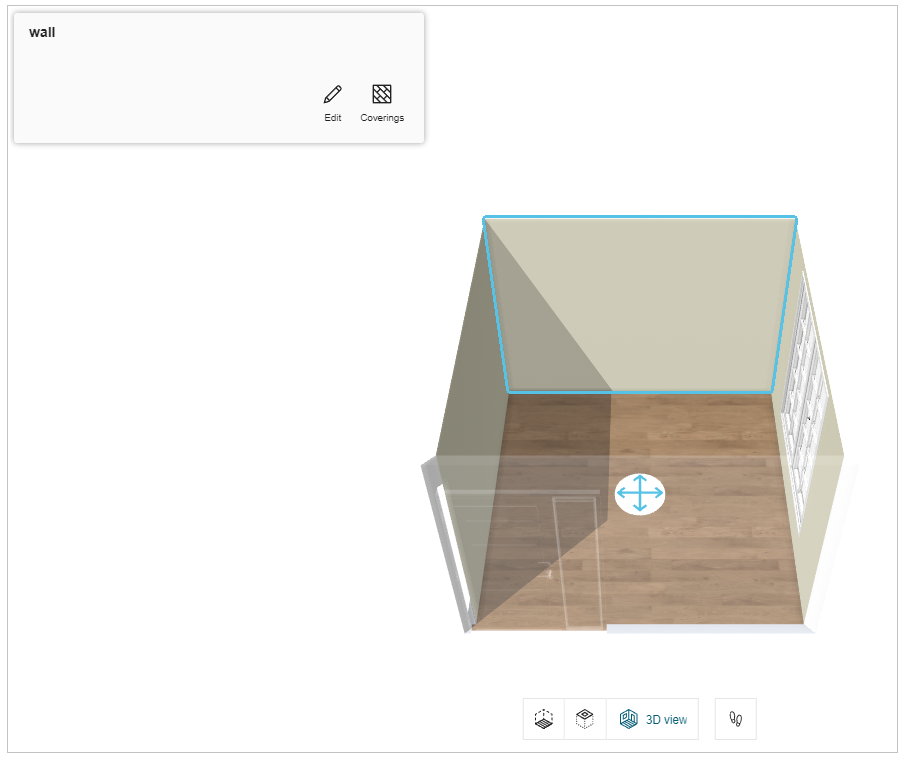
- Select the wall, click the dimension of the wall, as shown below:

-
Modify the dimension value of the wall, click APPLY LEFT or APPLY RIGHT button as required.
Selecting the appropriate button changes the length of the wall in the respective direction.
If you press the Enter key or click the blank space in the planner, by default the change in the dimension is applied in the direction of the button highlighted in blue color. In the above image, it is APPLY LEFT. -
If you select the vertical wall/ slanting wall, the APPLY ABOVE and APPLY BELOW appears to modify the wall dimension.
If the two adjacent walls of the room are joint at a perpendicular angle (i.e. 90 degree), then a square symbol is displayed, as shown above.
For non-perpendicular angles, the angle value is displayed.
Openings
This section explains the steps to add the openings (like Door, Window, and Roof window) to the room in the floorplan.
- Click the
 icon, the list of categories & sub-categories of openings are displayed, as shown below:

You can add a door/window by clicking the desired category.
For example:
- Click the Double windows. The list of double windows appears, as shown below:
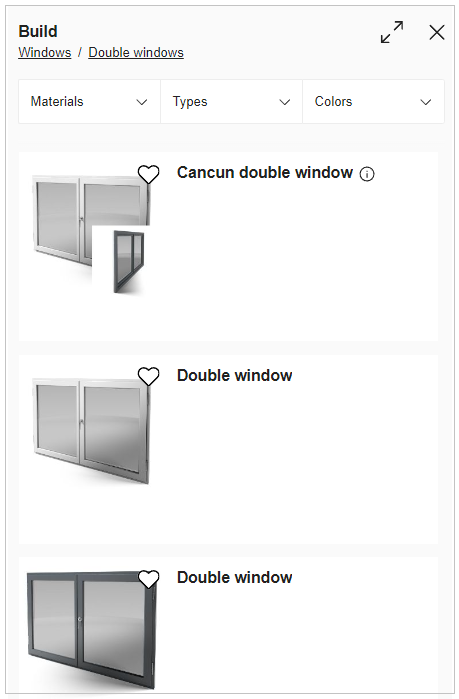
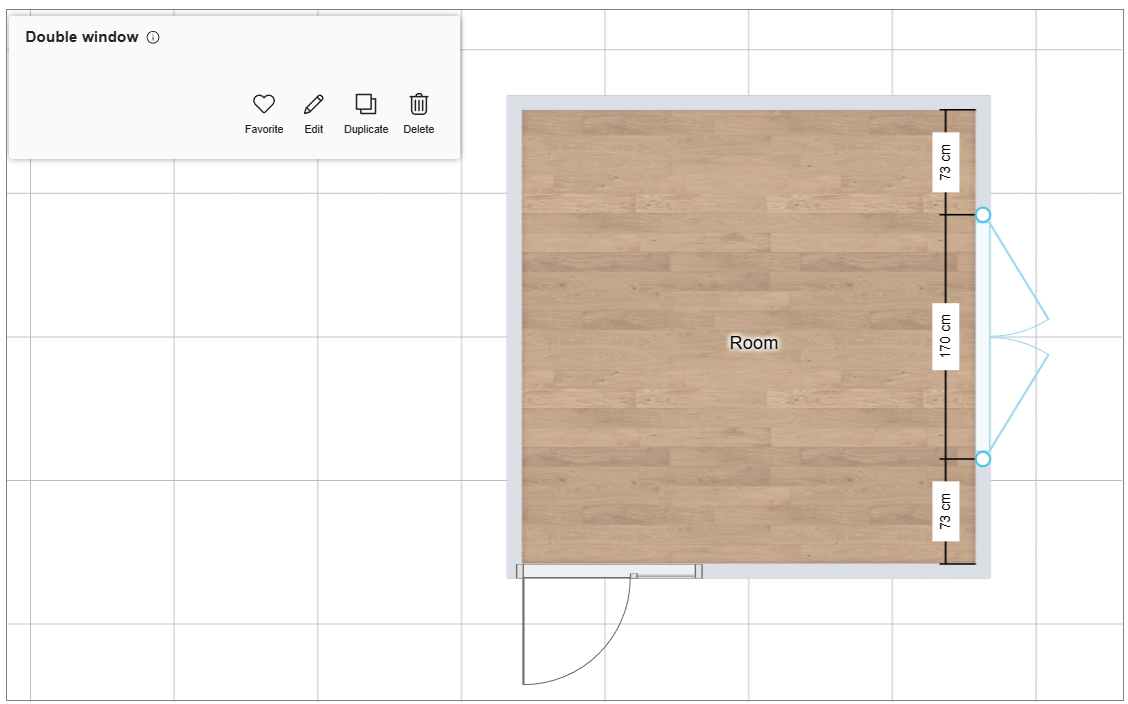
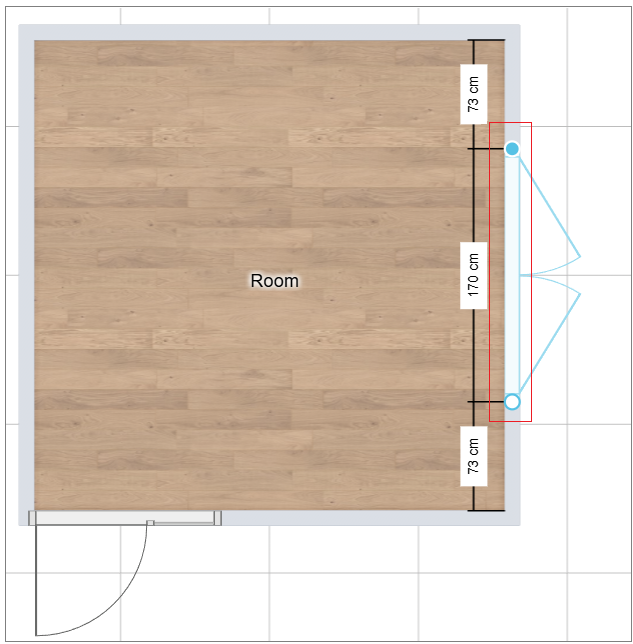
- Select the Double window from the catalog, the window is added to the wall, as shown below:
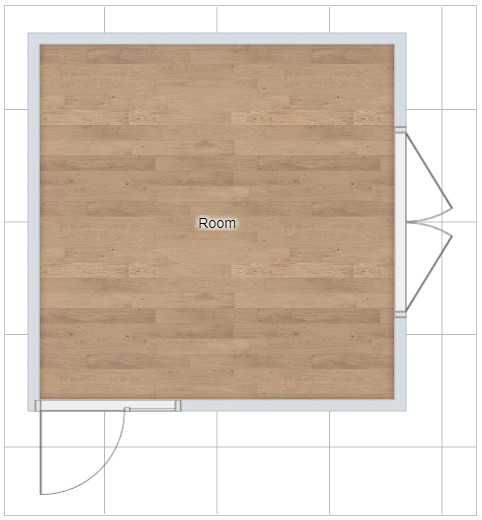
You can move the window to the desired position by dragging it or by editing the measurement that is displayed after selecting it, as shown below:
Similarly, you can add other types of openings like different types of doors, windows, or roof windows.
- The openings width can also be modified by selecting the product and editing the dimensions.
- You can also add the Openings to the room by drag and drop them from the catalog.
Edit Door / Window Properties
You can Edit door/windows in 2D/3D view.
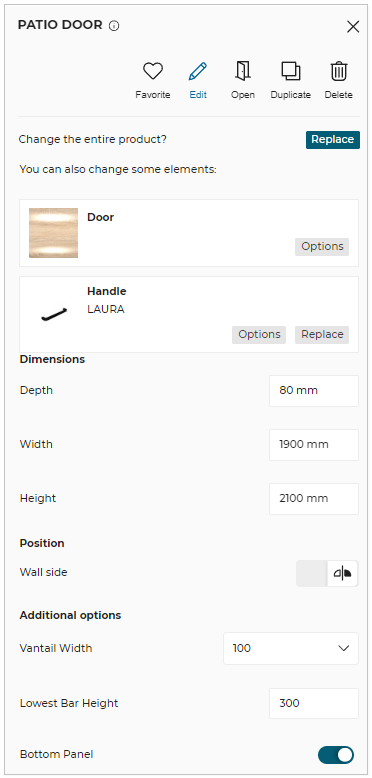
- Click the door/window to open the Edit toolbar in 2D/3D view, as shown below:

To edit the properties of window/door:
Click the Edit option, the properties panel appears, as shown below:
You can also resize the openings in 2D view by dragging the end points of the opening, as shown below:
| Option | Function |
|---|---|
 Edit | Lists editing options. |
Duplicate | Duplicates the selected opening and adds it to the room wall. |
Open | Open/Close the openings. |
Delete | Deletes the selected opening. |
Information | Shows dimension information about the product. |
Options: Shows the options available for the opening selected.
Replace: You can replace the product/material using this button.
Dimensions: The width, height of the window can be edited.
Position: Height from the floor, wall side (opening of window-inner/outer side), can be edited.
Additional options: For bay products, you can add additional dimension parameters according to your needs.
- The option available in the edit properties window can change depending on the type of opening selected.
- You cannot move or duplicate the door/window in 3D View.
- The Open/Close option is available in 3D view only.
Wall Mouldings
Adding Wall Moulding
You can add the mouldings to the wall.
- Select the wall on which you want to add the moulding, as shown below:
- Click the Edit button, the different types of moulding options are displayed, as shown below:

You can add Cornice, Picture rail, and Baseboard type of mouldings.
Cornice
You can add the cornice moulding to the wall.
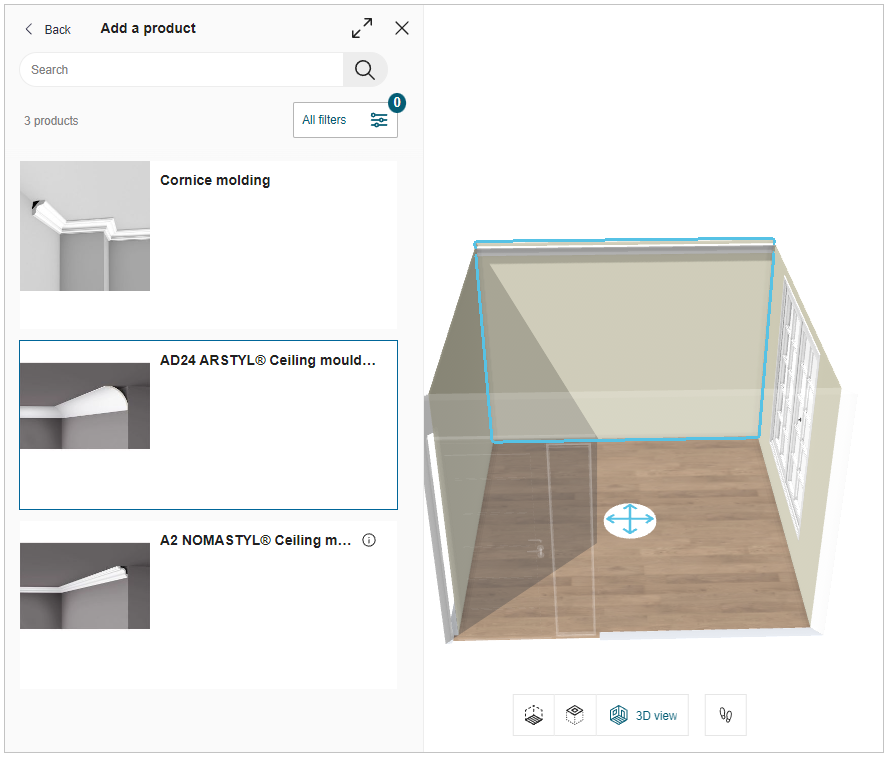
- Click the Add button of Cornice option, and the catalog of cornice moulding are displayed, as shown below:
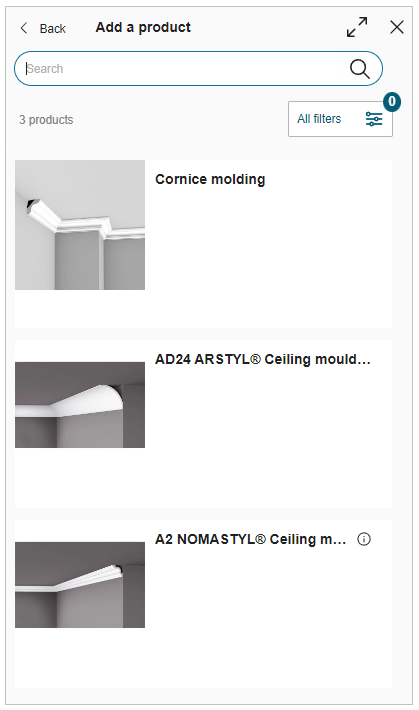
- Select the required cornice moulding from the catalog, the applied moulding is displayed, as shown below:
Picture rail
You can add the picture rail moulding to the wall.
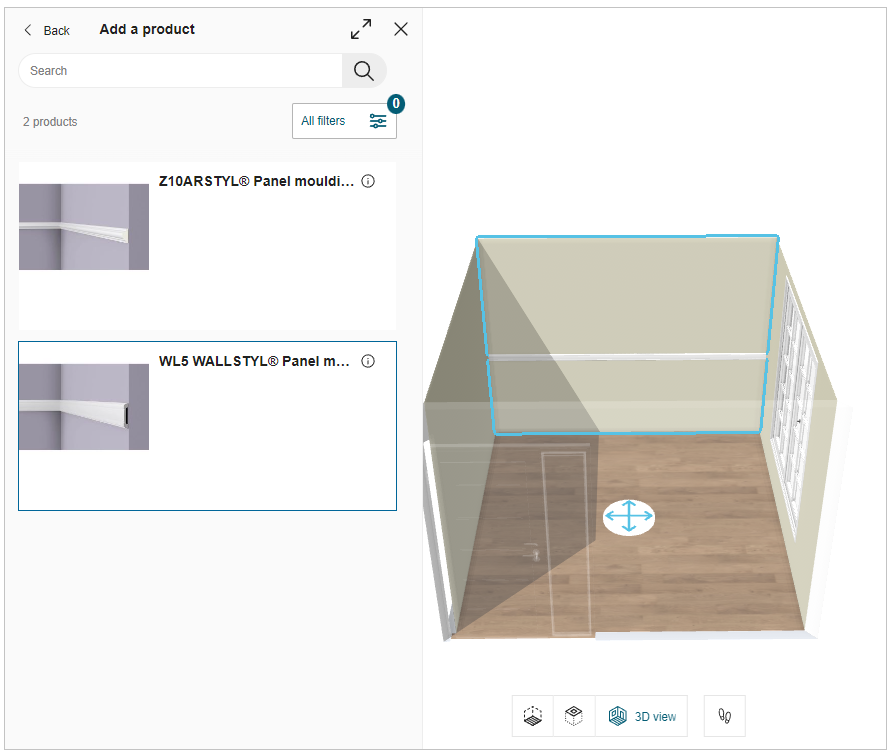
- Click the Add button of Picture rail option, and the catalog of picture rail moulding are displayed, as shown below:
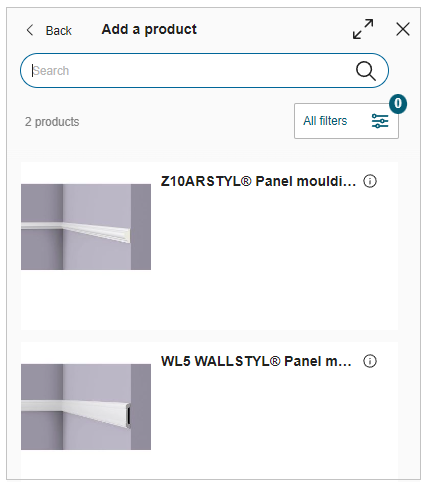
- Select the required picture rail moulding from the catalog, the applied moulding is displayed, as shown below:
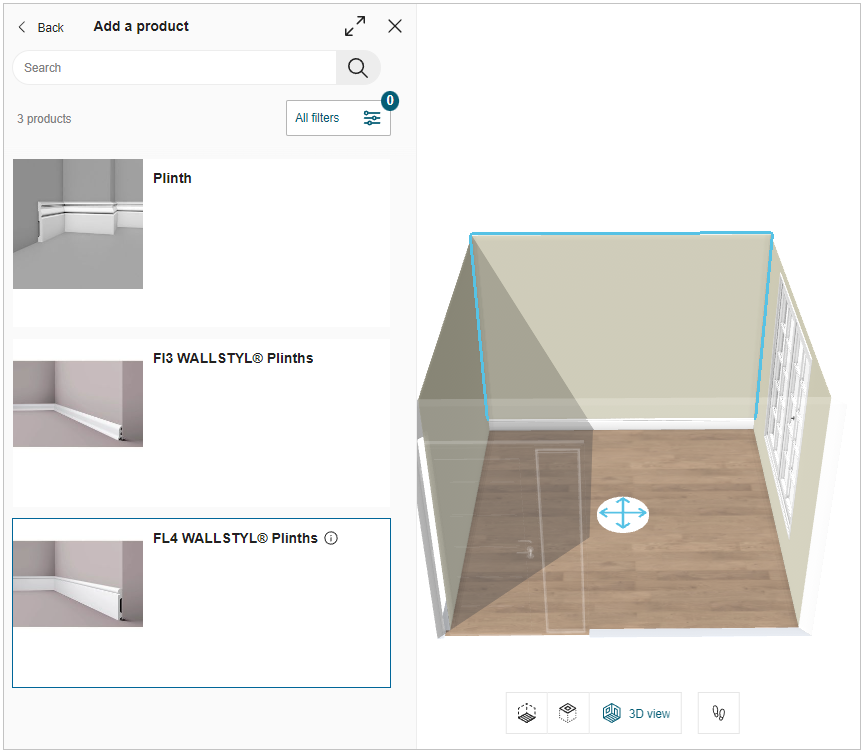
Baseboard
You can add the baseboard moulding to the wall.
- Click the Add button of Baseboard option, and the catalog of baseboard moulding are displayed, as shown below:
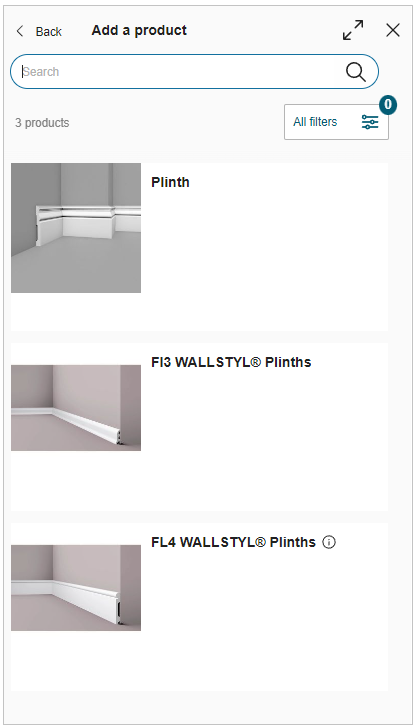
- Select the required picture rail moulding from the catalog, the applied moulding is displayed, as shown below:
Edit Wall Moulding
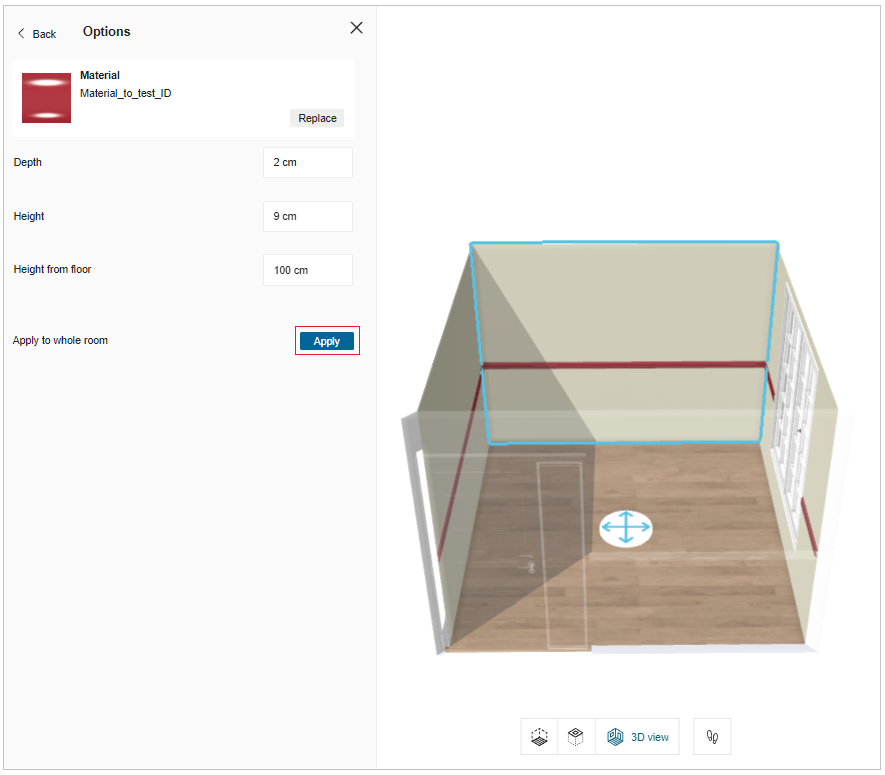
- Select the wall and click the Options button, as shown below:

- The Options panel is displayed, as shown below:

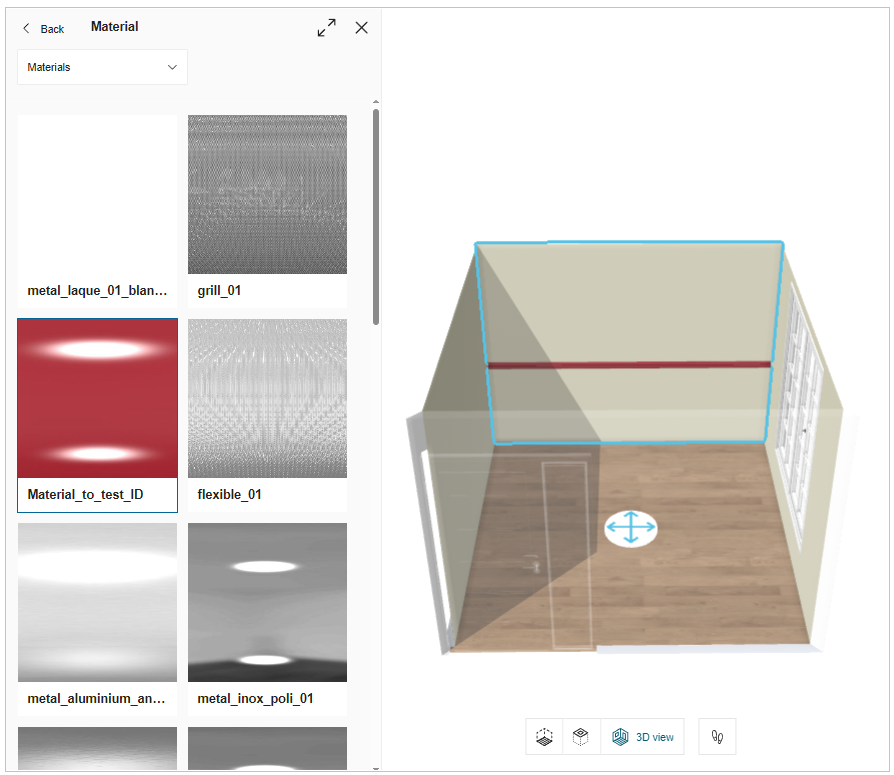
- Click the Add button of the Add Material option to apply the material to the moulding.
The material catalog is displayed, as shown below:
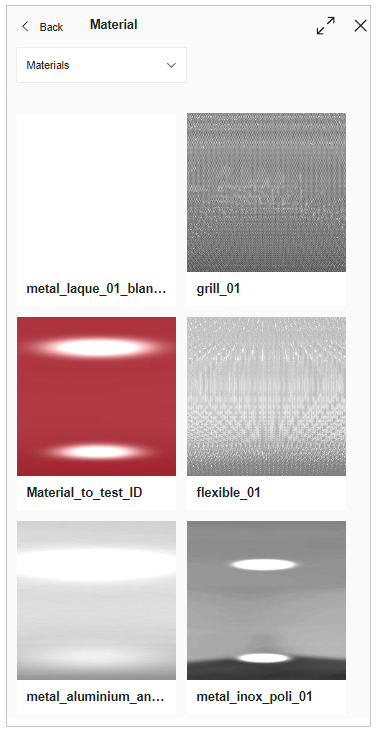
- The applied material to the moulding is displayed, as shown below:
You can edit/modify the dimensions of the mouldings, as shown below:

To apply the moulding to the whole room:
Click the Apply button of the Apply to whole room.
The applied moulding is displayed, as shown below:
Replace Wall Moulding
- Click the Replace button to replace the wall moulding.
The replaceable moulding catalog is displayed, as shown below:
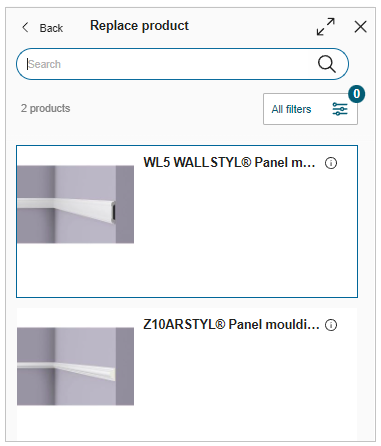
- Select the moulding from the catalog to replace the wall moulding.
Delete Wall Moulding
- Click the Delete button to delete the wall moulding.
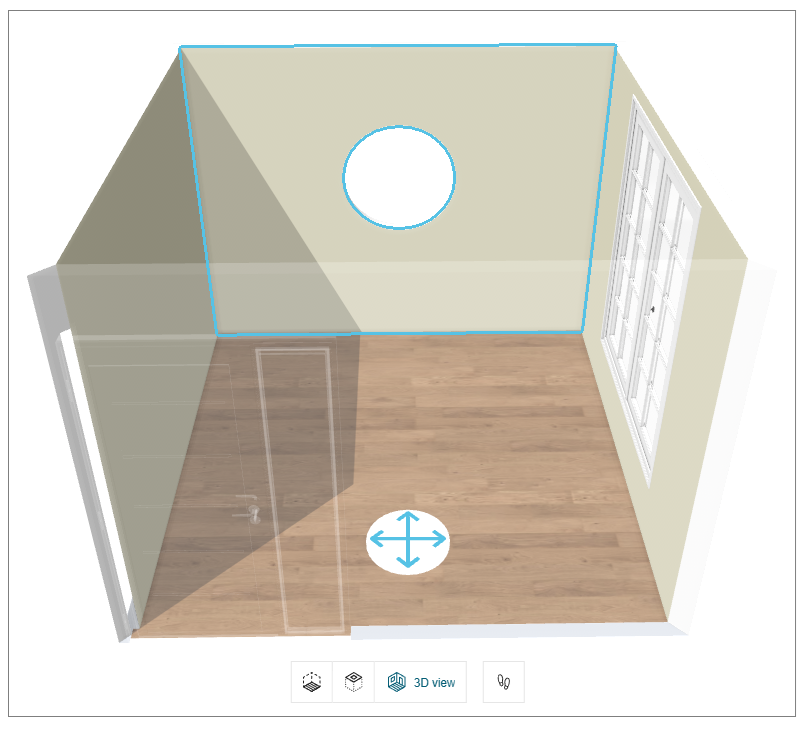
Niche
You can add a Niche into a wall to create a recessed space for fixtures, decorative items, kitchen accessories, etc in 2D/3D view.
-
Select the wall in the 2D/3D view.
-
Click the Edit button, the Wall options are displayed, as shown below:

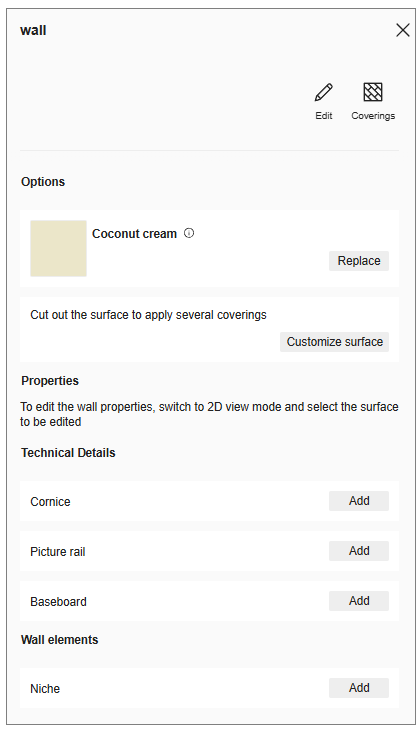
- Click the Add button of the Niche option, the niche products catalog is displayed, as shown below:
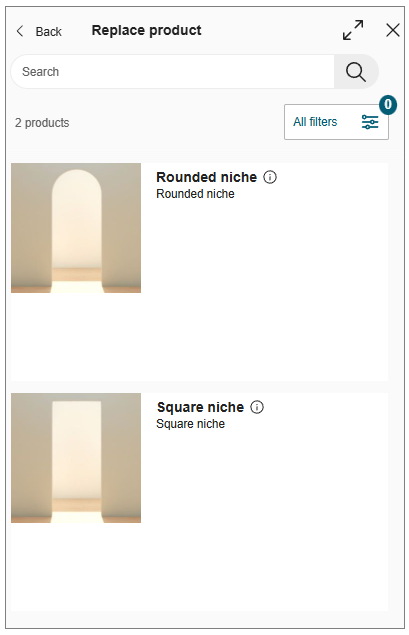
- Select the required niche product from the catalog, the applied niche is displayed, as shown below:
Replace Niche
- Click the Replace button, to replace the niche product.
The Replace niche catalog is displayed, as shown below:
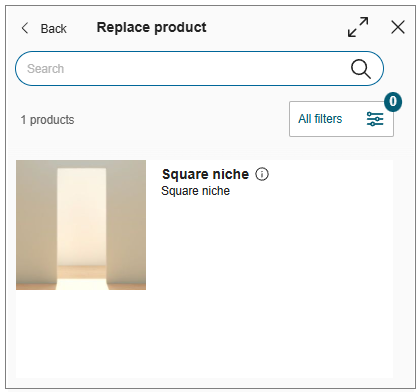
- Select the product from the catalog to replace the niche product.
Edit Niche Parameters (2D & 3D)
You can edit the niche parameters in 2D and 3D views.
- Select the niche in the 2D/3D view, the property window is displayed, as shown below:

- Click the Edit button, the niche parameters are displayed, as shown below:

- Select the dimension value of the Niche product, and modify the required dimension.
Manage Sloped Ceilings
You can add sloped ceilings to your project.
Steps to add a sloped ceiling:
-
Click Draw plan > Manage sloped ceilings.
-
Select a wall.
-
Enter the height (A), incline distance (B) and angle of inclination (C), and click Create.
Click Hide schema/Show schema to hide/show the illustration. -
Click Create.
To add another sloped ceiling, repeat from step 2.
Add Sloped Ceiling:
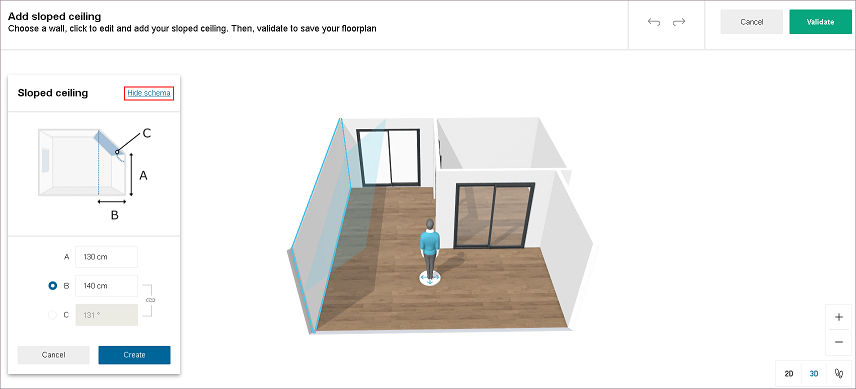
-
Click Validate.
Sloped ceilings are added to the project.
Add Roof Window
You can add roof window on sloped ceiling in your project.
- Click Build > Roof windows.
- Select Roof window from list in catalog.
- Roof window is added on sloped ceiling.
Note:
- Roof window is removed from floorplan if corresponding sloped ceiling is removed.
- No space available message displayed if sloped ceiling is too small to fit the roof window. In this case, roof window is added in the middle of the screen. You can move it to desired location.
- Following pop-up notification displayed, if sloped wall is not available in floorplan.
You cannot add a roof window without a sloped ceiling. Add a sloped ceiling.
Click Add a sloped ceiling link to add sloped ceiling.
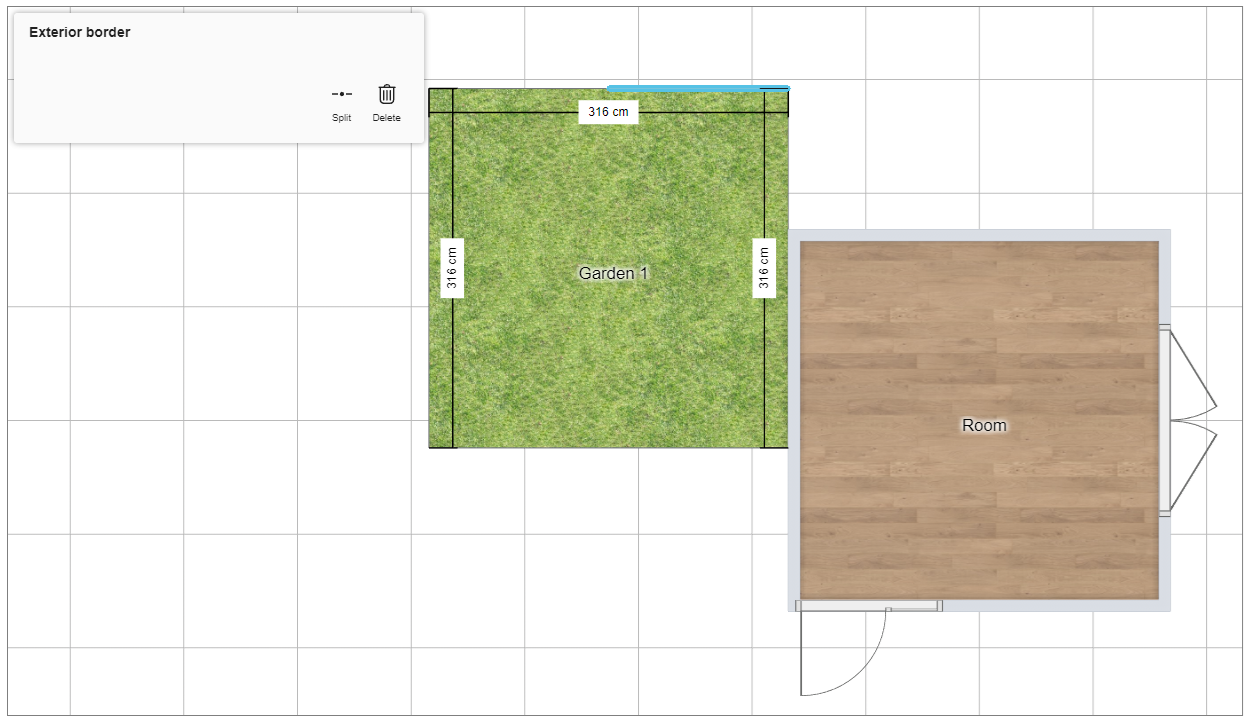
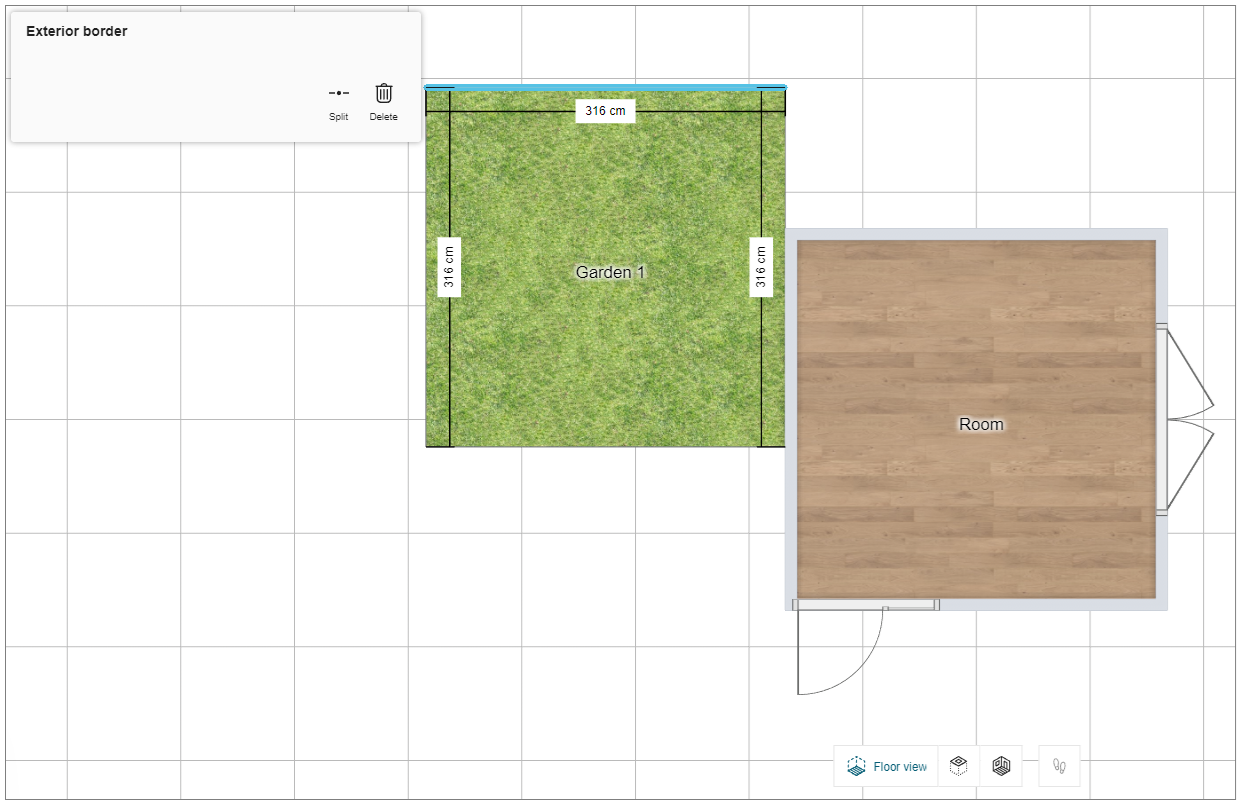
Add an Exterior
You can add exterior design to your project.
- Click the Floor plan > Add an exterior.
The exterior materials are displayed, as shown below:
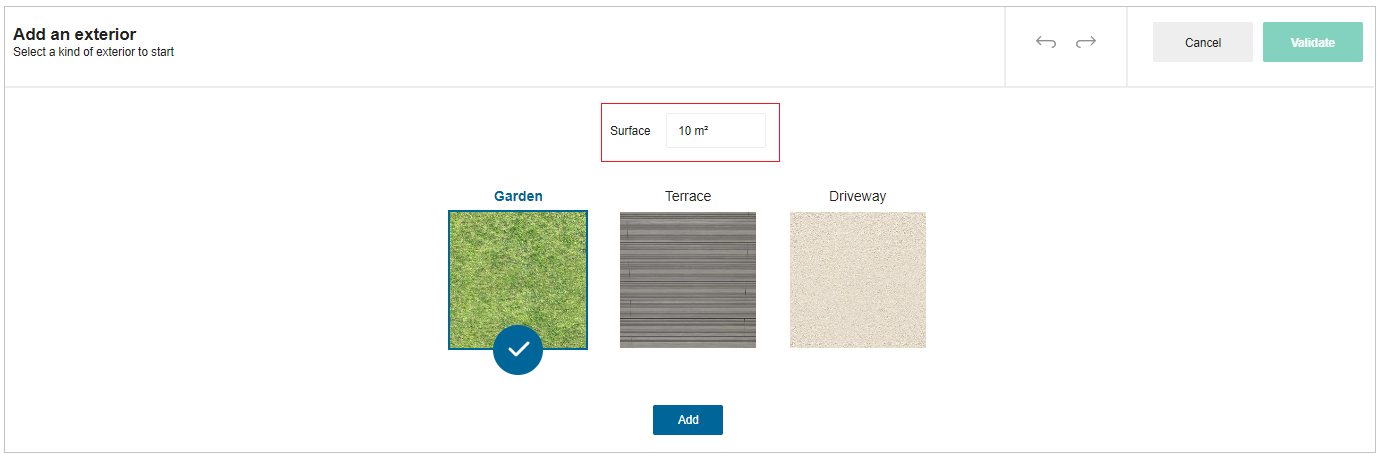
-
Modify the surface area according to your need and select the exterior type.
-
Click the Add button, the window to adjust the exterior is displayed, as shown below:
You can drag and place the exterior.
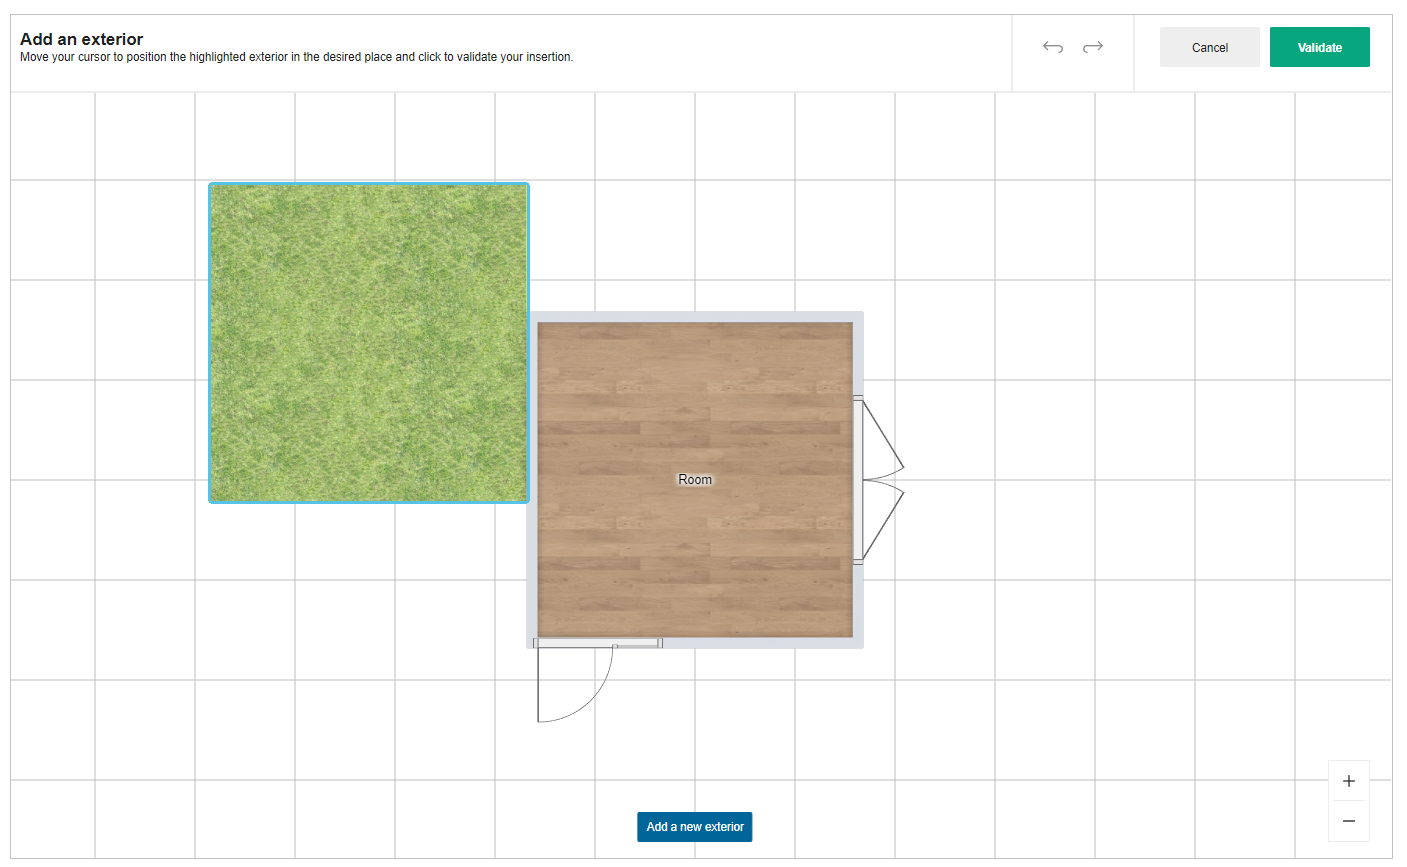
-
Position the exterior.
To add another exterior material, click the Add a new exterior, repeat from step 2. -
Click the Validate button.
Exteriors are added to the project.
Edit Exterior
You can edit the exterior design in your project.
- Select the exterior material in 2D view, the edit panel is displayed, as shown below:
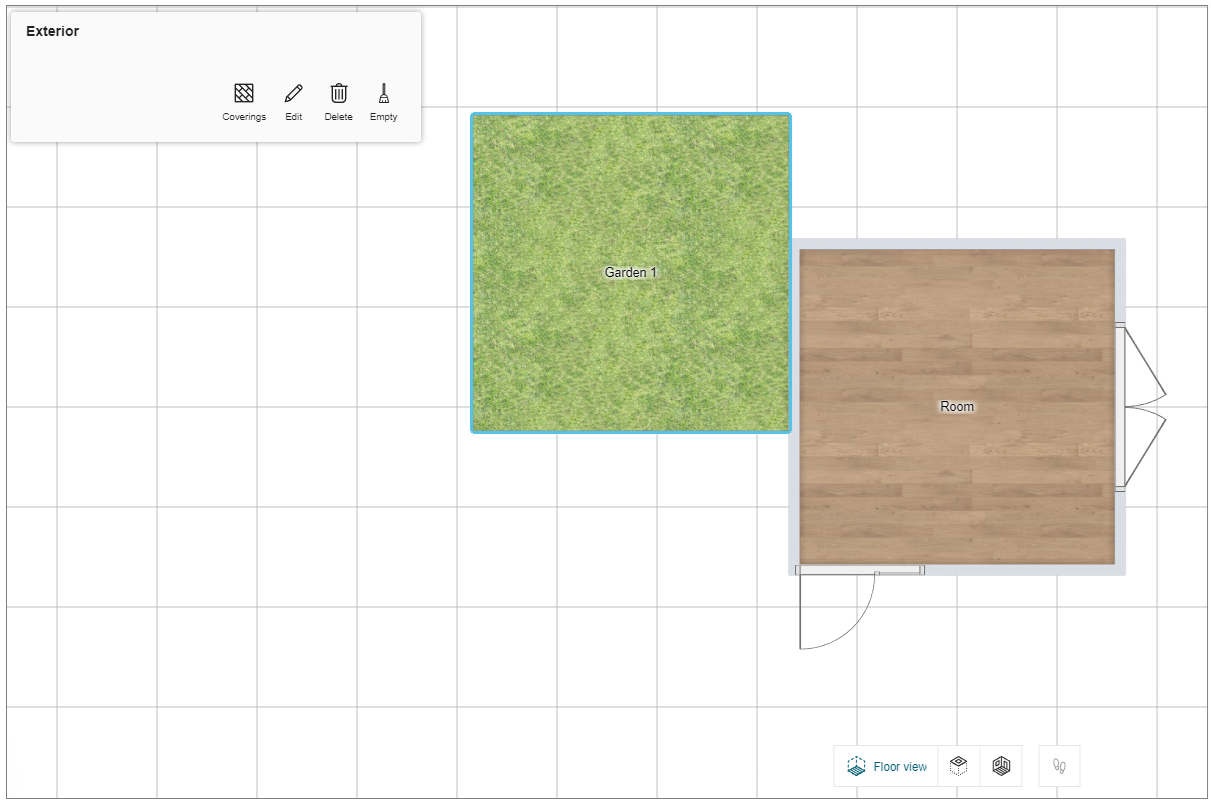
Coverings
You can change the covering material of the exterior.
- Click the Coverings option, the available covering materials are displayed, as shown below:
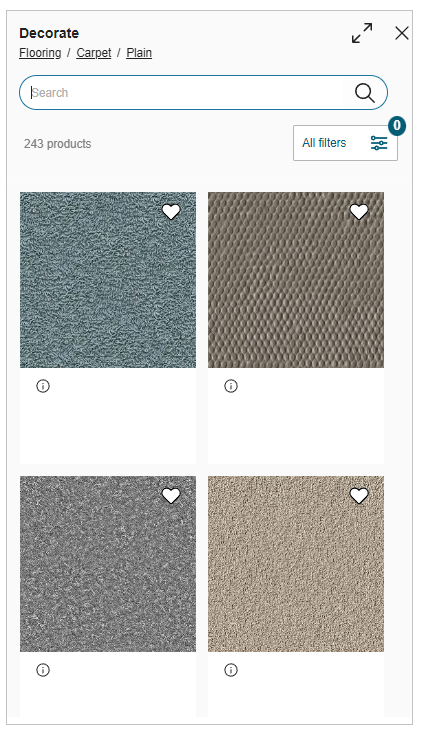
- Select the covering material from the catalog to apply the material.
Edit
You can edit the name of the exterior material.
- Click the Edit button, the option to modify the name of the exterior material, as shown below:

2.To modify the exterior name, select the name in the input box.
Delete
You can delete the exterior material from your project.
Empty
You can empty the products from the exterior material.
- Select the Empty button, the Empty the exterior pop up window appears, as shown below:

- Click the Yes button to empty the exterior.
Split
You can split the exterior material into two parts.
- Select the edge of the exterior material, the options to split the exterior is displayed, as shown below:
- Click the Split option, the split exterior material is displayed, as shown below:
You can select and drag the split part accordingly.