From the Scratch
This section provides detailed steps on planning a project from the scratch by adding rooms, walls, separators, sloped ceilings and exteriors.
Add a Room
You can add rooms to your project.
Steps to add a room:
Click Draw plan > Add a room.
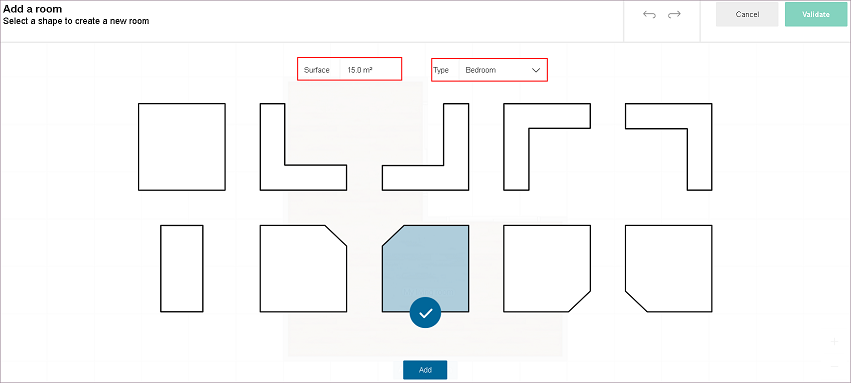
Enter the surface area, room type.
Select the room shape, click Add.
Room Selection:
Position the room.
To add another room, click Add a new room, repeat from step 2.
Room Position:
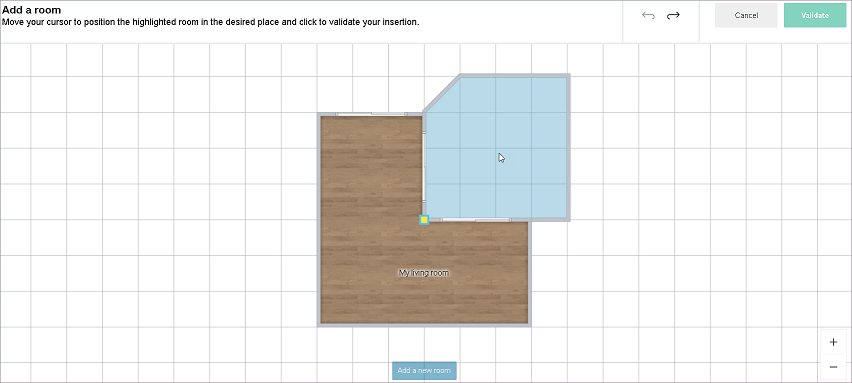
Click Validate.
Rooms are added to the project.
Add a Wall
You can add walls to your project.
Steps to add a wall:
Click Draw plan > Add a wall.
Draw wall with the help of sketcher.
Add Walls:
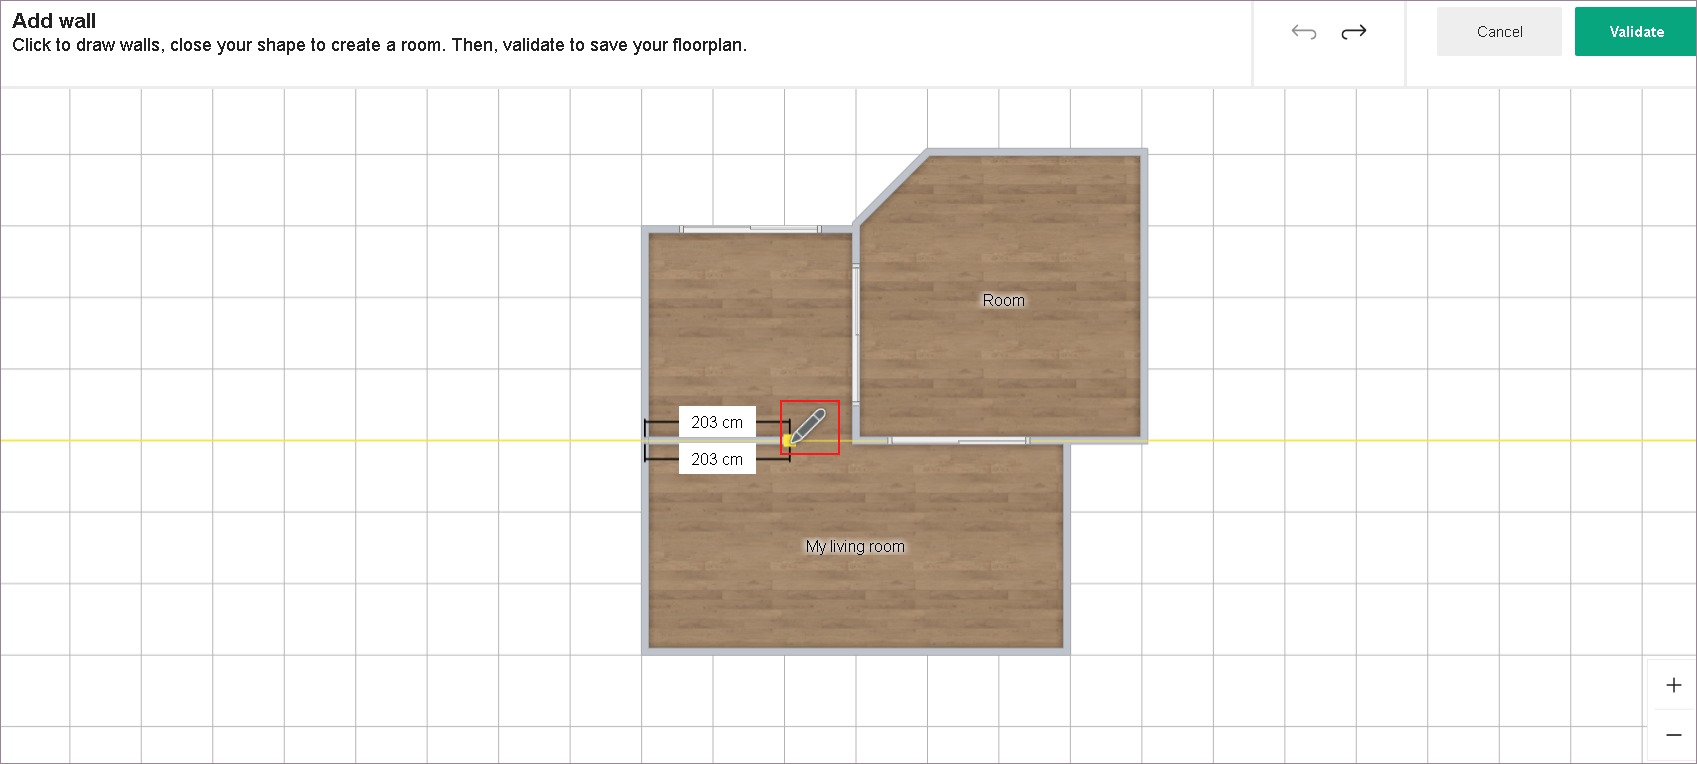
Feature Icon Command Command Location Sketcher 
Helps in drawing walls Draw plan Click Validate. Walls are added to the project.
Add a Separation
You can add room separations to your project.
Steps to add a room separator:
Click Draw plan > Add a separation.
Draw separator with the help of sketcher.
Add Separators:
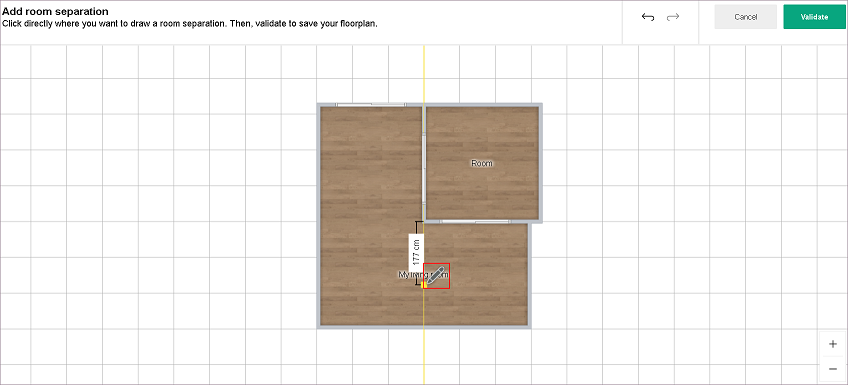
Feature Icon Command Command Location Sketcher Helps in drawing separators Draw plan Click Validate.
Room separators are added to the project.
Manage Sloped Ceilings
You can add sloped ceilings to your project.
Steps to add a sloped ceiling:
Click Draw plan > Manage sloped ceilings.
Select a wall.
Enter the height (A), incline distance (B) and angle of inclination (C), and click Create.
Click Hide schema/Show schema to hide/show the illustration.Click Create.
To add another sloped ceiling, repeat from step 2.
Add Sloped Ceiling:
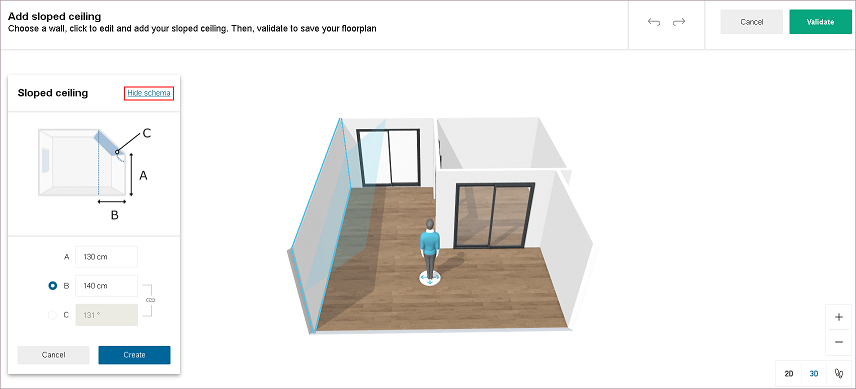
Click Validate.
Sloped ceilings are added to the project.
Add Roof Window
You can add roof window on sloped ceiling in your project.
- Click Build > Roof windows.
- Select Roof window from list in catalog.
- Roof window is added on sloped ceiling.
Note:
1. Roof window is removed from floorplan if corresponding sloped ceiling is removed.
2. No space available message displayed if sloped ceiling is too small to fit the roof window. In this case, roof window is added in the middle of the screen. You can move it to desired location.
3. Following pop-up notification displayed, if sloped wall is not available in floorplan.
You cannot add a roof window without a sloped ceiling. Add a sloped ceiling.
Click Add a sloped ceiling link to add sloped ceiling.
Add an Exterior
You can add exterior design to your project.
Steps to add an exterior:
Click Draw plan > Add an exterior.
Enter the surface area.
Select the exterior type, click Add.
Exterior Selection:
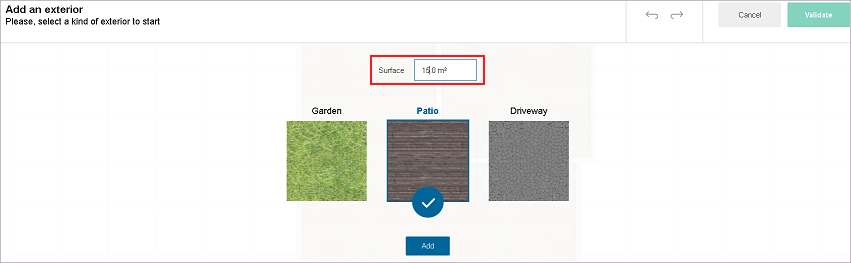
Position the exterior.
To add another exterior, click Add a new exterior, repeat from step 2.Click Validate.
Exteriors are added to the project.